Windows 8 ได้ออกแบบใหม่ทั้งหมด ข้อผิดพลาด BSOD และวิธีแก้ไข เมื่อเทียบกับ Windows 7 และเวอร์ชันก่อนหน้านี้ได้เลือกใช้วิธีการที่เป็นมิตรกับผู้ใช้มากขึ้นเพื่อให้ผู้ใช้ทั่วไปสามารถค้นหารหัสหยุดได้ในหน้าการสนับสนุนของ Microsoft
เมื่อ Windows 10 พบข้อผิดพลาดร้ายแรงระบบจะทำทุกวิถีทางเพื่อป้องกันข้อมูลสูญหายและความเสียหายโดยแสดงหน้าจอสีน้ำเงินพร้อมใบหน้ายิ้มเศร้า ๆ และข้อความสีขาวระบุว่า พีซีของคุณประสบปัญหาและจำเป็นต้องรีสตาร์ท เรากำลังรวบรวมข้อมูลข้อผิดพลาดบางอย่าง
ไม่ใช่ปัญหาเมื่อคุณสะดุดกับสถานการณ์นี้เพียงครั้งเดียวเนื่องจากคุณสามารถรีสตาร์ทคอมพิวเตอร์และทำต่อจากจุดที่คุณทำค้างไว้ แต่จะกลายเป็นปัญหาอย่างแท้จริงเมื่อ พีซีของคุณประสบปัญหาและจำเป็นต้องรีสตาร์ท ข้อความแสดงข้อผิดพลาดเข้าสู่การวนซ้ำ บางครั้งเครื่องค้างที่ 100% และไม่สามารถบูต Windows ได้ทำให้คุณต้องรีสตาร์ท

อะไรเป็นสาเหตุที่ทำให้ พีซีของคุณประสบปัญหาและจำเป็นต้องรีสตาร์ท ข้อผิดพลาด
พีซีของคุณอาจได้รับผลกระทบจากเหตุการณ์ซอฟต์แวร์ฮาร์ดแวร์ล้มเหลวหรือทั้งสองอย่าง สาเหตุที่เป็นไปได้มีดังนี้:
- ฮาร์ดแวร์ล้มเหลว
- เซกเตอร์เสียในดิสก์
- ไฟล์ระบบเสียหายหรือที่เก็บส่วนประกอบ
- ระบบปฏิบัติการไดรเวอร์หรือ BIOS ที่ล้าสมัย
- การตั้งค่า BIOS หรือรีจิสทรีไม่ถูกต้อง
- เนื้อที่ดิสก์ไม่เพียงพอ
- แอปพลิเคชันที่เข้ากันไม่ได้การอัปเดตระบบหรือฮาร์ดแวร์
- การติดมัลแวร์
- ปัญหาเกี่ยวกับหน่วยความจำระบบ
- ความร้อนสูงเกินไปเป็นผลมาจากการโอเวอร์คล็อก
วิธีแก้ไข พีซีของคุณประสบปัญหาและจำเป็นต้องรีสตาร์ท ใน Windows 10
มีหลายวิธีที่คุณสามารถใช้ในการแก้ไขปัญหา แต่คุณควร ตั้งค่าจุดคืนค่าระบบ ก่อนดำเนินการแก้ไขปัญหาแรกในรายการนี้ ด้วยวิธีนี้คุณสามารถยกเลิกการเปลี่ยนแปลงได้ตลอดเวลาหากคุณทำผิดพลาด
1. เริ่ม Windows ในเซฟโหมด
หากคุณไม่สามารถบูตระบบปฏิบัติการของคุณเพื่อเข้าถึงเดสก์ท็อปและดำเนินการใด ๆ เนื่องจากคุณถูกส่งไปยังลูป พีซีของคุณพบปัญหาและต้องรีสตาร์ท ทันทีคุณสามารถ เริ่ม Windows ในเซฟโหมด . เป็นมาตรการป้องกันที่สร้างสภาพแวดล้อมที่ปลอดภัยสำหรับการวินิจฉัย
วิธีเริ่ม Windows ใน Safe Mode โดยไม่ต้องบูต:
- เปิด Windows และขัดจังหวะลำดับการบูต
- ทำสามครั้งนี้เพื่อเข้าสู่โหมด การกู้คืน
- ในหน้าจอ เลือกตัวเลือก เลือก แก้ไขปัญหา

- ไปที่ ตัวเลือกขั้นสูง
- เลือก การตั้งค่าการเริ่มต้น
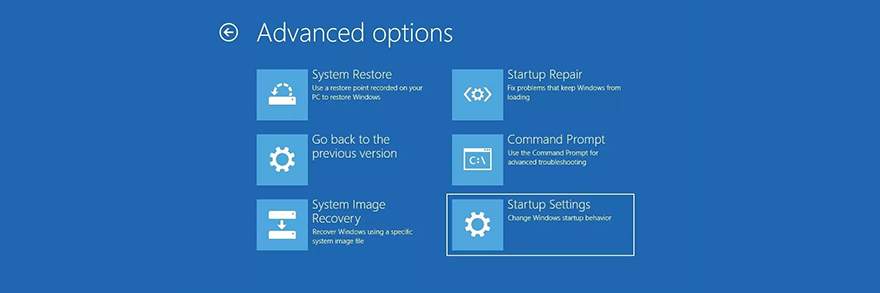
- คลิก เริ่มต้นใหม่
- กด F4 เพื่อเปิดใช้ Safe Mode


2. เรียกใช้คลีนบูต
หาก พีซีของคุณประสบปัญหาและจำเป็นต้องรีสตาร์ท ข้อผิดพลาดไม่ได้รับการทริกเกอร์ในเซฟโหมดคุณสามารถคลีนบูต Windows 10 เพื่อปิดใช้งานกระบวนการไดรเวอร์หรือบริการที่ไม่จำเป็น ที่อาจทำให้เกิดปัญหา วิธีทำให้เกิดขึ้นดังต่อไปนี้:
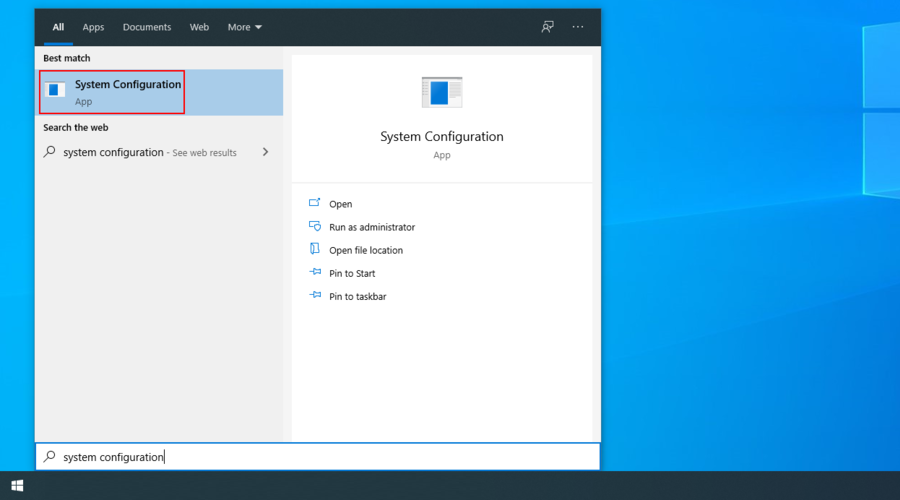
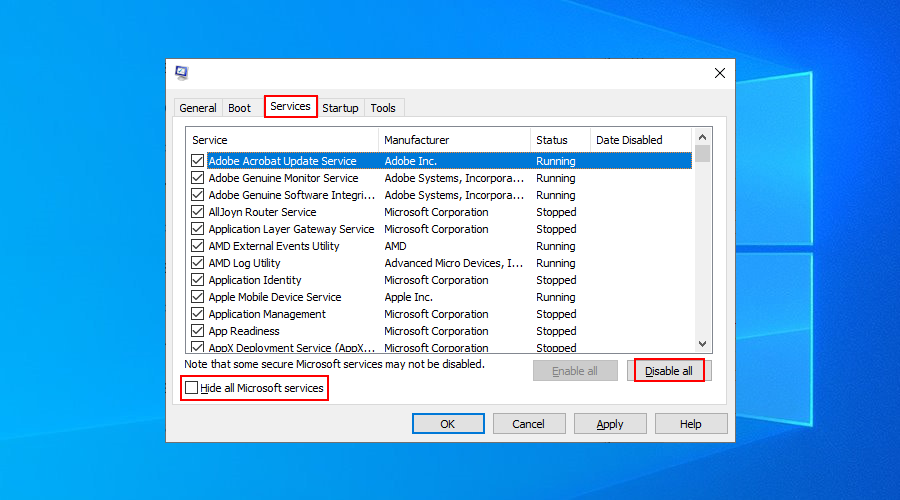
- คลิกปุ่ม เริ่ม พิมพ์ การกำหนดค่าระบบ แล้วกด Enter
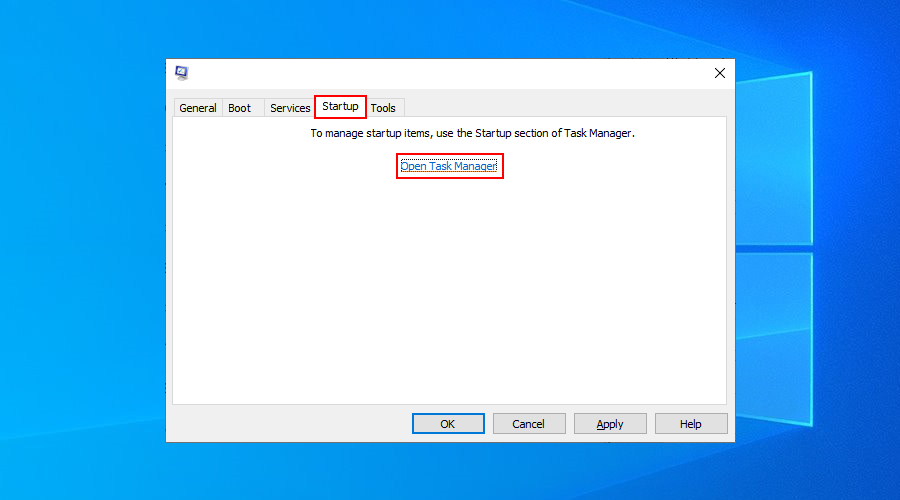
- ไปที่ส่วน บริการ
- ยกเลิกการเลือก ซ่อนบริการทั้งหมดของ Microsoft แล้วคลิก ปิดใช้งานทั้งหมด

- สลับไปที่แท็บ เริ่มต้น แล้วคลิก เปิดตัวจัดการงาน
- เลือกแอปที่มีสถานะ เปิดใช้งาน แล้วคลิก ปิดใช้งาน
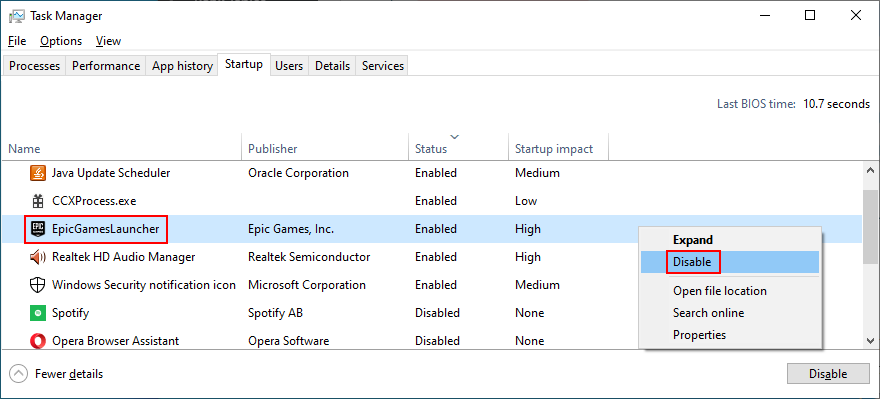
- ดำเนินการนี้กับทุกแอปที่มีสถานะ เปิดใช้งาน
- รีสตาร์ทพีซีของคุณและตรวจสอบปัญหา
3. เรียกใช้ Windows Update
การอัปเดต Windows ด้วยโปรแกรมแก้ไขด่วนและแพตช์ความปลอดภัยล่าสุดเป็นสิ่งสำคัญเพื่อหลีกเลี่ยงปัญหาความเสถียรของระบบและข้อความแสดงข้อผิดพลาด พีซีของคุณประสบปัญหาและจำเป็นต้องรีสตาร์ท
- กดแป้น Win พิมพ์ ตรวจหาการอัปเดต และกด Enter
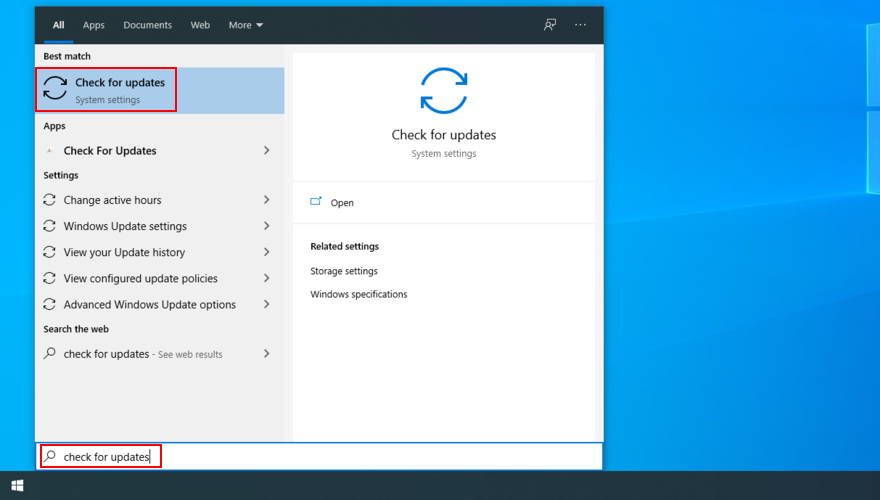
- คลิก ตรวจหาการอัปเดต และรอ
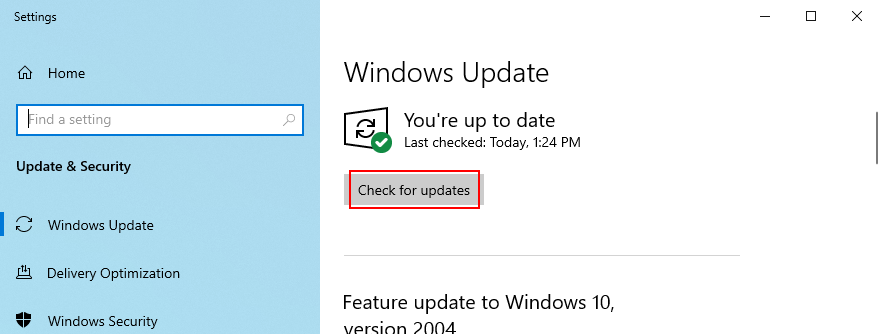
- หาก Windows พบสิ่งใดให้คลิก ดาวน์โหลด
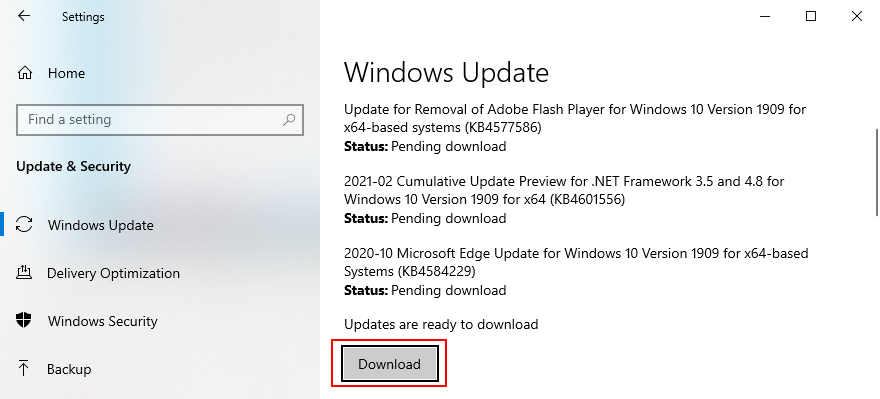
- รีบูตพีซีของคุณหลังจากการอัปเดตเสร็จสิ้นและตรวจสอบข้อผิดพลาด
4. ตรวจสอบบันทึกของระบบ
Windows รวบรวมบันทึกเกี่ยวกับเหตุการณ์สำคัญทั้งหมดที่เกิดขึ้นบนเครื่องของคุณรวมถึงการขัดข้อง หากต้องการทราบรายละเอียดเพิ่มเติมเกี่ยวกับข้อผิดพลาด พีซีของคุณประสบปัญหาและจำเป็นต้องรีสตาร์ท คุณสามารถตรวจสอบบันทึกระบบโดยใช้ Event Viewer หรือ BlueScreenView
Event Viewer เป็นเครื่องมือข้อมูลระบบที่มีอยู่ในระบบปฏิบัติการ คุณสามารถใช้เพื่อวิเคราะห์ minidumps ที่เกิดจากการขัดข้องของระบบเพื่อค้นหาว่าไดรเวอร์ใดที่ทำให้ พีซีของคุณประสบปัญหาและจำเป็นต้องรีสตาร์ท ข้อผิดพลาด
วิธีใช้ Event Viewer:
- รีสตาร์ทระบบปฏิบัติการของคุณทันทีหลังจากเกิดข้อขัดข้อง
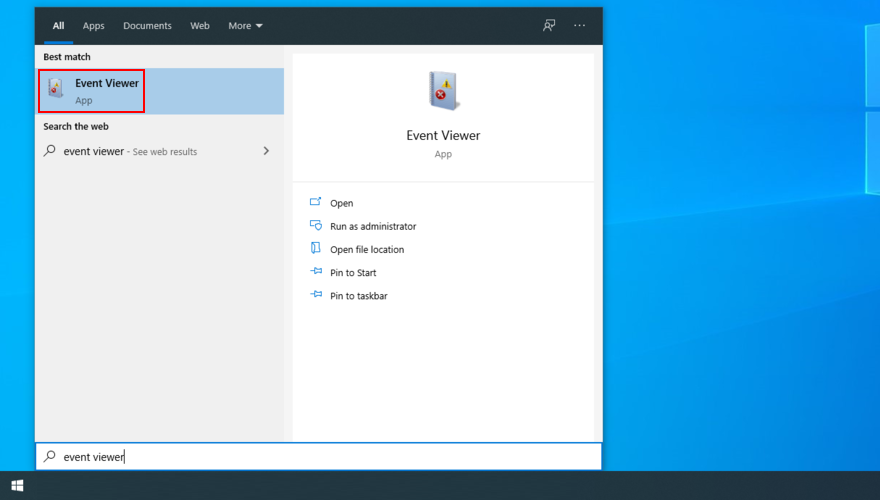
- คลิกปุ่ม เริ่ม พิมพ์ Event Viewer และเปิดแอปนี้
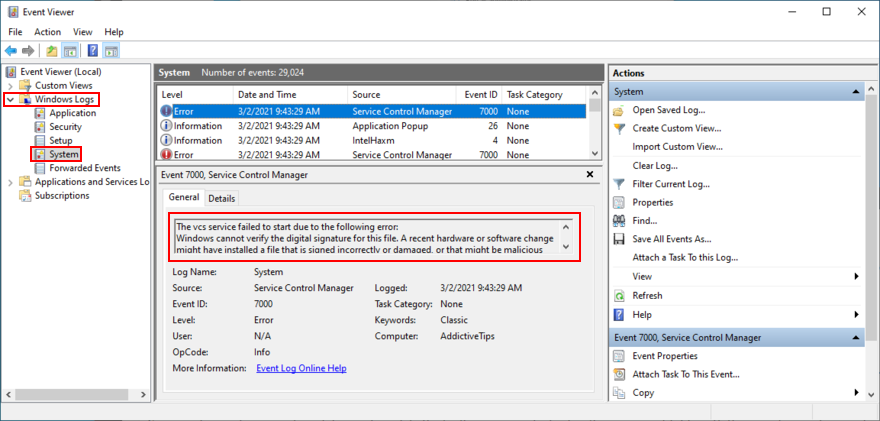
- เข้าถึงส่วน Windows Logs ทางด้านซ้าย
- เปิดโฟลเดอร์ ระบบ
- เลือกข้อผิดพลาดแรกในรายการ
- วิเคราะห์ข้อมูลเกี่ยวกับข้อขัดข้องของระบบในแท็บ ทั่วไป และ รายละเอียด
หากคุณต้องการแนวทางที่เป็นมิตรกับผู้ใช้มากกว่าในการตรวจสอบไฟล์ minidump คุณสามารถติดตั้งและใช้ BlueScreenView ได้ เป็นเครื่องมือที่มีน้ำหนักเบาพกพาสะดวกและใช้งานง่าย
วิธีใช้ BlueScreenView:
- ดาวน์โหลด BlueScreenView จาก เว็บไซต์อย่างเป็นทางการ
- เปิดแอปและเปิดไฟล์. dmp ที่สร้างขึ้นโดยระบบล่ม
- ค้นหาไฟล์ไดรเวอร์ที่ทำให้เกิดเหตุการณ์
5. ตรวจสอบไดรเวอร์อุปกรณ์ของคุณ
เมื่อคุณพบไดรเวอร์ที่ทำงานผิดปกติซึ่งทำให้เกิดข้อผิดพลาด พีซีของคุณประสบปัญหาและจำเป็นต้องรีสตาร์ท คุณสามารถแก้ไขปัญหาได้สามวิธี: ติดตั้งอะแดปเตอร์ใหม่อัปเดตไดรเวอร์หรือม้วน กลับไดรเวอร์เป็นเวอร์ชันก่อนหน้า
วิธีติดตั้งอะแดปเตอร์ใหม่:
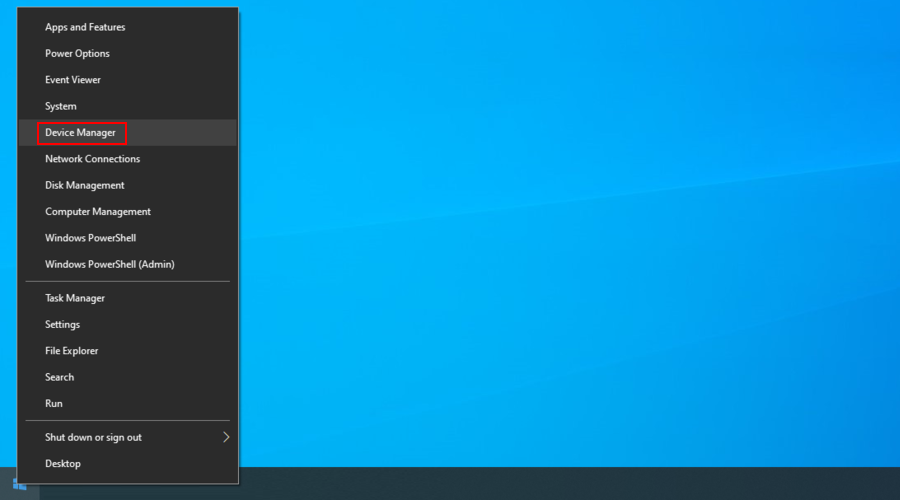
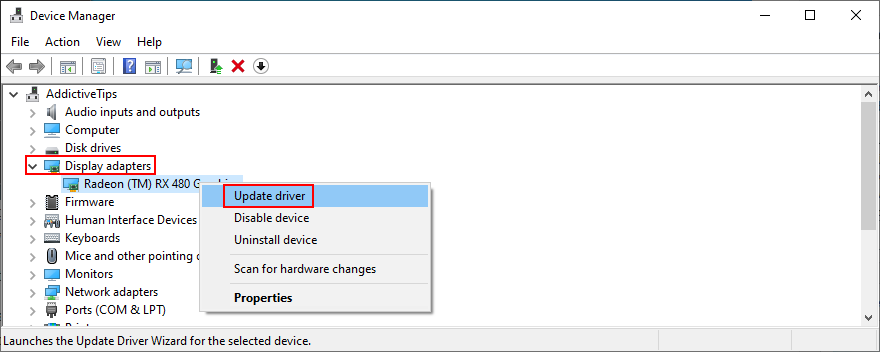
- คลิกขวาที่ปุ่ม เริ่ม และเลือก ตัวจัดการอุปกรณ์
- เลือกอุปกรณ์ที่ผิดพลาดจากรายการคลิกขวาแล้วเลือก ถอนการติดตั้งอุปกรณ์
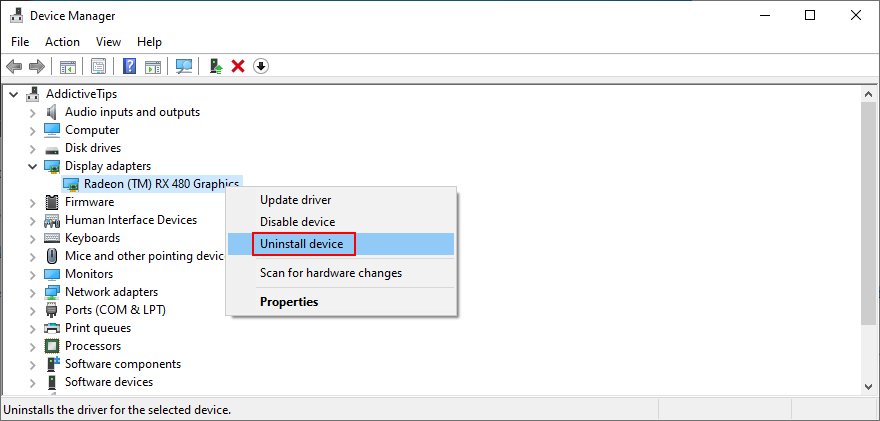
- ทำตามขั้นตอนบนหน้าจอ
- เลือกอุปกรณ์ใดก็ได้เปิดเมนู การทำงาน แล้วคลิก สแกนหาการเปลี่ยนแปลงฮาร์ดแวร์
- รีบูตเครื่องพีซีของคุณ อะแดปเตอร์ที่หายไปจะถูกติดตั้งใหม่โดยอัตโนมัติโดย Windows
- ตรวจสอบปัญหาความเสถียรของระบบเพิ่มเติม

วิธีแก้ปัญหานี้ควรกำจัด พีซีของคุณประสบปัญหาและจำเป็นต้องรีสตาร์ท ข้อความแสดงข้อผิดพลาดหากเกิดจากอุปกรณ์ที่เชื่อมต่อกับระบบปฏิบัติการไม่ถูกต้อง
วิธีอัปเดตไดรเวอร์:
- กลับไปที่ ตัวจัดการอุปกรณ์
- คลิกขวาที่อุปกรณ์ที่ล้าสมัยแล้วเลือก อัปเดตไดรเวอร์
- คลิก ค้นหาซอฟต์แวร์ไดรเวอร์ที่อัปเดตโดยอัตโนมัติ
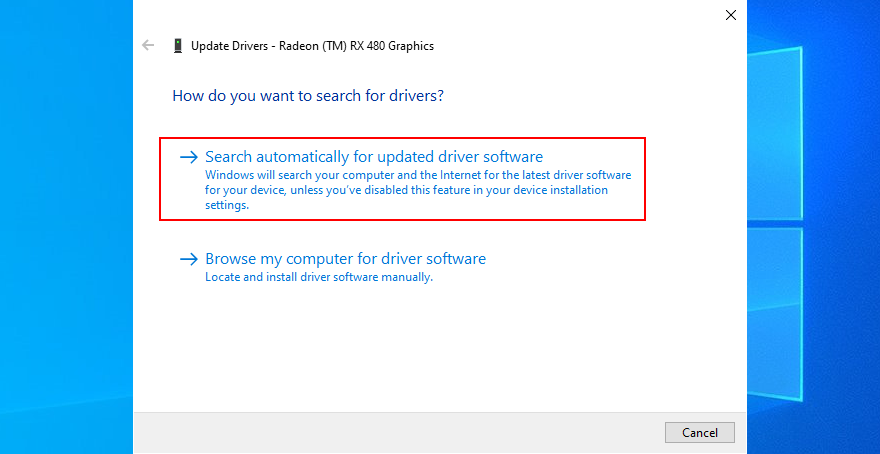
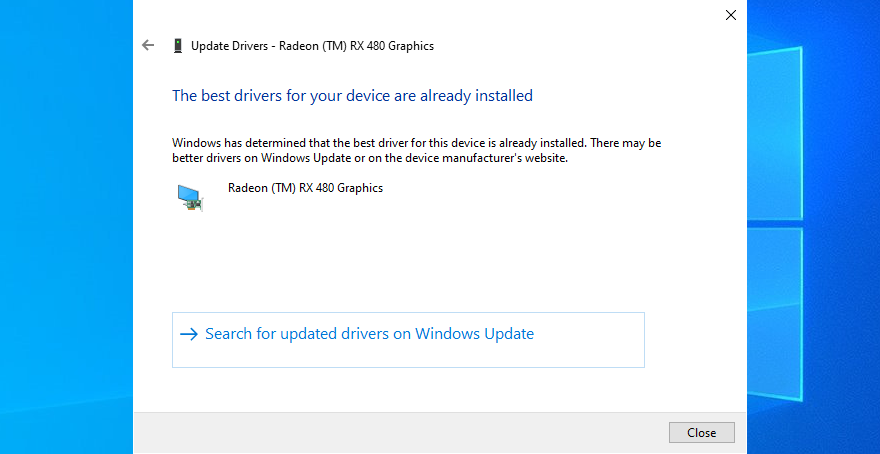
- หากไม่พบไดรเวอร์ให้คลิก ค้นหาไดรเวอร์ที่อัปเดตบน Windows Update
- รีสตาร์ทพีซีของคุณและตรวจสอบข้อผิดพลาดของระบบปฏิบัติการ

ไดรเวอร์ที่ล้าสมัยอาจทำให้คอมพิวเตอร์ขัดข้องดังนั้นการอัปเดตควรทำตามเคล็ดลับ อย่างไรก็ตามหาก Windows Update ไม่พบไดรเวอร์รุ่นใหม่คุณจะต้องดาวน์โหลดและติดตั้งจากเว็บไซต์ของผู้ผลิต
อย่างไรก็ตามมีความเสี่ยงเนื่องจากคุณอาจติดตั้งไดรเวอร์ที่เข้ากันไม่ได้โดยไม่ได้ตั้งใจ เพื่อหลีกเลี่ยงสถานการณ์นี้ควรใช้ไดรเวอร์ อัปเดตแอปพลิเคชัน ที่ดาวน์โหลดและติดตั้งไดรเวอร์รุ่นใหม่โดยอัตโนมัติ
ในทางกลับกันหากระบบปฏิบัติการของคุณเริ่มขัดข้องหลังจากการอัปเดตไดรเวอร์อาจเป็นเพราะเวอร์ชันล่าสุดไม่รองรับ Windows 10 อย่างสมบูรณ์ในกรณีนี้คุณควรย้อนกลับไดรเวอร์เป็นเวอร์ชันก่อนหน้าและเสถียร.
วิธีย้อนกลับไดรเวอร์:
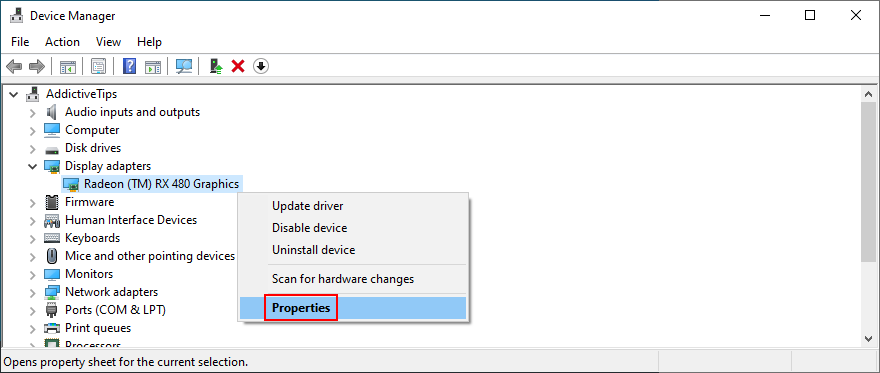
- กลับไปที่ ตัวจัดการอุปกรณ์
- เลือกอุปกรณ์คลิกขวาและไปที่ คุณสมบัติ
- เลือกส่วน ไดรเวอร์
- คลิก ย้อนกลับไดรเวอร์ และทำตามขั้นตอน
- หากคุณไม่สามารถคลิกปุ่มได้เนื่องจากปุ่มเป็นสีเทาแสดงว่าไม่มีไดรเวอร์เวอร์ชันก่อนหน้านี้ในพีซีของคุณคุณจึงไม่สามารถดำเนินการย้อนกลับให้เสร็จสมบูรณ์ได้
- รีสตาร์ทคอมพิวเตอร์และทดสอบข้อผิดพลาด
6. ตรวจสอบพื้นที่ดิสก์ของคุณ
ระบบปฏิบัติการของคุณต้องการพื้นที่ว่างในดิสก์อย่างต่อเนื่องสำหรับการดำเนินการต่างๆ มิฉะนั้นอาจเกิดความผิดพลาดและทำให้คุณไม่สามารถล็อกพีซีของคุณได้จนกว่าคุณจะแก้ไขปัญหาได้ เป็นไปได้ที่จะจัดสรรพื้นที่ดิสก์เพิ่มเติมให้กับพาร์ติชันระบบปฏิบัติการของคุณจากไดรฟ์อื่นหรือนำไฟล์ที่มีอยู่ออกเพื่อเพิ่มพื้นที่
วิธีเพิ่มขนาดพาร์ติชัน OS ด้วยการจัดการดิสก์:
- กดปุ่ม Win + R พิมพ์ diskmgmt.msc และกด Enter
- เลือกไดรฟ์ขนาดใหญ่ข้างไดรฟ์ที่มี Windows
- คลิกขวาแล้วเลือก ลดระดับเสียง
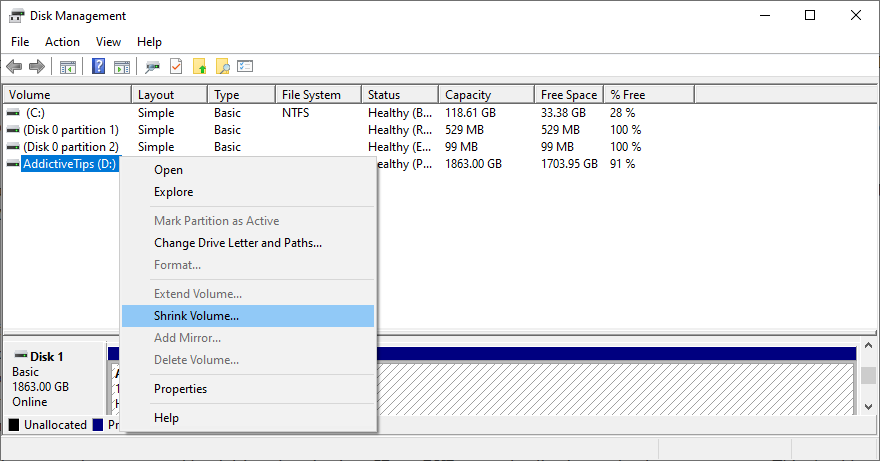
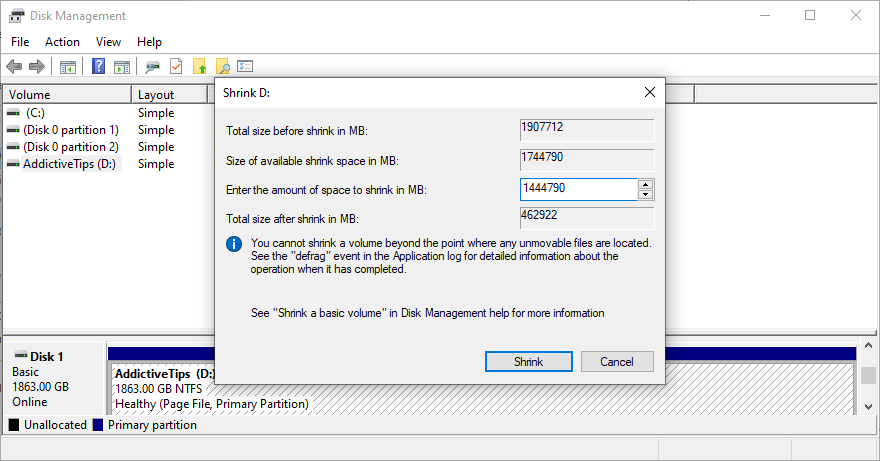
- ตั้งค่าขนาดใหม่ของไดรเวอร์แล้วคลิก ย่อ
- คลิกขวาที่พาร์ติชัน Windows แล้วเลือก ขยายระดับเสียง
- ระบุขนาดใหม่โดยเพิ่มเนื้อที่ว่างบนดิสก์ที่คุณได้รับมาก่อนหน้านี้
- เสร็จสิ้นการเปลี่ยนแปลงรีสตาร์ทพีซีของคุณและตรวจสอบข้อขัดข้อง
หากไม่สามารถจัดสรรพื้นที่ดิสก์เพิ่มเติมจากพาร์ติชันอื่นได้คุณสามารถลบไฟล์ที่มีอยู่ได้ ตัวอย่างเช่นคุณสามารถย้ายคอลเล็กชันภาพถ่ายและภาพยนตร์ไปยังดิสก์ภายนอกอัปโหลดไปยังบัญชีคลาวด์หรือเบิร์นลงในดีวีดี ควรถอนการติดตั้งเกมและแอปพลิเคชันขนาดใหญ่ที่คุณไม่ต้องการอีกต่อไป
และเมื่อพูดถึงข้อมูลขยะคุณสามารถกำจัดได้โดยเปลี่ยนเป็น ตัวล้างระบบ หรือหากคุณไม่ต้องการติดตั้งแอปเพิ่มเติมคุณสามารถใช้เครื่องมือ Windows Disk Cleanup
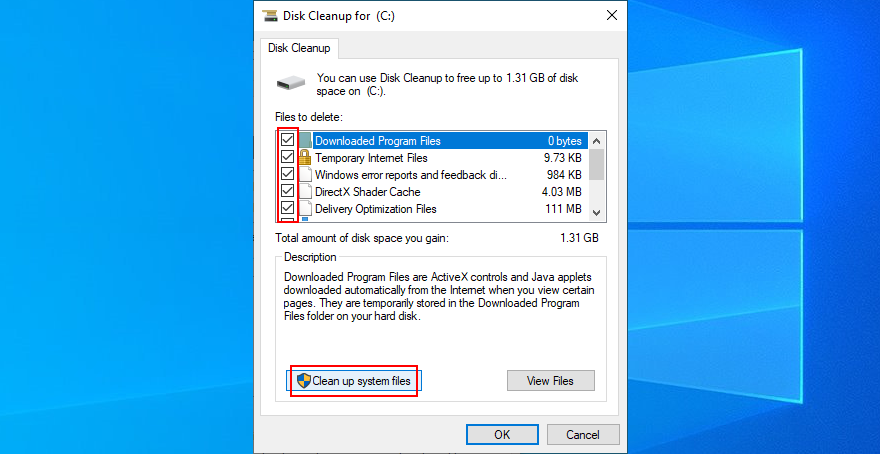
วิธีใช้ Windows Disk Cleanup:
- อย่าลืมลงชื่อเข้าใช้ Windows 10 ด้วยบัญชีผู้ดูแลระบบ
- ไปที่ ดาวน์โหลด และ ถังรีไซเคิล เพื่อตรวจสอบว่ามีไฟล์ใดที่คุณต้องการเก็บไว้ก่อนลบหรือไม่
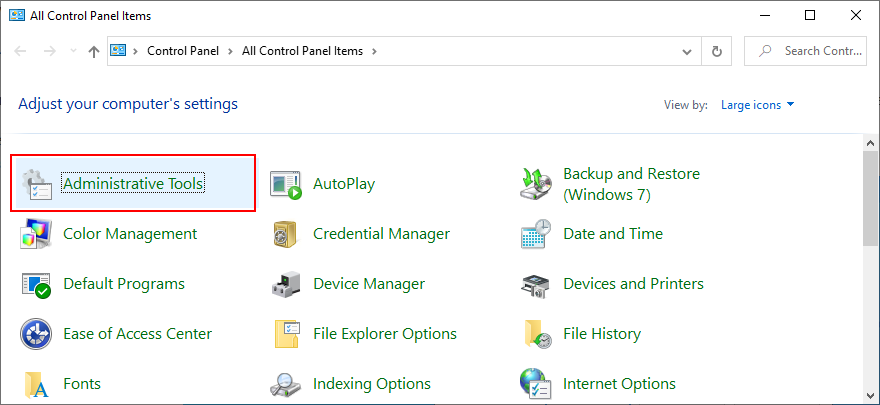
- คลิกเมนู เริ่ม พิมพ์ แผงควบคุม แล้วกด เข้าสู่
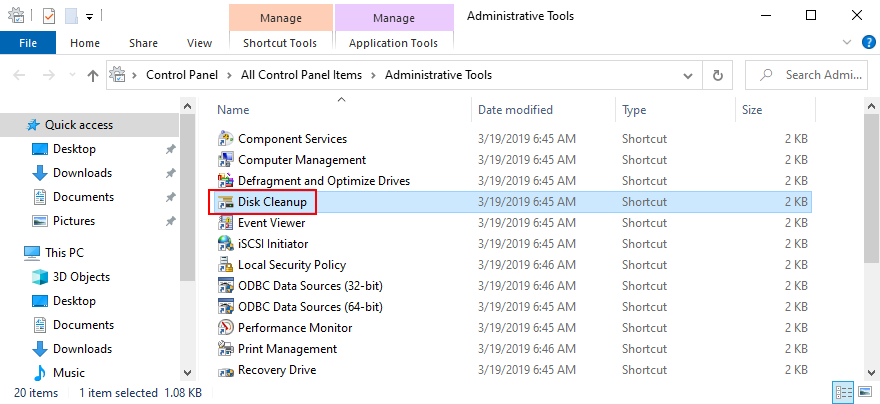
- เลือก เครื่องมือการดูแลระบบ
- คลิกสองครั้งที่ การล้างข้อมูลบนดิสก์ เพื่อเปิดแอปนี้
- เลือกพาร์ติชัน Windows แล้วคลิก ตกลง
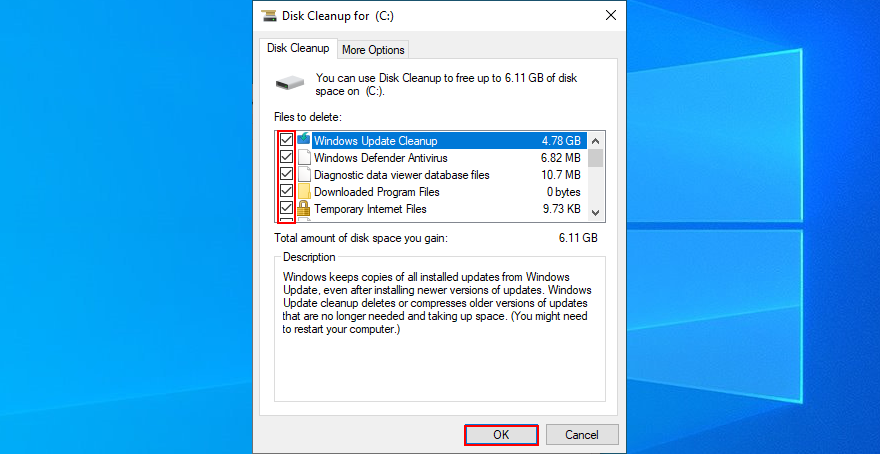
- ที่ ไฟล์ที่จะลบ เลือกรายการทั้งหมดแล้วคลิก ล้างไฟล์ระบบ
- เมื่อการสแกนเสร็จสิ้นให้เลือกไฟล์ทั้งหมดอีกครั้ง
- คลิก ตกลง และ ลบไฟล์ เพื่อยืนยันการลบ
- Don’t shut down or turn off your PC during the cleanup
- Once it’s over, reboot your PC and check for system stability issues
7. Unplug new hardware devices
The Your PC ran into a problem and needs to restart error can be triggered by peripheral devices that have compatibility issues with your computer and operating system. If you notice that you started having problems with your computer after plugging in a new piece of hardware, you should take it out.
It can be anything, from a webcam to a Wi-Fi adapter. Furthermore, if the peripheral device is connected through a USB cable, then you should switch USB ports in case not all of them are functioning correctly.
8. Scan your PC for malware
If your computer was infected with malware, it’s possible that critical processes and services were disabled in an attempt to take down your defenses. It often translates to system crashes, too, represented by a blue screen with an error message and perhaps a stop code.
How to run Windows Defender:
- Press the Windows key, type Windows Security, and open this app
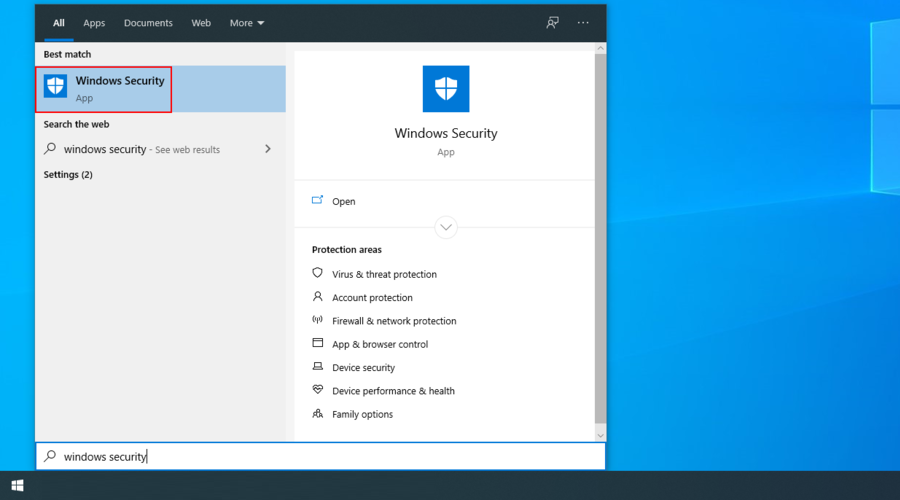
- Select the Virus & threat protection section
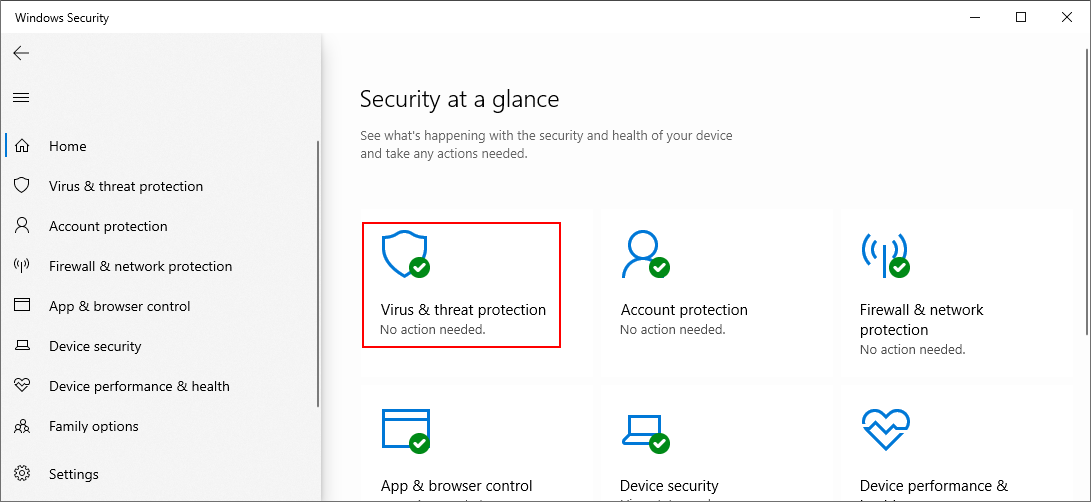
- Click Scan options
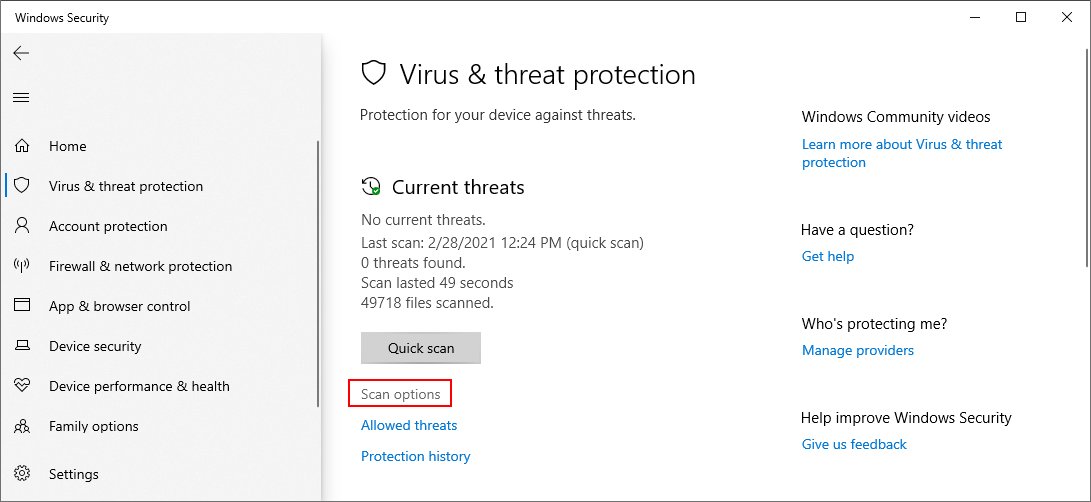
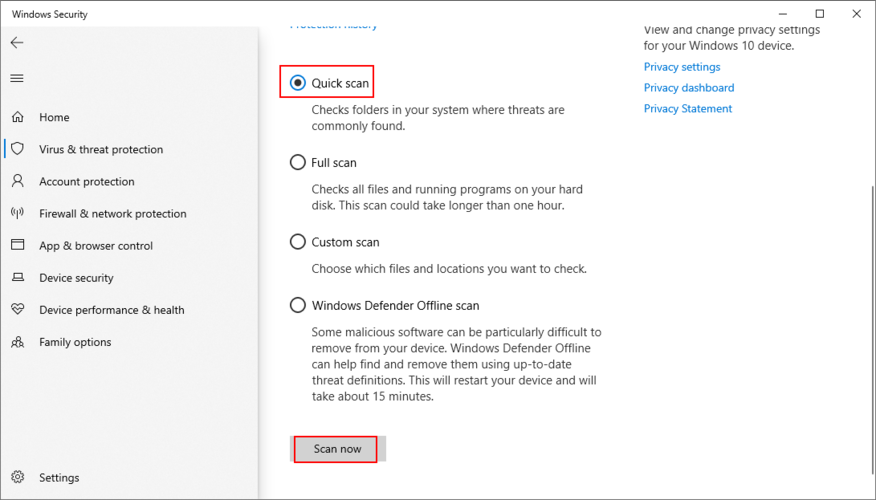
- Pick Quick scan and click Scan now
- If the scan doesn’t reveal anything suspicious, select Windows Defender Offline scan and click Scan now
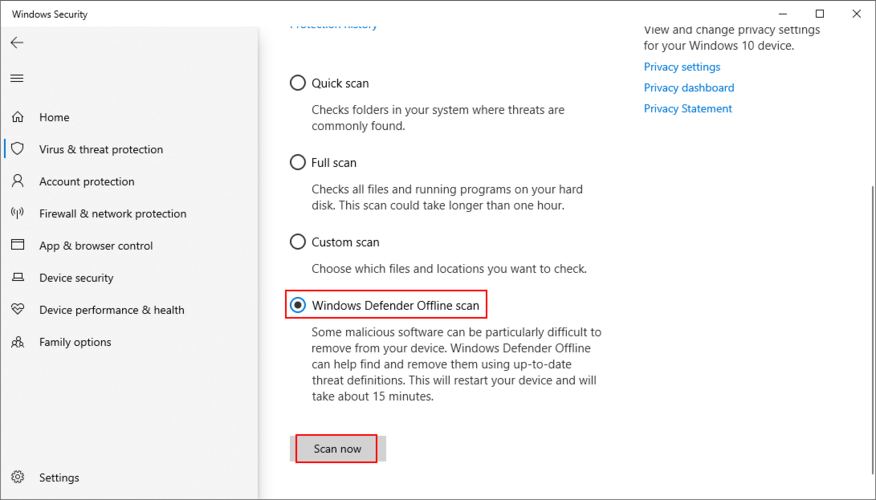
- Once Defender removes the infected files, restart your PC and check for errors
If you have any antivirus solution installed beside Windows Defender, make sure to adapt the steps above.
9. Check the system memory
Any issues with your RAM card can affect the entire computer, leading to system crashes and various stop codes. However, you can quickly verify the system memory with the help of Windows Memory Diagnostic, a built-in tool.
How to use Windows Memory Diagnostic:
- Save your work and close all programs
- Click the Start button, type Windows Memory Diagnostic, and open this app
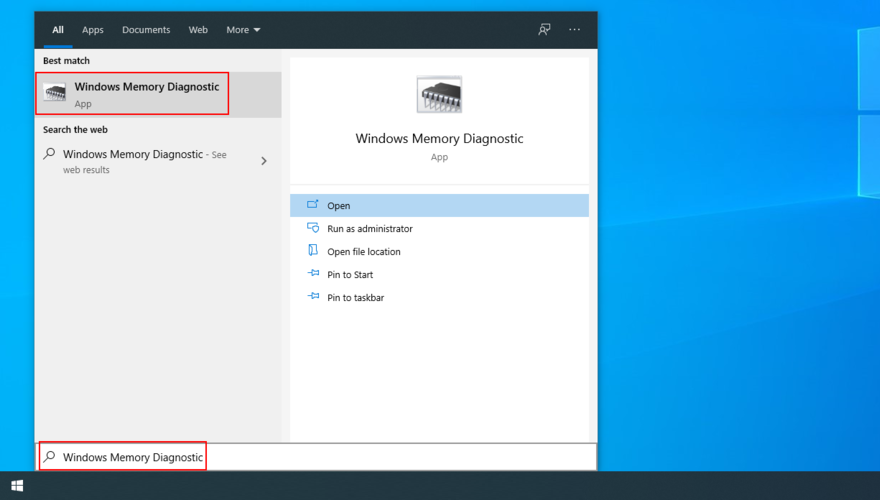
- Click Restart now and check for problems (recommended)
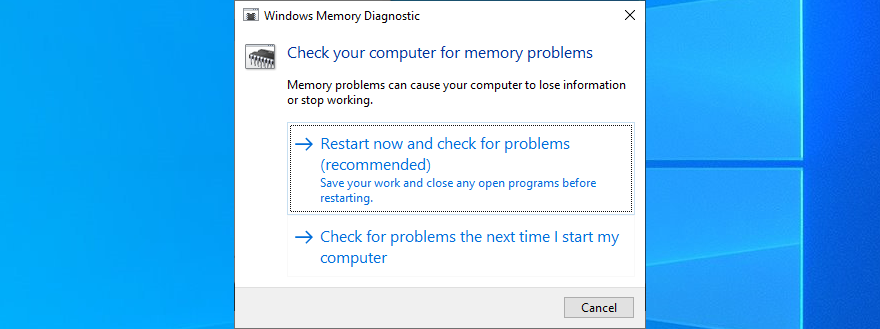
- Your PC will reboot and start checking your RAM
- Once it repairs all memory problems, boot Windows and check for stability issues
Windows Memory Diagnostic is pretty good at what it does. But if you’re looking for something a little more advanced, you should check out MemTest86.
10. Disable overclocking tools
Gamers typically use overclocking tools like MSI Afterburner, AMD Overdrive, CPU-Z or GPU-Z to crank up their systems and enhance their gaming experience. However, it’s not often done properly.
For example, you must have a cooler powerful enough to handle the heat resulted from overclocking. Else, your PC will shut down and show the Your PC ran into a problem and needs to restart error message to prevent overheating and protect itself.
So it’s a good idea to turn off all overclocking software solutions you have on your PC, whether you applied them for your GPU, CPU, or RAM. Then, reset the clock settings to default and check your PC for any additional stability problems.
11. Reset BIOS to default
It’s possible to control many computer settings from the BIOS area, including overclocking and caching. However, if you don’t know what you’re doing, you can end up harming your PC and triggering system crashes with can’t carry out its activities properties due to missing or damaged files. However, you can try to fix these problems by resorting to three command-linethe Your PC ran into a problem and needs to restart error message.
But you can fix it by resetting all BIOS settings to their factory values. Here’s how to make it happen:
- Restart your computer
- During reboot, press the key shown on the screen to access BIOS mode
- Find the advanced options
- Locate the setting that resets configuration data and turn it on
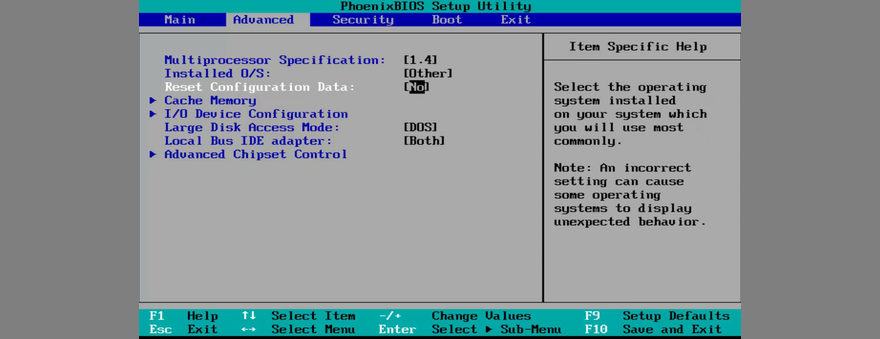
- Save the current BIOS layout and exit
- After Windows starts, check for stability issues
12. Update BIOS
Since you’re already changing BIOS settings, it’s a good idea to update BIOS to the latest version to avoid computer functionality problems and the Your PC ran into a problem and needs to restart loop. Here’s how:
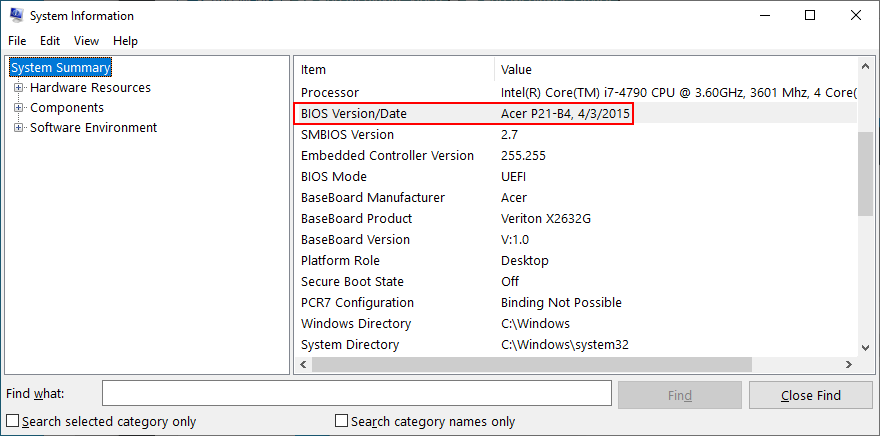
- Click the Start button, type System Information, and open this app
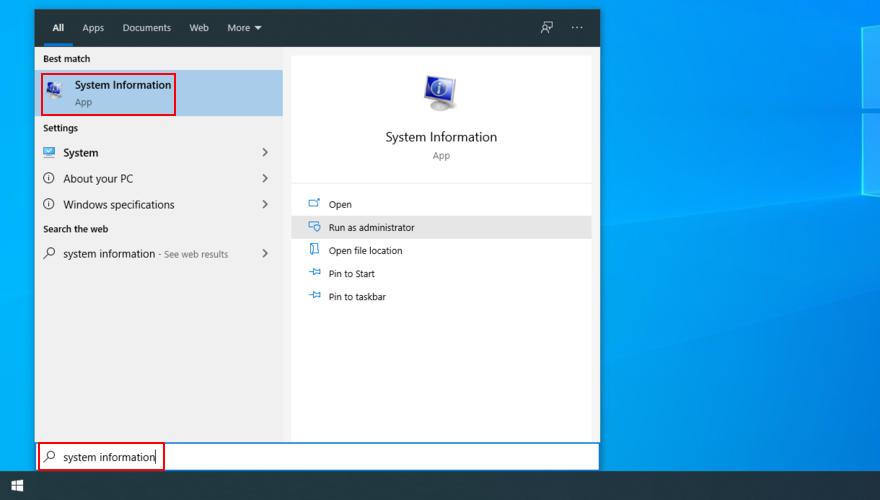
- Select the System Summary area
- Take note of the BIOS Version/Date
- Start a web browsing session and visit the website of your BIOS manufacturer
- Find and download a newer BIOS version that’s compatible with your PC
- Unzip the downloaded archive and copy contents to a USB flash drive
- Restart your PC and press the key that enters BIOS mode
- Back up the current BIOS version and save it to the pen drive
- Begin the BIOS update and proceed with the on-screen instructions
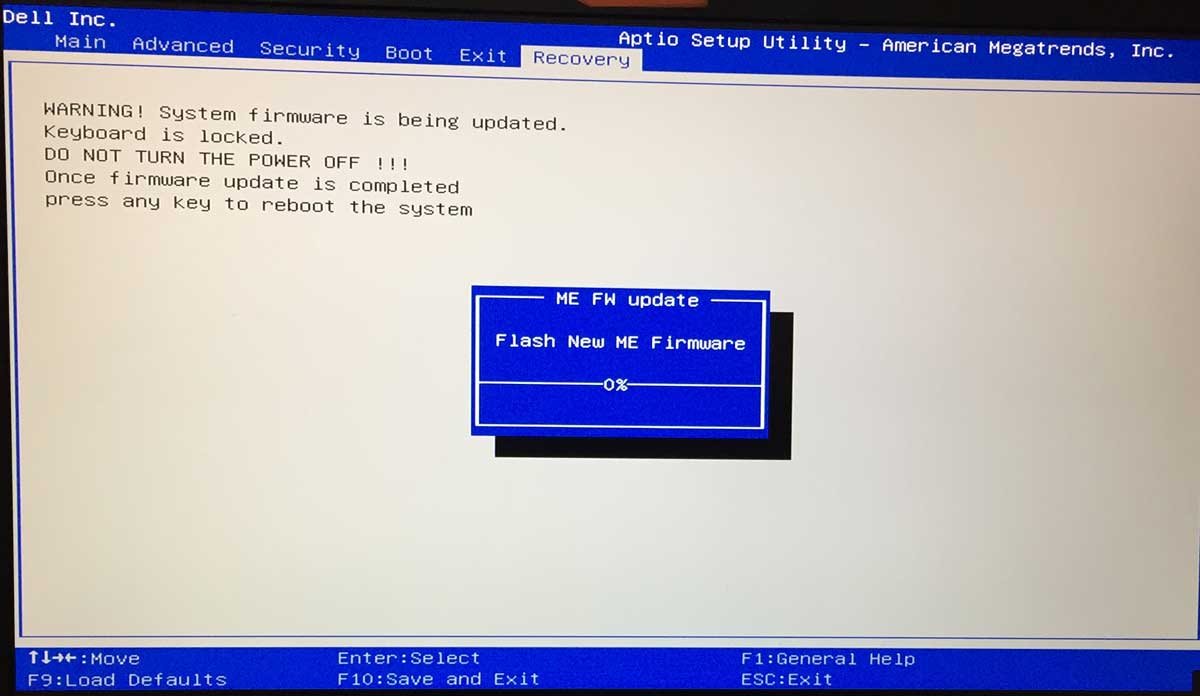
- Don’t shut down or restart your PC during the update
- Start Windows and check for errors
13. Repair disk and system errors
Your hard disk may have bad sectors, or your operating system may have corrupt files. As a result, Windows 10 can’t carry out its activities due to missing or damaged files. However, you can try to fix these problems by resorting to three command-line tools built into the OS: CHKDSK (Check Disk), SFC (System File Checker), and DISM (Deployment Image Servicing and Management).
How to fix bad sectors with CHKDSK:
- Press Win key + R, type cmd, and press Ctrl + Shift + Enter to open Command Prompt with admin rights

- If Windows is installed on the C: drive, run
chkdsk c:/f. Otherwise, replacec:with the right partition letter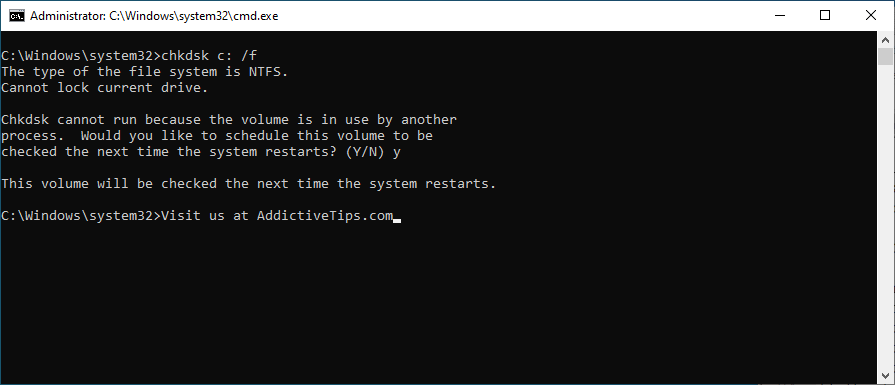
- Type y and press Enter when you’re asked to schedule the task at the next system startup
- Restart your PC and wait for CHKDSK to do its job
- Once it finishes, start Windows as normal and check if it still crashes
How to fix system errors with SFC:
- Run Command Prompt as administrator
- Type
sfc/scannowand press Enter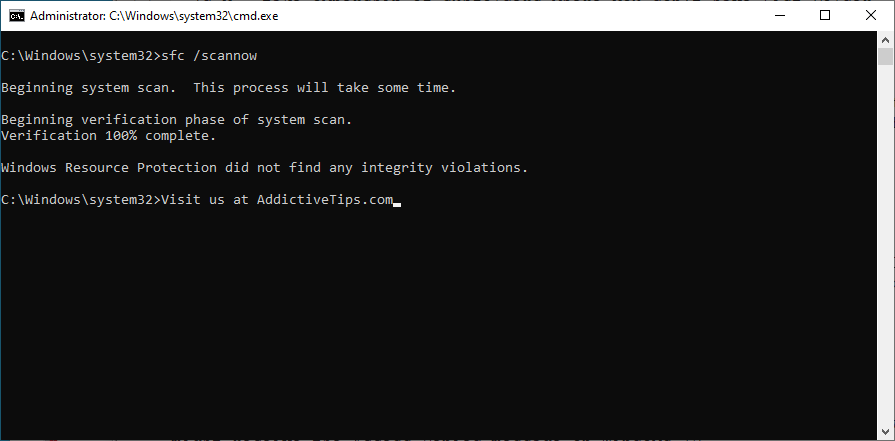
- SFC will begin to scan and repair any problems it detects
- Once it finishes, restart your PC and check for issues
How to fix component store issues with DISM:
- Run CMD with elevation rights
- Type
DISM/online/cleanup-image/scanhealthand press Enter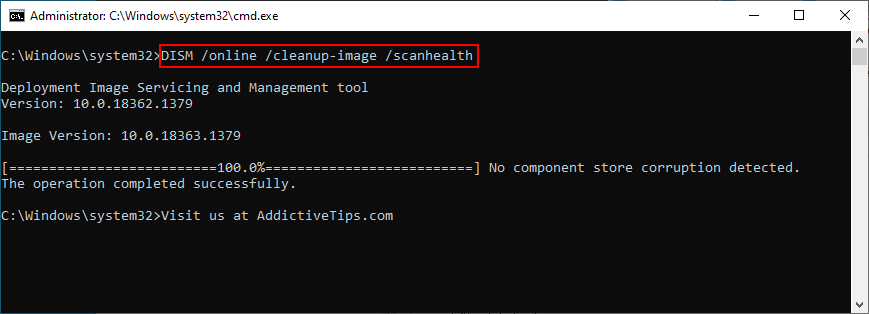
- If it finds any problems, fix them using
DISM/online/cleanup-image/restorehealth - Reboot your PC
- Launch CMD as admin again and run SFC
- Restart your PC one last time to check for stability issues
14. Remove new system updates
Many users report getting the Your PC ran into a problem and needs to restart, we’re just collecting some error info error message right after installing a new Windows update. It’s quite possible that the system update does not fully support Windows 10, resulting in crashes.
To fix this problem, you have to uninstall the most recent system update. Here’s how:
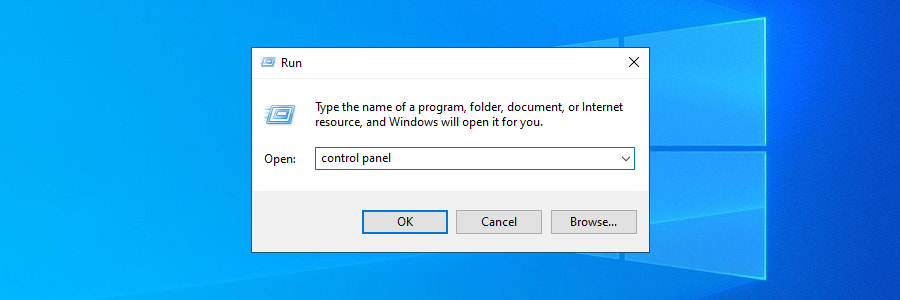
- Press the Windows key + R, type control panel, and press Enter
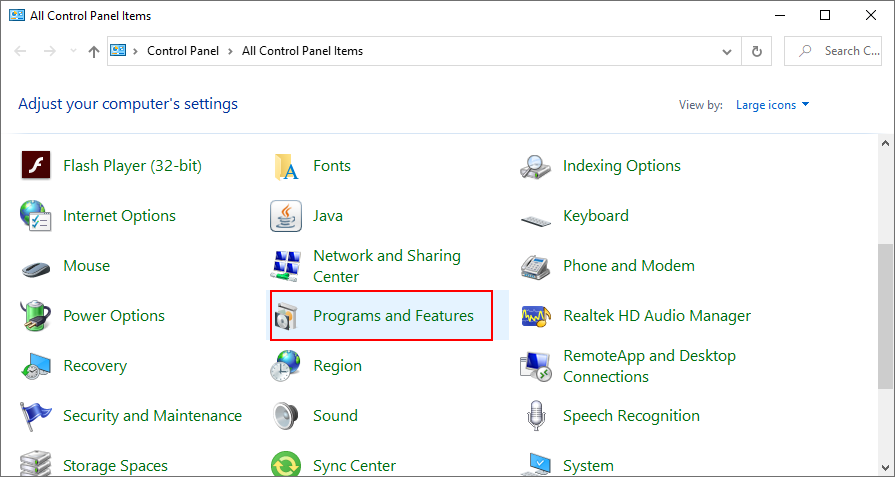
- Go to Programs and Features
- Click View installed updates on the top-left corner
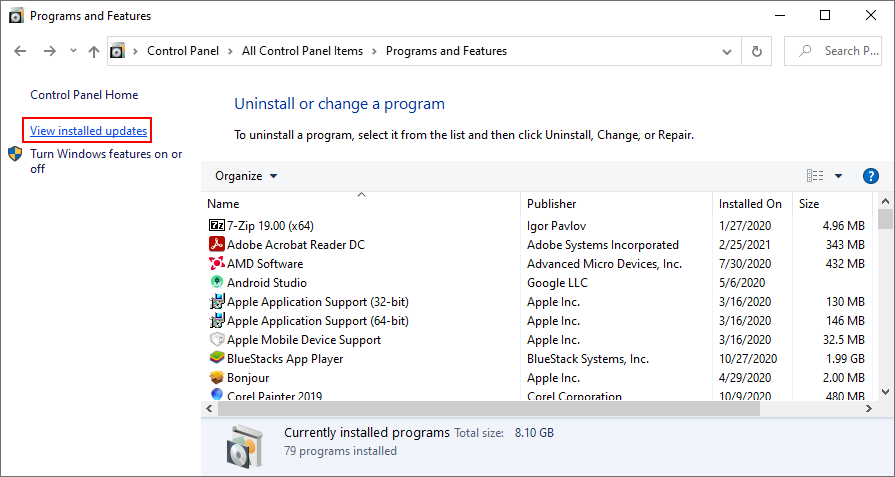
- Click the Installed On column to sort the update (newest first)
- Right-click the first update in the list and select Uninstall
- Click Yes to confirm
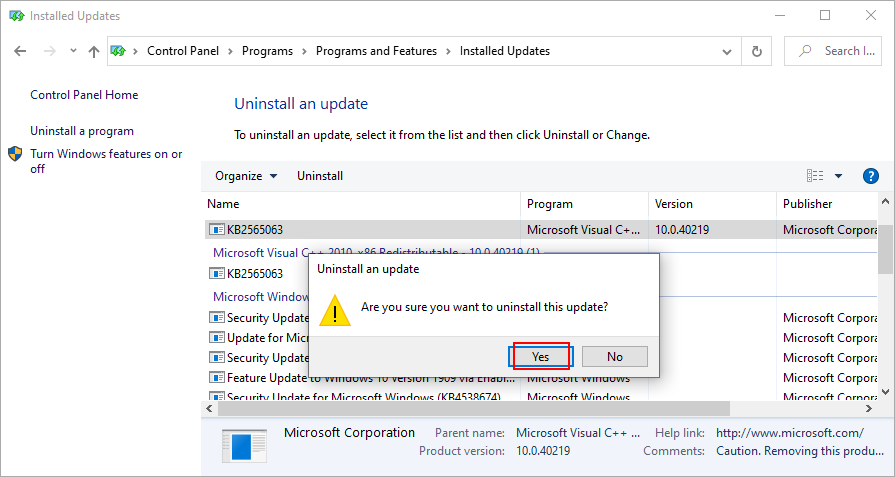
- Restart your PC to inspect results
15. Uninstall third-party applications
Some types of software are known to cause PC functionality problems due to their poor support for Windows 10 as well as the fact that they require access to sensitive parts of the system. It’s the case of several free antivirus and VPN tools, for example. You just have to get rid of them to restore your computer’s performance.
How to uninstall recent programs:
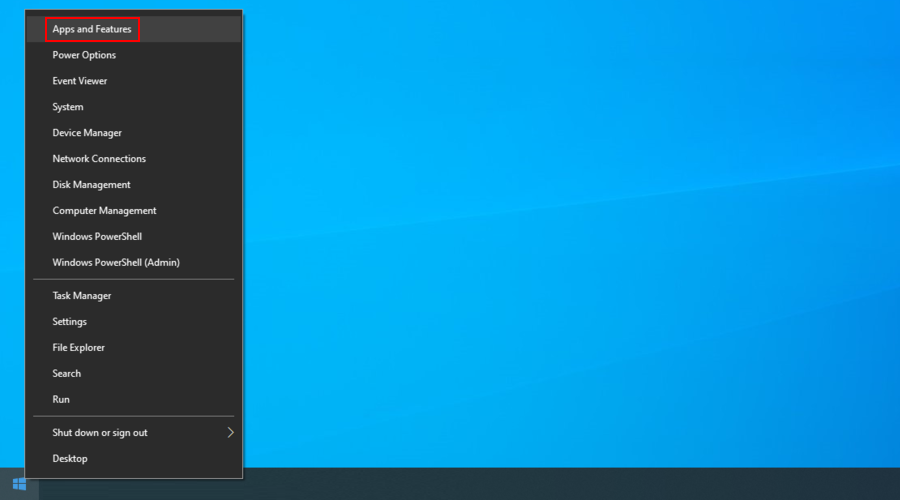
- Right-click the Start button and go to Apps and Features
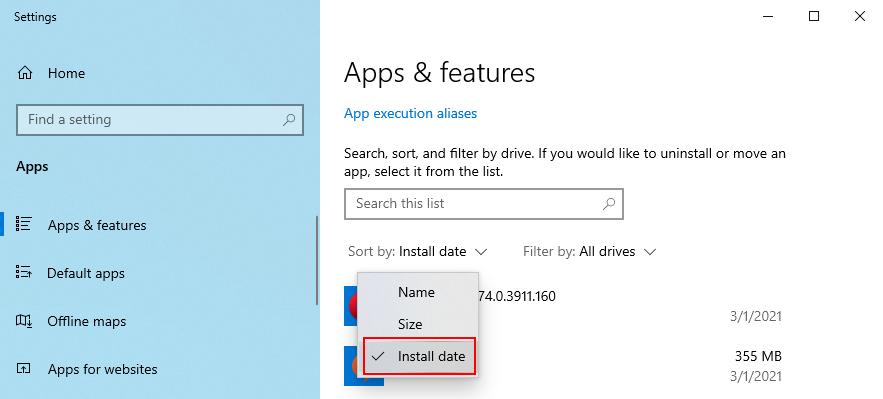
- Click the menu next to Sort by and select Install date (newest first)
- Choose the first application in the list and click Uninstall
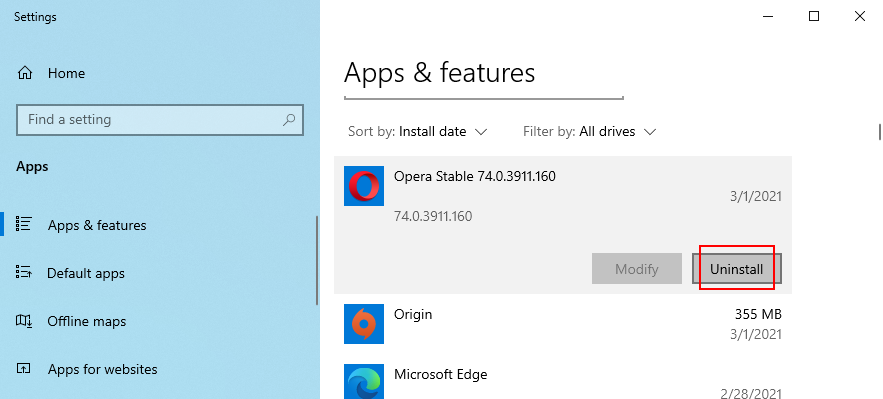
- Click Uninstall again to confirm its removal
- Once the app is removed, restart your PC to check for errors
This method won’t work for applications that have made significant changes to the system registry. However, you can turn to a program uninstaller, which is more thorough than the Windows default uninstaller because it also eliminates leftover files and registry entries.
16. Repair registry settings
If there are incorrect settings in the system registry, like an entry with a wrong value or a missing key, then you should expect system crashes and error messages like Your PC ran into a problem and needs to restart. However, it’s possible to apply some quick fixes from Command Prompt and without having to use an OS emergency disk.
- Press the power button to open a menu
- Hold down Shift and press Restart to trigger Recovery mode
- Or, if you can’t boot Windows at all, interrupt the startup sequence three times to start Recovery mode
- Select Troubleshoot
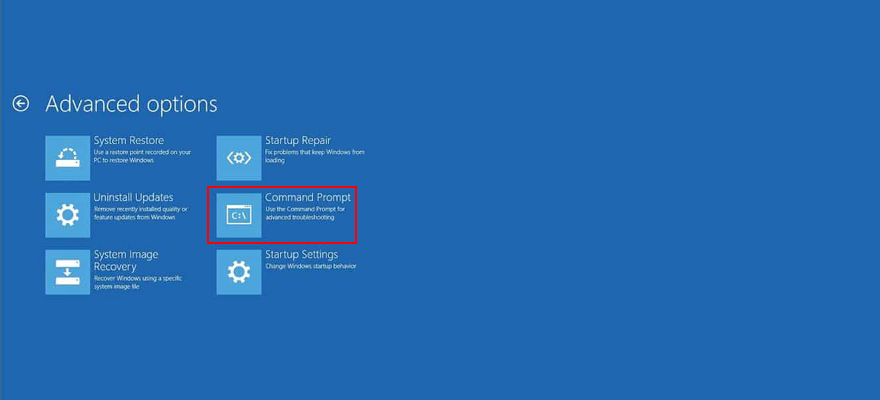
- Go to Advanced
- Click Command Prompt
- Copy and paste the following lines (press Enter after each line):
-
cd c:\Windows\System32\config
-
ren c:\Windows\System32\config\DEFAULT DEFAULT.old
-
ren c:\Windows\System32\config\SAM SAM.old
-
ren c:\Windows\System32\config\SECURITY SECURITY.old
-
ren c:\Windows\System32\config\SOFTWARE SOFTWARE.old
-
ren c:\Windows\System32\config\SYSTEM SYSTEM.old
-
copy c:\Windows\System32\config\RegBack\DEFAULT c:\Windows\System32\config\
-
copy c:\Windows\System32\config\RegBack\DEFAULT c:\Windows\System32\config\
-
copy c:\Windows\System32\config\RegBack\SAM c:\Windows\System32\config\
-
copy c:\Windows\System32\config\RegBack\SECURITY c:\Windows\System32\config\
-
copy c:\Windows\System32\config\RegBack\SYSTEM c:\Windows\System32\config\
-
copy c:\Windows\System32\config\RegBack\SOFTWARE c:\Windows\System32\config\
-
- Reboot your PC and inspect results
17. Use System Restore
Any software events that you can’t identify can be reversed by rolling back Windows 10 in System Restore more. But that means that you must have created a restore point before you started experiencing system stability problems that lead to the Your PC ran into a problem and needs to restart error message.
How to use System Restore:
- Press Win key + R, type control panel, and press Enter
- Click Recovery
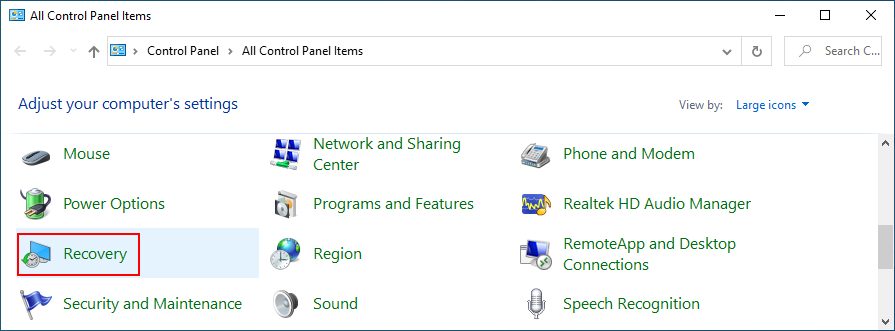
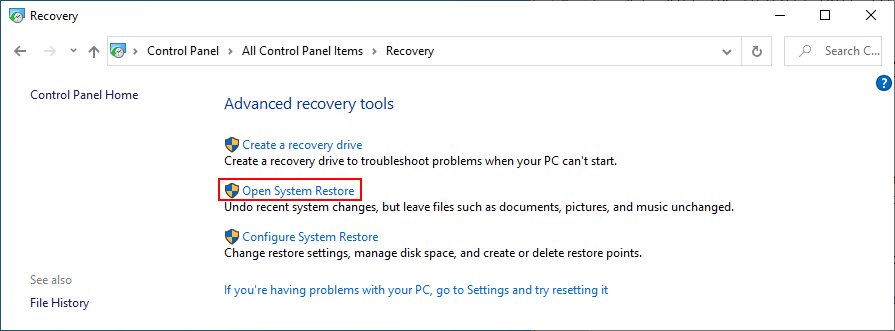
- Click Open System Restore (you need administrator rights)
- Choose a restore point. You can click Scan for affected programs to learn more about the changes
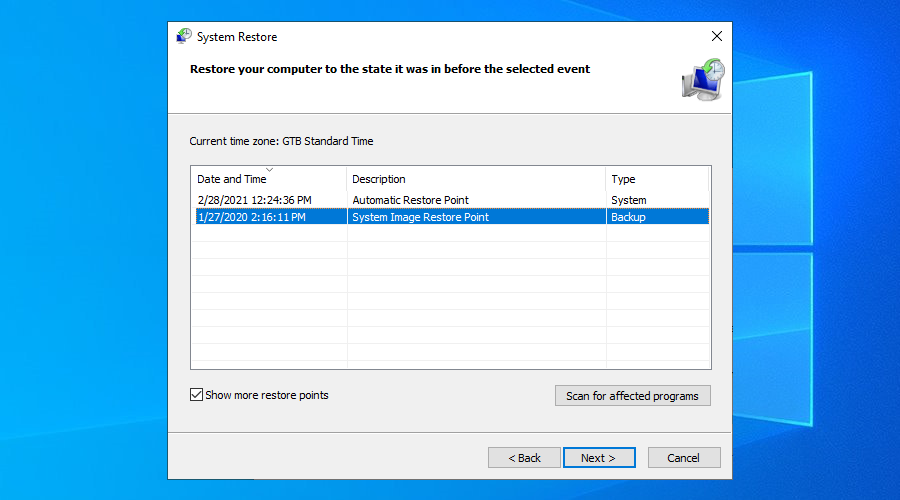
- Click Next and follow the steps
- Restart your PC and check for errors
If you can’t boot Windows, interrupt the startup sequence three times to start Recovery mode. Then, go to Troubleshoot > Advanced options to access System Restore.
18. Reset Windows 10
Resetting your OS to factory values is among the last solutions you should try when you can’t get rid of the Your PC ran into a problem and needs to restart error message. You will keep your personal files, but all applications will be removed, so you will have to reinstall everything afterward.
How to reset Windows 10 without boot:
- Interrupt the Windows boot three times to enter Recovery mode
- Click Troubleshoot
- Select Reset this PC
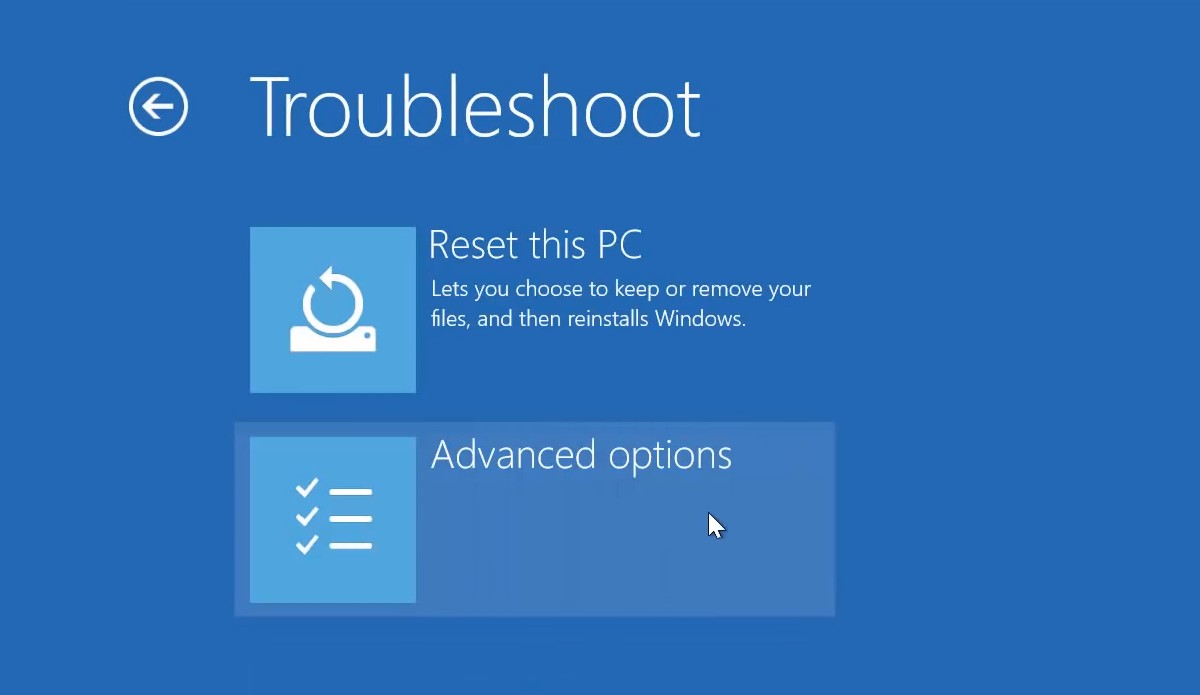
- Click Keep my files
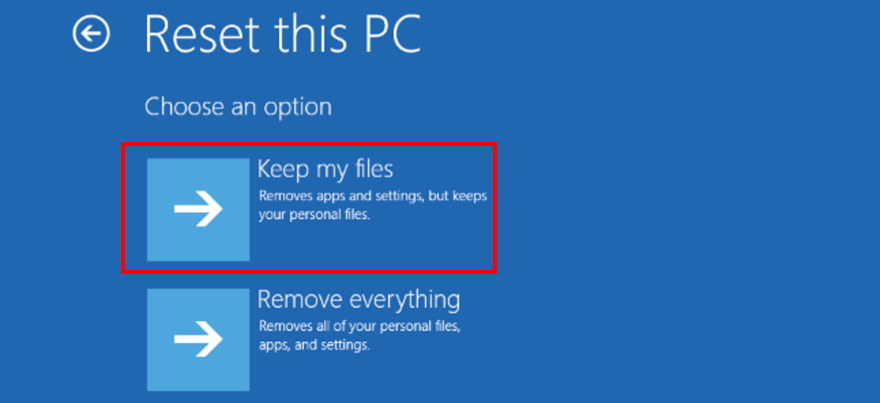
- Follow the on-screen instructions
19. Run System Image Recovery
If all solutions failed until this point, it’s time to create and use OS recovery media with the help of the System Image Recovery tool. Note that it means losing all applications and files, so it’s a good idea to back up everything important to you before proceeding with this solution.
How to create OS recovery media:
- Get an empty USB pen drive with 16 Gb minimum storage capacity
- Plug the pen drive into your PC
- Press the Windows key, type Create a recovery drive and hit Enter
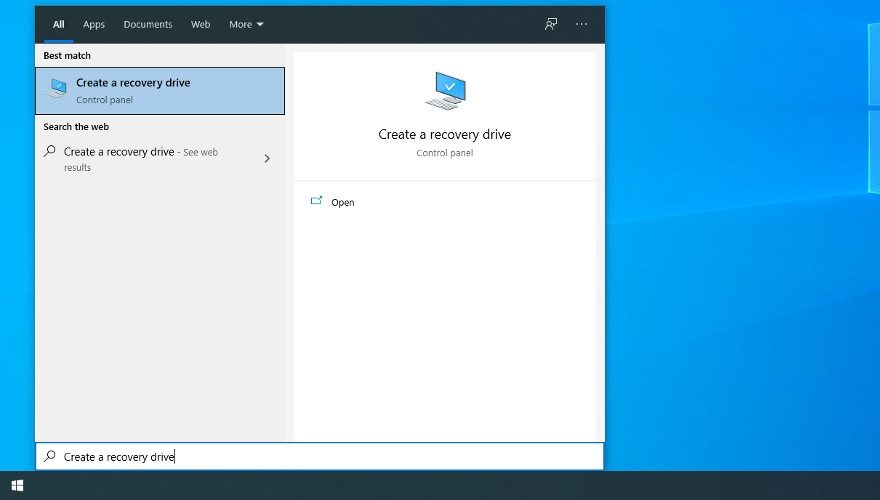
- Specify your admin password if prompted for authorization
- Select Back up system files to the recovery drive and click Next
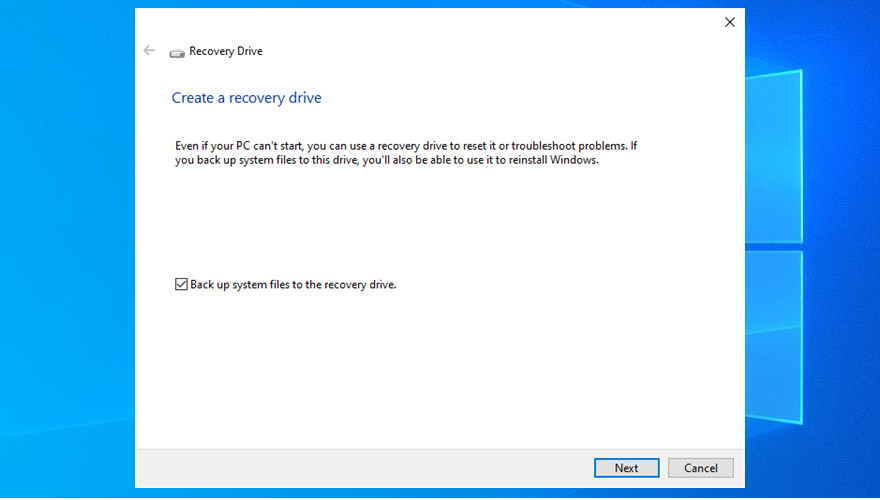
- Select the empty USB drive from the list
- Click Next and then Create
- Patiently wait while Windows creates your recovery media drive
How to use OS recovery media:
- With the USB flash drive still plugged into your computer, restart Windows
- Interrupt the boot sequence three times to trigger Recovery mode
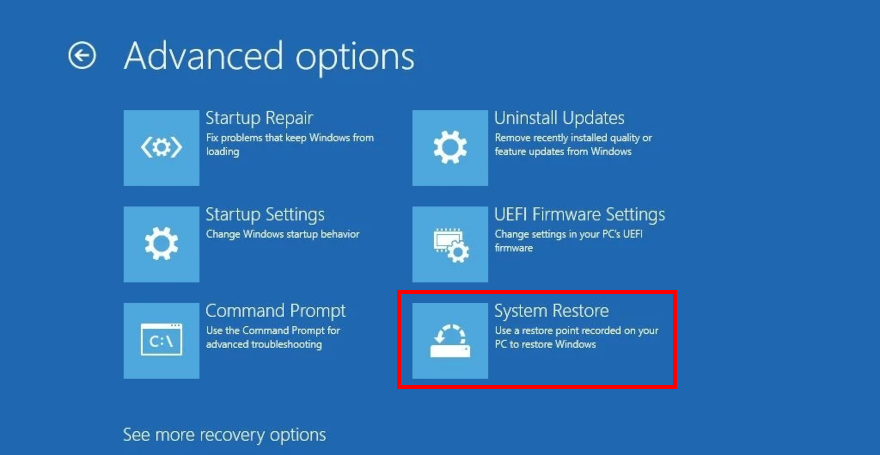
- Go to Troubleshoot and select Advanced Options
- Click System Image Recovery and proceed with the given steps
สรุป
To review, the Your PC ran into a problem and needs to restart error message is shown on the screen when your display turns blue and your operating system is trying to protect itself from data loss and corruption. It can be caused by various events at the software or hardware level.
However, you can try to repair this error by starting Windows in Safe Mode, running a clean boot, using Windows Update, investigating the system log, checking the device drivers and disk space, or unplugging new gear.
It’s also a good idea to scan your computer for malware infections, check the system memory, disable overclocking tools, reset BIOS to default, update BIOS, repair disk and system errors, and remove new system updates that may not be compatible with your PC.
In addition, you can uninstall third-party applications, repair registry settings, use System Restore, reset Windows 10, and run System Image Recovery.
What solutions did you use to get rid of the Your PC ran into a problem and needs to restart error? Did we miss any important steps? Let us know in the comment area below.