กำลังมองหาวิธีบันทึกหน้าจอใน Windows 11 อยู่หรือไม่? บทแนะนำนี้เป็นทุกสิ่งที่จำเป็นสำหรับการเริ่มต้น
หน้าจอการบันทึกมีประโยชน์จริง ๆ ในหลาย ๆ สถานการณ์ คุณอาจต้องการบันทึกวิดีโอแนะนำวิธีการสำหรับเพื่อนที่ไม่ใช่นักเทคโนโลยี หรือคุณต้องการบันทึกการทำงานแบบกะทันหันของบางแอปพลิเคชันบนเครื่อง Windows ของคุณ การบันทึกหน้าจอสามารถพิสูจน์ได้ว่าเป็นเครื่องมือที่มีประโยชน์และมีประสิทธิภาพในหลายสถานการณ์
Windows ยังมีเครื่องมือในตัวสำหรับการจับภาพหน้าจอ อย่างไรก็ตาม มีข้อจำกัดบางประการซึ่งจำกัดการใช้งานในบางสถานการณ์ อย่างไรก็ตาม ด้วยการใช้ Windows อย่างแพร่หลาย จึงไม่น่าแปลกใจเลยที่มีแอพพลิเคชั่นของบุคคลที่สามมากมายเช่นกัน ในคู่มือนี้ เราจะตรวจสอบตัวเลือกที่ดีที่สุดบางส่วนที่มีให้บริการ
การใช้แอป Xbox Game Bar เพื่อบันทึกหน้าจอใน Windows 11
Windows 11 มีแอป”Game Bar”ในตัวที่เปิดใช้งานโดยค่าเริ่มต้น และช่วยให้คุณบันทึกหน้าจอของคุณได้อย่างไม่มีที่ติโดยไม่ต้องยุ่งยาก แต่มีสิ่งที่จับได้ แอปพลิเคชั่น Game Bar ไม่มีคุณสมบัติในการบันทึกทั้งหน้าจอหรือตัวสำรวจไฟล์ของคุณ คุณสามารถบันทึกได้เฉพาะแอปพลิเคชันที่ไม่มีการควบคุมภูมิภาคของการบันทึกใดๆ
หากคุณเป็นคนที่ต้องการอวดการเคลื่อนไหวที่ซับซ้อนที่คุณดึงมาจากเกมโปรดของคุณ หรือให้วิธีการนำทางในแอป Game Bar อาจเป็นตัวเลือกที่ดีที่สุดสำหรับคุณ
หากต้องการบันทึกหน้าจอโดยใช้แอป Game Bar ก่อนอื่นให้เปิดแอปพลิเคชันจากตัวสำรวจไฟล์หรือเมนูเริ่มในเครื่อง Windows ที่คุณต้องการบันทึก
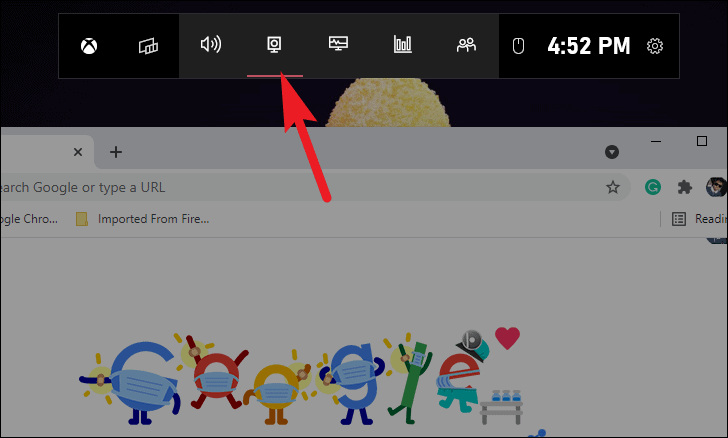
ถัดไป ให้เปิดแอป Game Bar โดยกดปุ่ม Windows+G พร้อมกันบนแป้นพิมพ์ แล้วเลือกตัวเลือก’Capture’จาก Game Bar ที่ส่วนบนของหน้าจอ
p>
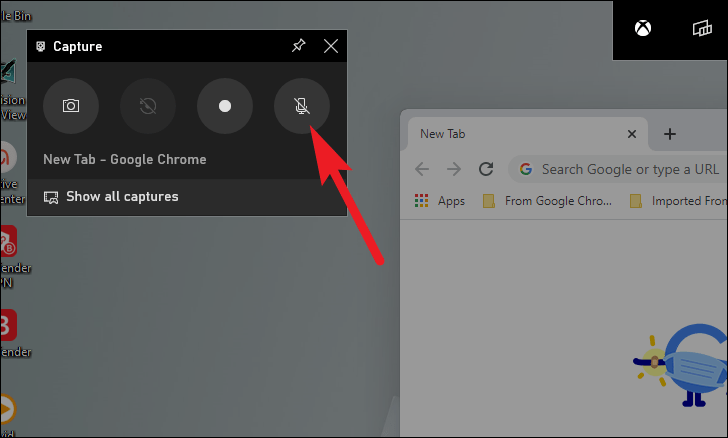
แอป Game Bar ให้คุณเลือกได้ว่าต้องการใส่คำใบ้หรือคำบรรยายในการบันทึกหรือไม่
ในการทำเช่นนั้น ให้กดปุ่ม’ไมค์’ที่อยู่ในบานหน้าต่าง’จับภาพ’ซึ่งปกติจะอยู่ทางด้านซ้ายของหน้าจอ หรือจะกด Windows+Alt+M เพื่อเปิดหรือปิดไมค์ก็ได้
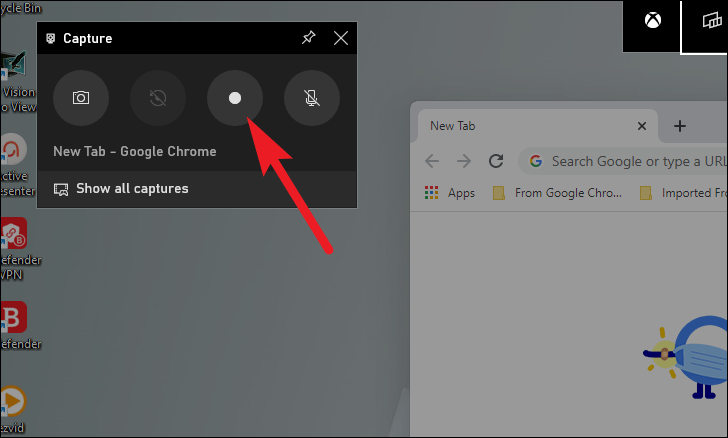
ตอนนี้ คลิกที่ปุ่ม’เริ่มการบันทึก’บนบานหน้าต่าง’จับภาพ’เพื่อเริ่มบันทึกแอปพลิเคชัน อีกวิธีหนึ่ง คุณยังสามารถกด Windows+Alt+R บนแป้นพิมพ์เพื่อเริ่ม/หยุดการบันทึก
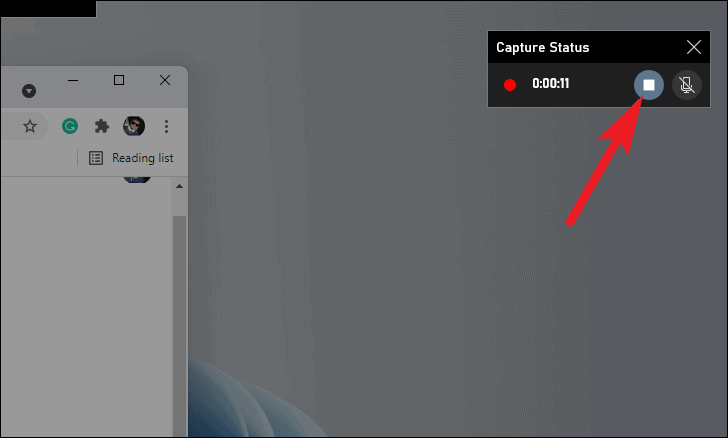
เมื่อเริ่มการบันทึกหน้าจอ ช่องจับภาพและแถบเกม Xbox จะถูกย่อให้เล็กสุด และคุณจะสามารถเห็นบานหน้าต่าง”สถานะการจับภาพ”ซึ่งมักจะปรากฏอยู่ที่ขอบด้านขวาของหน้าจอ
ในการปิดการบันทึก คุณสามารถใช้ทางลัดโดยกด Windows+Alt+R บนแป้นพิมพ์หรือโดยคลิกที่’ปุ่มบันทึก’จากบานหน้าต่างสถานะการบันทึก
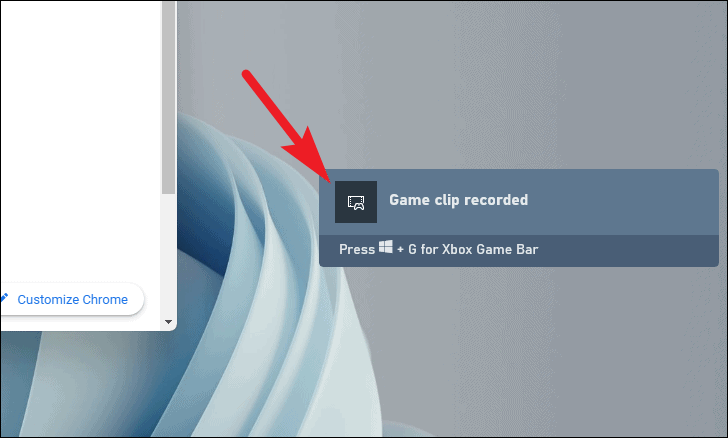
เมื่อคุณปิดการบันทึกหน้าจอ คุณจะสังเกตเห็นแบนเนอร์ที่ขอบด้านขวาของหน้าจอ ซึ่งจะแจ้งให้คุณทราบว่ามีการบันทึกคลิปแล้ว แตะเพื่อเปิดรายการบันทึกหน้าจอและภาพหน้าจอทั้งหมด
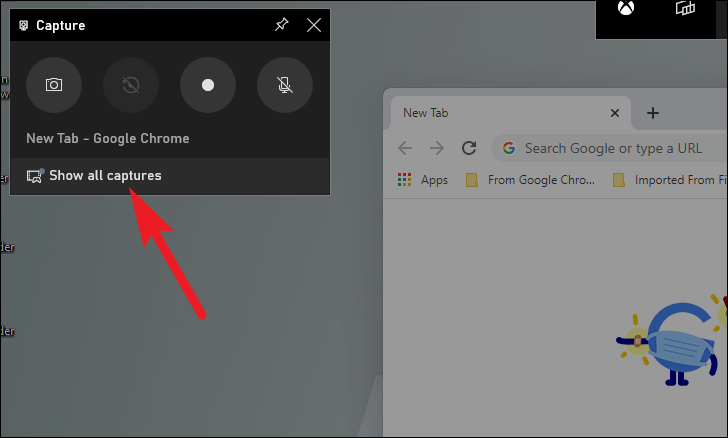
อีกวิธีหนึ่ง คุณยังสามารถคลิกปุ่ม”แสดงการจับภาพทั้งหมด”บนแถบเครื่องมือเพื่อเปิดมุมมองแกลเลอรีของแอป Game Bar
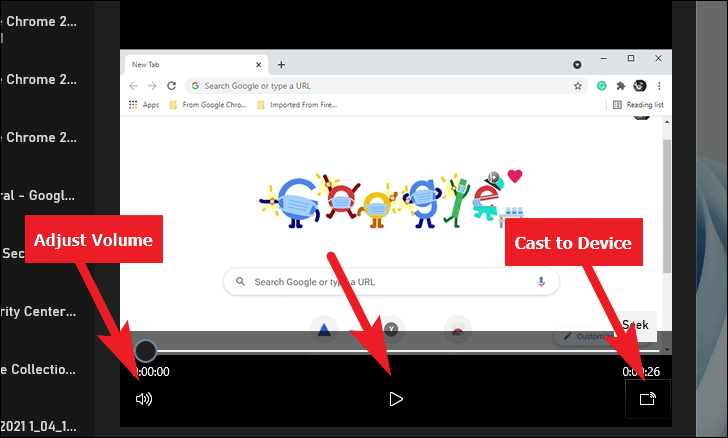
ในมุมมองแกลเลอรี คุณสามารถดูตัวอย่างการบันทึกหน้าจอได้โดยคลิกที่ปุ่ม”เล่น”ที่ปรากฏบนหน้าจอ คุณยังสามารถปรับเสียงหรือแคสต์การบันทึกหน้าจอไปยังอุปกรณ์ที่เข้ากันได้โดยใช้ตัวเลือกที่มีให้ในแต่ละขอบของพื้นที่แสดงตัวอย่าง
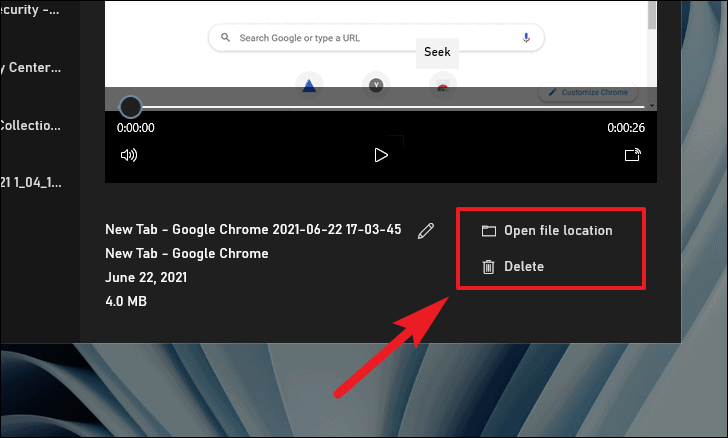
หากต้องการแก้ไขชื่อการบันทึก ให้แตะที่ไอคอน”แก้ไข”ที่อยู่ใต้พื้นที่แสดงตัวอย่างบนหน้าจอ ข้อมูลเกี่ยวกับการบันทึกหน้าจอ เช่น ชื่อของแอปพลิเคชัน วันที่บันทึก และขนาดไฟล์จะอยู่ใต้ชื่อไฟล์ด้วย
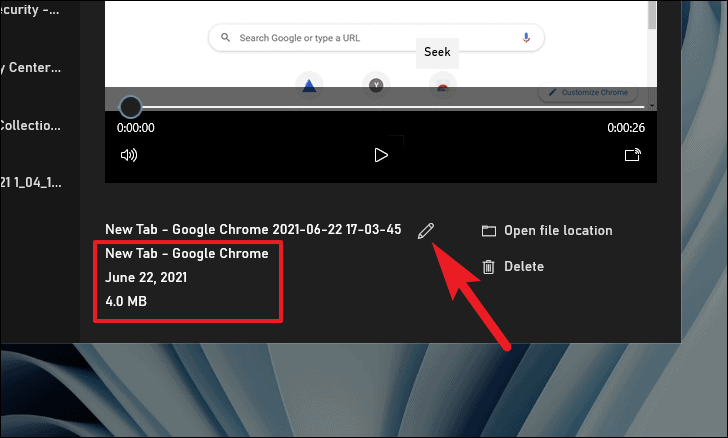
คุณยังสามารถข้ามไปยังตำแหน่งไฟล์ใน file explorer หรือลบการบันทึกจากตัวเลือกที่ด้านล่างขวาของมุมมองแกลเลอรี
แอป Xbox Game Bar เป็นโซลูชันที่ยอดเยี่ยมสำหรับการบันทึกหน้าจอแบบเนทีฟใน Windows 11 อย่างไรก็ตาม ข้อจำกัดในการบันทึกเฉพาะแอปพลิเคชันและไม่มีตัวเลือกสำหรับการบันทึก File explorer จะไม่ปล่อยให้แอปอยู่ในอันดับต้นๆ
การใช้แอปพลิเคชันบุคคลที่สามเพื่อบันทึกหน้าจอใน Windows 11
มีแอปพลิเคชั่นบันทึกหน้าจอที่มีความสามารถมากมายสำหรับแพลตฟอร์ม Windows เนื่องจากไม่สามารถรวมทุกรายการไว้ที่นี่ เรามาดูตัวเลือกที่ดีที่สุดบางส่วนที่มีให้กัน
กล้องฟรี
กล้องฟรีเป็นฟรีแวร์ที่ไม่มีโฆษณาสำหรับการบันทึกหน้าจอบนแพลตฟอร์ม Windows ใช้งานง่าย เป็นพื้นฐาน แต่เป็นเครื่องบันทึกหน้าจอที่มีความสามารถสูงสำหรับผู้ที่ต้องการบันทึกหน้าจอเป็นครั้งคราว และยังต้องปรับแต่งและตัดแต่งการบันทึกตามความชอบ
มีเวอร์ชันฟรีและเวอร์ชันที่ต้องชำระเงินของ Free Cam เวอร์ชันที่ต้องชำระเงินจะทำให้คุณได้รับเงินคืน $227/ปี ดังที่กล่าวไปแล้ว เวอร์ชันฟรีก็ไม่ได้แย่ไปกว่าครึ่งด้วยฟังก์ชันหลักๆ เกือบทั้งหมดที่พร้อมใช้งานโดยไม่มีลายน้ำหรือจำกัดเวลาสำหรับการบันทึกหน้าจอ
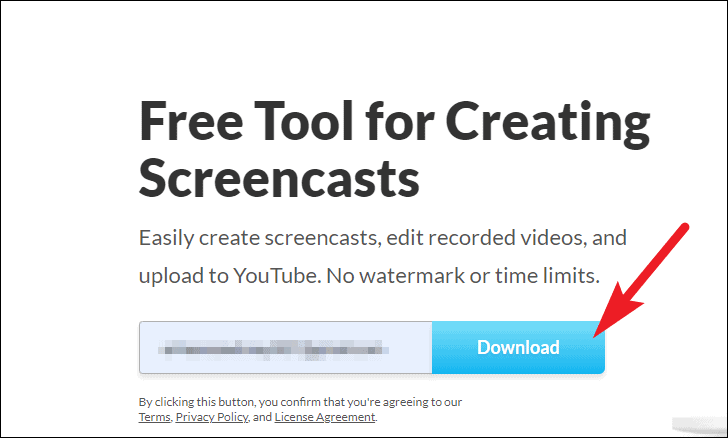
หากต้องการเริ่มใช้ Free cam ก่อนอื่น ให้ดาวน์โหลดจากเว็บไซต์อย่างเป็นทางการ freescreenrecording.com โดยป้อนที่อยู่อีเมลของคุณแล้วคลิก ปุ่มดาวน์โหลด
เมื่อดาวน์โหลดแล้ว ให้ติดตั้งซอฟต์แวร์ Free Cam บนเครื่อง Windows ของคุณ คุณสามารถค้นหาไฟล์ติดตั้งได้ในไดเร็กทอรีดาวน์โหลดของเบราว์เซอร์ที่คุณตั้งค่าไว้ หากคุณไม่ได้ตั้งค่าไดเร็กทอรีดาวน์โหลด ไดเร็กทอรีเริ่มต้นคือโฟลเดอร์”ดาวน์โหลด”ของคุณ
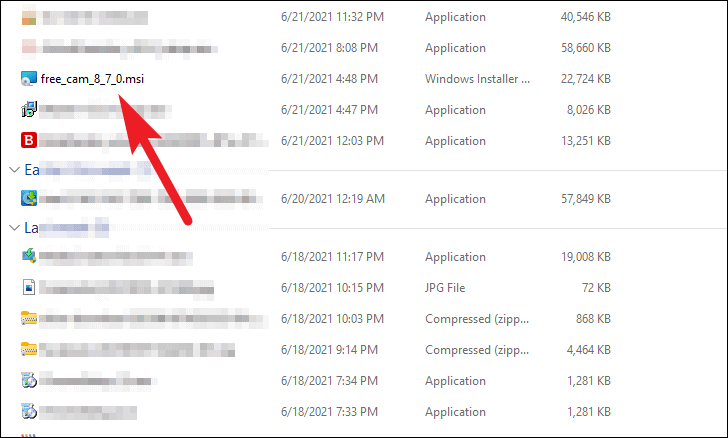
หลังการติดตั้ง ให้เรียกใช้ซอฟต์แวร์ Free Cam โดยดับเบิลคลิกที่ทางลัดที่ปรากฏบนเดสก์ท็อปหรือจากเมนูเริ่มของ Windows

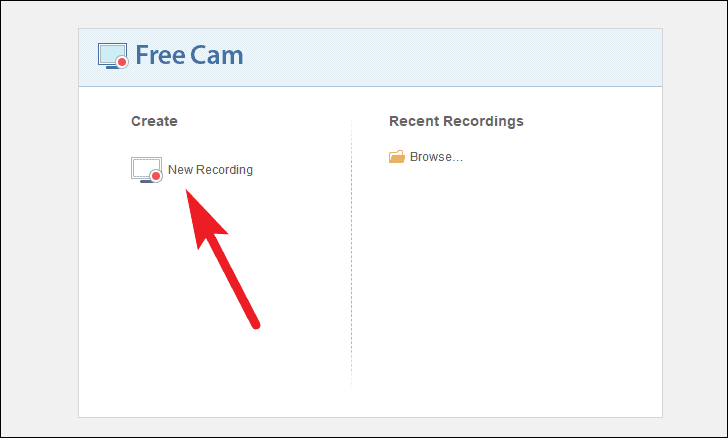
เมื่อหน้าต่าง Free Cam เปิดขึ้น ให้คลิกที่ปุ่ม’New Recording’จากหน้าจอ
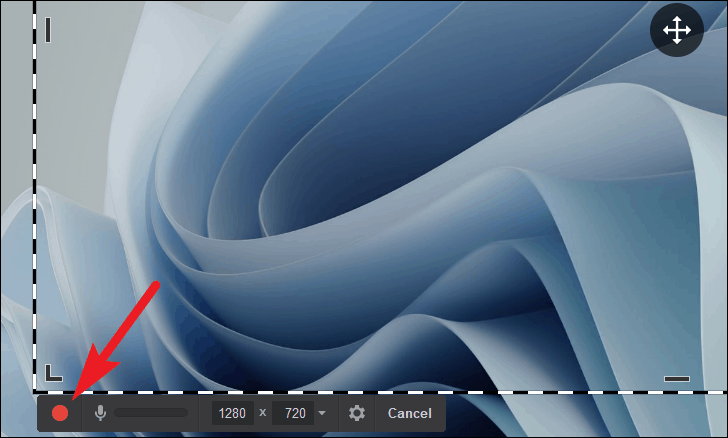
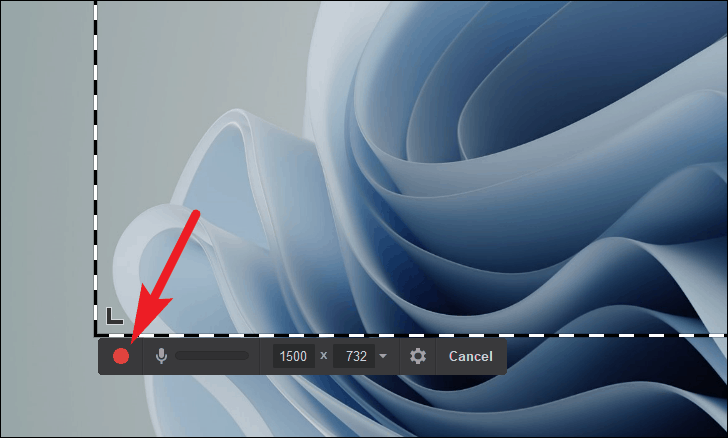
ในการเริ่มบันทึกหน้าจอด้วย Free Cam โดยใช้การตั้งค่าเริ่มต้น (ซึ่งเป็นพื้นที่คงที่ 1280×720 พิกเซลโดยไม่มีการบันทึกเสียงภายนอก) ให้คลิกปุ่ม”บันทึก”ที่มุมล่างซ้าย ของกรอบที่มองเห็นได้บนหน้าจอ
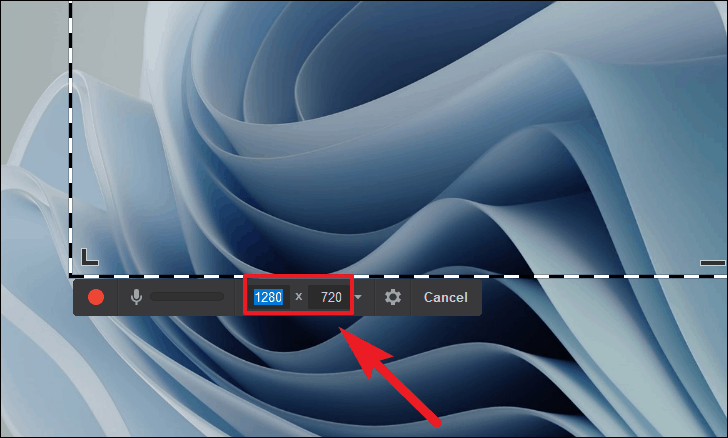
มิฉะนั้น หากคุณต้องการเปลี่ยนขนาดขอบเขตคงที่ ให้เปลี่ยนความสูงหรือความกว้างของขอบเขตโดยแก้ไขค่าบนแถบเครื่องมือ (ค่าเป็นพิกเซล)
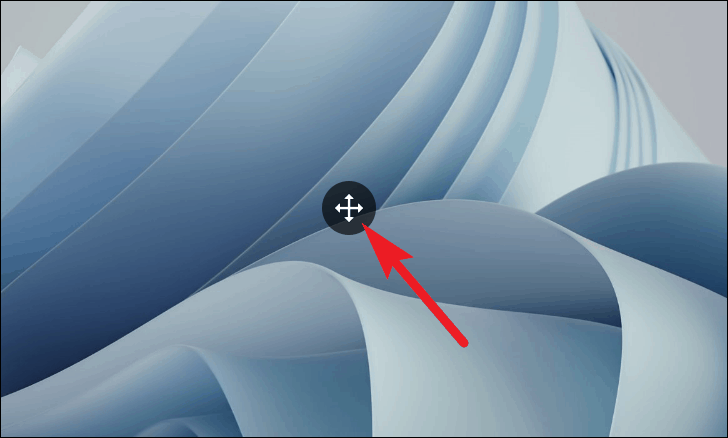
หากต้องการเปลี่ยนตำแหน่งพื้นที่คงที่ ให้คลิกปุ่มเมาส์ขวาบนไอคอน”ลูกศรสี่”จากกึ่งกลางของหน้าจอค้างไว้ แล้วลากเพื่อจัดตำแหน่งเฟรมบนหน้าจอ
หากต้องการปรับขนาดด้วยตนเอง คุณสามารถคลิกและลากจุดยอดใดก็ได้ของเฟรม
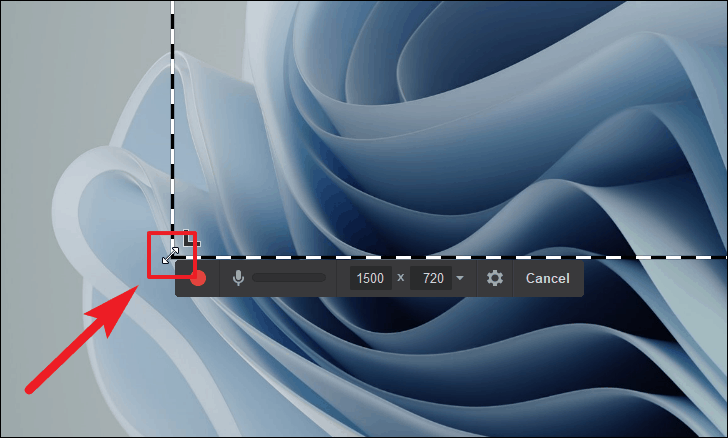
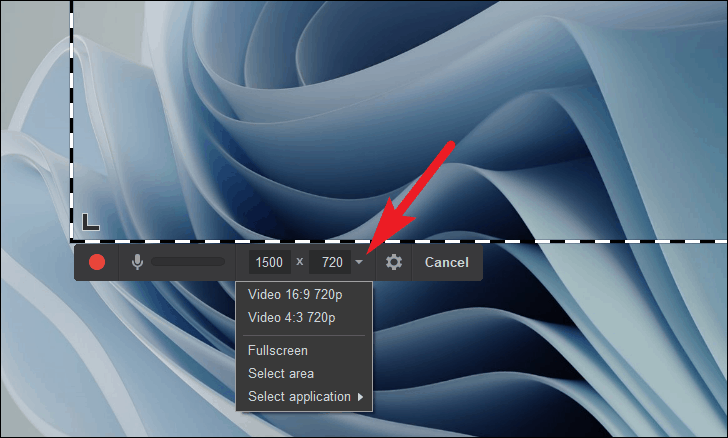
อีกวิธีหนึ่ง คุณยังสามารถปรับอัตราส่วนขนาดเฟรม วาดพื้นที่คงที่ หรือบันทึกทั้งหน้าจอโดยคลิกที่ไอคอน”กะรัตลง”บนแถบเครื่องมือที่อยู่ด้านล่างเฟรมที่บันทึกได้
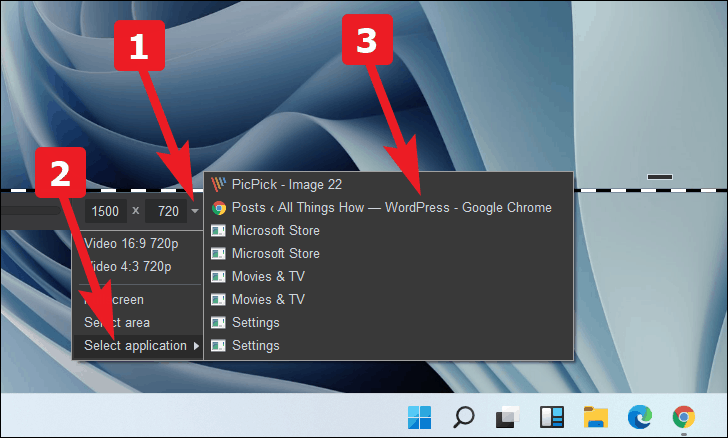
คุณยังสามารถเลือกแอปพลิเคชันที่ต้องการบันทึกจาก Free Cam ได้อีกด้วย คลิกไอคอน’กะรัตลง’จากแถบเครื่องมือที่มีอยู่บนแถบเครื่องมือใต้เฟรม จากนั้นไปที่ตัวเลือก’เลือกแอปพลิเคชัน’จากรายการ และสุดท้าย เลือกแอปพลิเคชันที่คุณต้องการบันทึกจากตัวเลือกที่มี
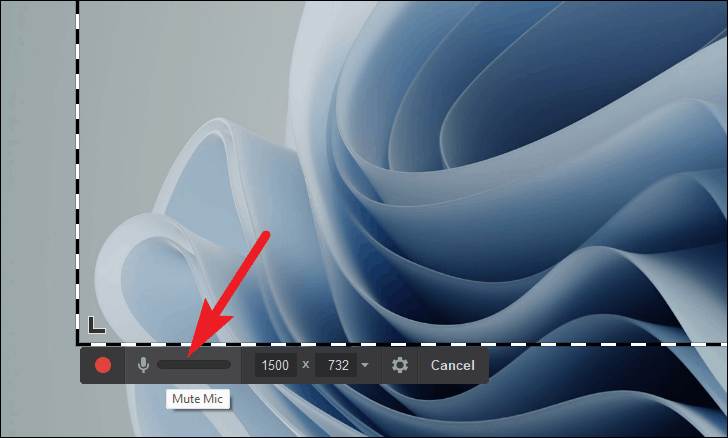
กล้องฟรียังช่วยให้คุณเลือกได้ว่าต้องการใส่คำใบ้หรือคำบรรยายสำหรับการบันทึกด้วยหรือไม่ หากต้องการเปิดใช้งาน ให้กดปุ่ม’ไมค์’ที่อยู่ด้านขวาปุ่ม’บันทึก’
เมื่อตั้งค่ากำหนดทั้งหมดของคุณแล้ว ให้คลิกที่ปุ่ม”บันทึก”ที่อยู่ใต้มุมล่างซ้ายของเฟรมที่มองเห็นได้บนหน้าจอ
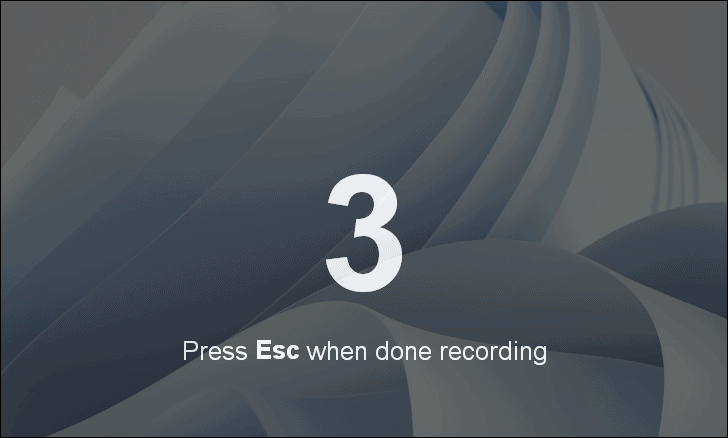
จากนั้น หน้าจอของคุณจะเริ่มนับถอยหลัง 3 วินาที ก่อนที่ Free Cam จะเริ่มบันทึก
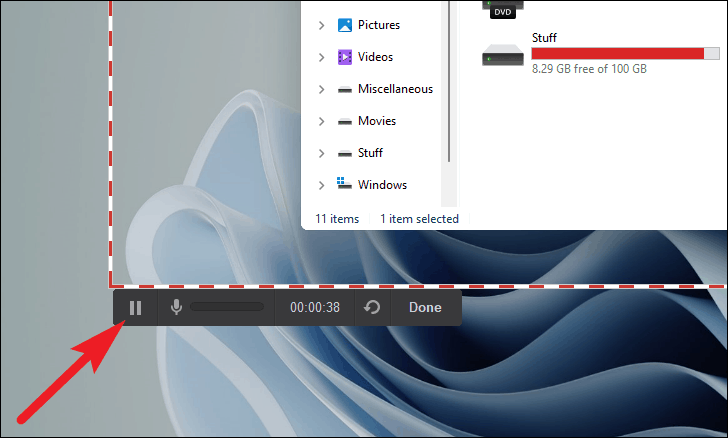
หากคุณต้องการหยุดวิดีโอชั่วคราวระหว่างการบันทึก คุณสามารถทำได้โดยคลิกปุ่ม”ไอคอนหยุดชั่วคราว”ที่ตำแหน่งเดียวกับปุ่ม”บันทึก”หากต้องการหยุดบันทึก ให้คลิกปุ่ม”เสร็จสิ้น”หรือกด Esc บนแป้นพิมพ์
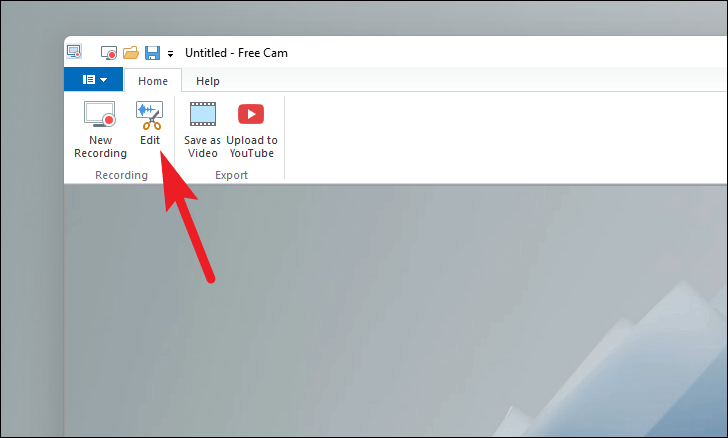
หลังจากกด Esc บนแป้นพิมพ์ Free Cam จะเปิดวิดีโอที่บันทึกไว้ในบานหน้าต่างแสดงตัวอย่าง คุณสามารถเลือกแก้ไขวิดีโอโดยใช้ตัวเลือก”แก้ไข”เพื่อเปิดตัวแก้ไขในตัว
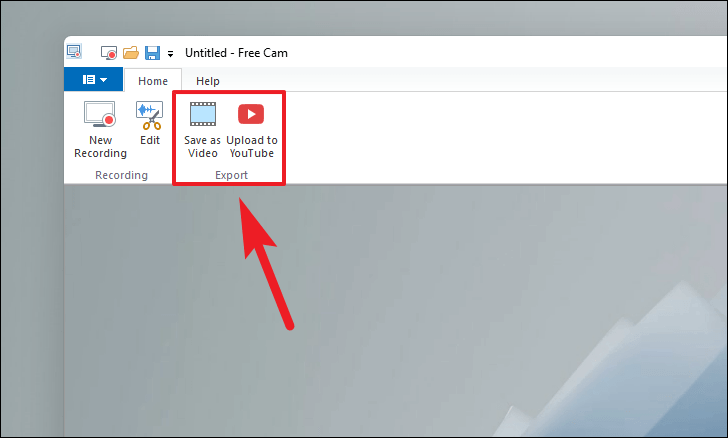
(หรือในกรณีนี้ คุณไม่จำเป็นต้องแก้ไขใดๆ คุณยังสามารถบันทึกวิดีโอลงในที่จัดเก็บในเครื่องของคุณโดยคลิกที่ตัวเลือก’บันทึกเป็นวิดีโอ’หรืออัปโหลดไปยัง YouTube ได้ทันทีโดยคลิกที่’อัปโหลดไปยัง YouTube’ตัวเลือกจากเมนูริบบอน)
ตัวแก้ไขในตัวให้ตัวเลือกที่เหมาะสมแก่คุณ เช่น ลบเฟรม ปิดเสียง ตัดแต่งเฟรม ลบเสียงรบกวน ปรับระดับเสียง เฟดเข้า/เฟดออกเพื่อแทนการเปลี่ยนภาพ และอื่นๆ อีกมากมายซึ่งมีอยู่ในเมนูริบบอน ของบรรณาธิการ
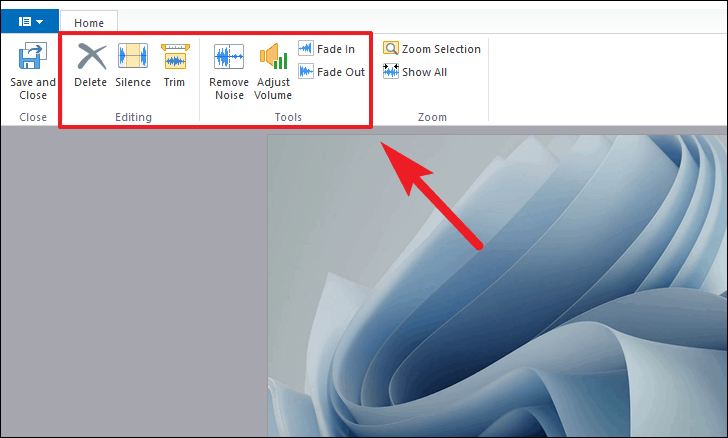
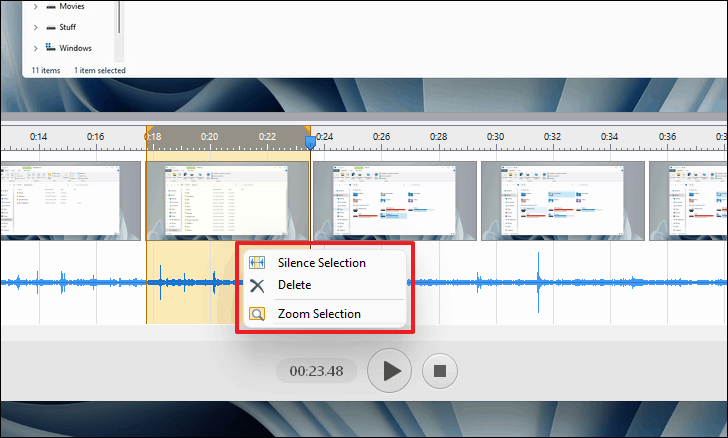
คุณยังสามารถปิดเสียงได้โดยคลิก”การเลือกปิดเสียง”และลบเฟรมวิดีโอโดยคลิกที่ตัวเลือก”ลบ”จากตัวแก้ไขไทม์ไลน์โดยคลิกขวาที่เฟรมที่ต้องการ
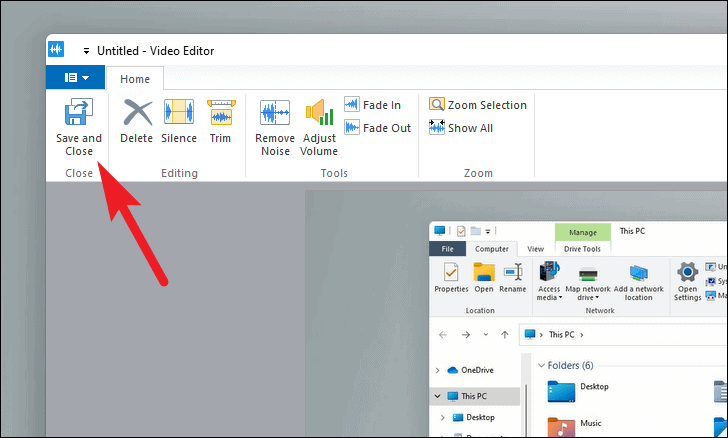
เมื่อแก้ไขการบันทึกของคุณเสร็จแล้ว คลิก’บันทึกและปิด’เพื่อกลับไปยังหน้าต่างก่อนหน้า
หลังจากแก้ไข คุณสามารถเลือกบันทึกการบันทึกลงในที่จัดเก็บในเครื่องของคุณโดยคลิกที่ตัวเลือก’บันทึกเป็นวิดีโอ’หรืออัปโหลดไปยัง YouTube ทันทีโดยคลิกที่ตัวเลือก’อัปโหลดไปยัง YouTube’จากเมนูริบบอน
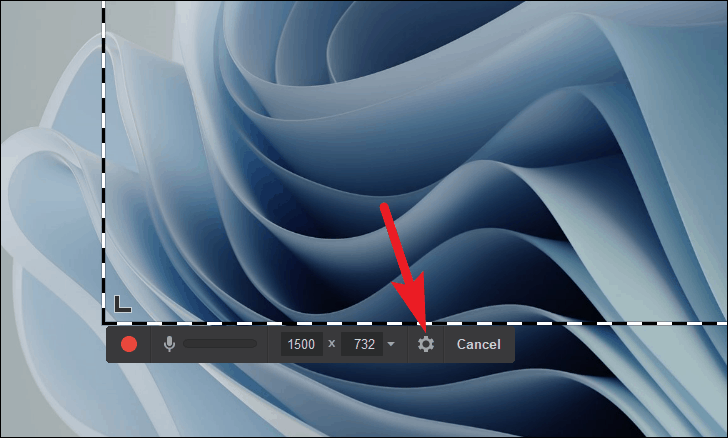
เพื่อให้สามารถควบคุมการบันทึกหน้าจอของคุณได้มากขึ้น จากหน้าจอการเลือกภูมิภาคของ Free Cam ให้คลิกที่ไอคอน”การตั้งค่า”ที่อยู่บนแถบเครื่องมือใต้มุมล่างซ้ายของเฟรมบนหน้าจอ
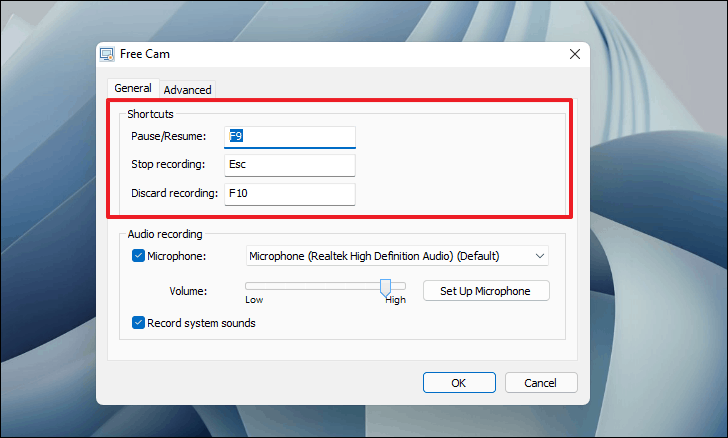
ตอนนี้จากแท็บ”ทั่วไป”คุณสามารถเปลี่ยนปุ่มลัดสำหรับการทำงานพื้นฐาน เช่น หยุดชั่วคราว หยุด หรือยกเลิกการบันทึก
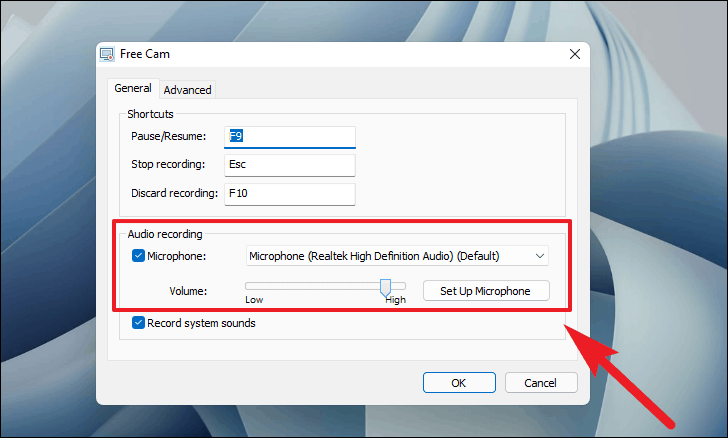
คุณยังสามารถเลือกจากไมโครโฟนที่มีอยู่สำหรับการบันทึกเสียงภายนอก โดยคลิกที่เมนูดรอปดาวน์ คุณยังสามารถปรับความเข้มของไมโครโฟนได้โดยใช้แถบเลื่อน
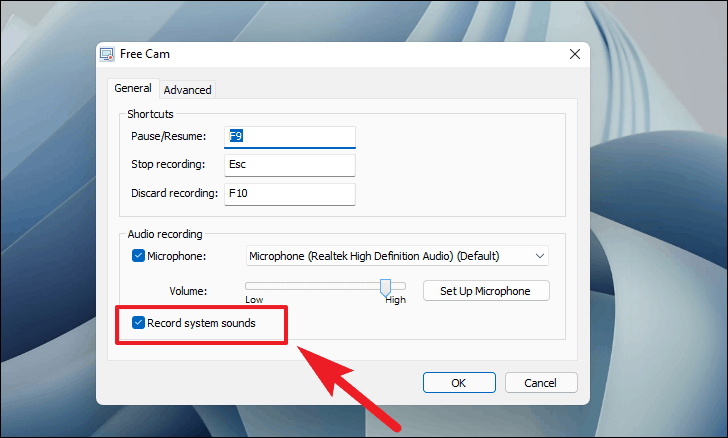
หลังจากนั้น คุณยังสามารถควบคุมการบันทึกเสียงของระบบในการบันทึกเสียงของคุณโดยเลือกหรือยกเลิกการเลือกช่องทำเครื่องหมายที่อยู่หน้าช่อง”บันทึกเสียงของระบบ”
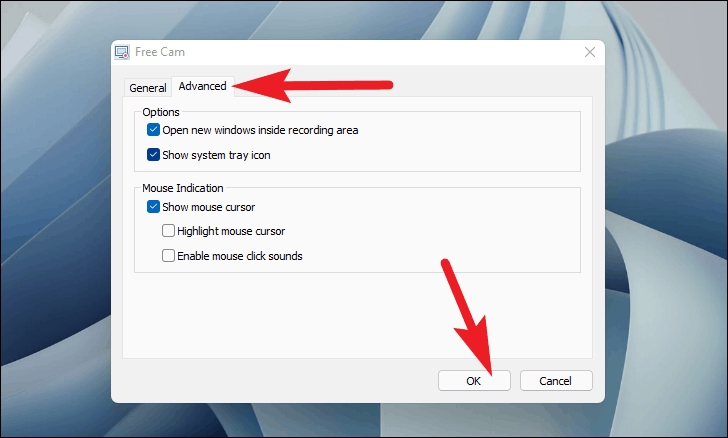
สำหรับการควบคุมการทำงานของแอปพลิเคชันและการตั้งค่าเคอร์เซอร์ของเมาส์ในระหว่างการบันทึก ให้ไปที่แท็บ”ขั้นสูง”จากนั้น ตรวจสอบ/ยกเลิกการเลือกตัวเลือกตามความต้องการของคุณ จากนั้นคลิก’ตกลง’เพื่อปิดบานหน้าต่างการตั้งค่า
Free Cam ให้การควบคุมที่ยอดเยี่ยมในกระบวนการสร้างสำหรับผู้เริ่มต้น และมอบความคุ้มค่าสูงสุดด้วยโปรแกรมตัดต่อวิดีโอในตัว อินเทอร์เฟซที่ใช้งานง่ายและประสิทธิภาพที่ดีทำให้เป็นตัวเลือกที่ดีมาก
ActivePresenter
ActivePresenter มีตัวเลือกในการจับภาพหน้าจอและตัวเลือกการตัดต่อวิดีโอที่เหมาะสม พร้อมด้วยตัวเลือกในการใส่คำอธิบายประกอบวิดีโอ เพิ่มทรานซิชัน แอนิเมชั่น และยังสามารถบันทึกจากเว็บแคมในตัวของคุณได้อีกด้วย
แม้ว่า ActivePresenter จะมีเวอร์ชันฟรีและเวอร์ชันที่ต้องชำระเงิน แต่คุณก็ยังใช้เวอร์ชันฟรีได้ตลอดโดยไม่มีโฆษณาและไม่มีลายน้ำ อย่างไรก็ตาม คุณลักษณะขั้นสูงบางอย่าง เช่น เสียงเฟดเข้า/ออก การลดสัญญาณรบกวน และหน้าจอสีเขียวมีเฉพาะในซอฟต์แวร์เวอร์ชันที่ต้องชำระเงินเท่านั้น
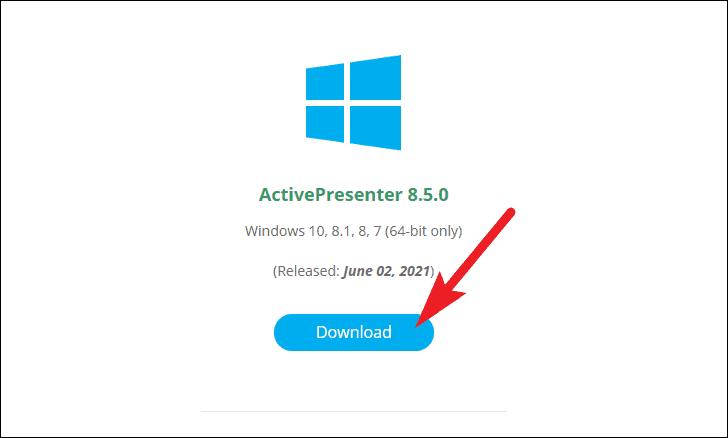
ในการเริ่มใช้งาน ActivePresenter ขั้นแรกให้ดาวน์โหลดแอปโดยไปที่ atomisystems.com/download
เมื่อดาวน์โหลดแล้ว ให้ติดตั้งซอฟต์แวร์ ActivePresenter บนเครื่อง Windows ของคุณ คุณสามารถค้นหาไฟล์ติดตั้งได้ในไดเร็กทอรีดาวน์โหลดของเบราว์เซอร์ที่คุณตั้งค่าไว้ ไดเรกทอรีเริ่มต้นคือโฟลเดอร์”ดาวน์โหลด”ของคุณ
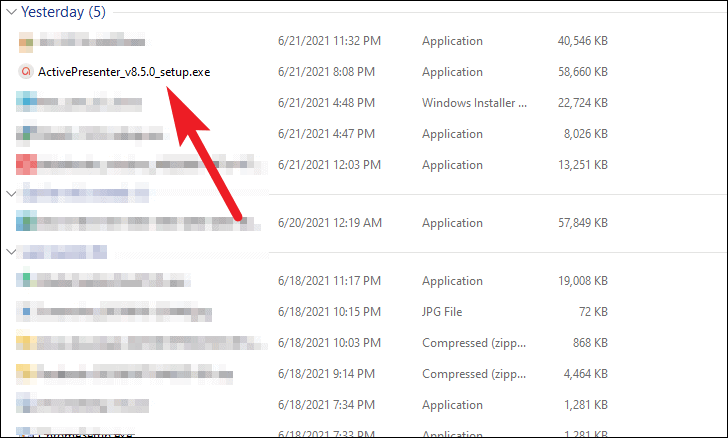
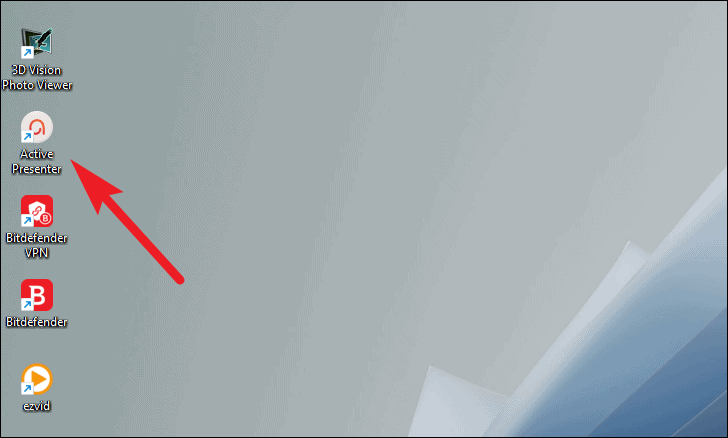
หลังการติดตั้ง ให้เรียกใช้ซอฟต์แวร์ ActivePresenter โดยดับเบิลคลิกที่ทางลัดที่ปรากฏบนเดสก์ท็อปหรือจากเมนูเริ่มของ Windows
จากหน้าจอหลักของ ActivePresenter ให้คลิกที่ปุ่ม”บันทึกวิดีโอ”
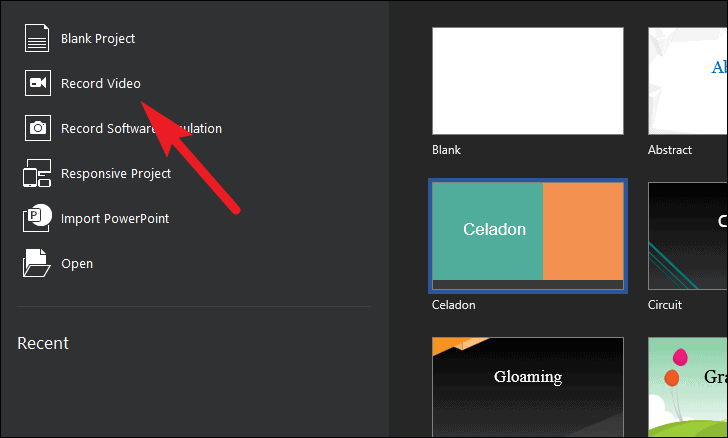
ก่อนที่คุณจะเริ่มจับภาพหน้าจอของคุณ คุณอาจจำเป็นต้องกำหนดค่าตัวเลือกที่พร้อมใช้งานตามความต้องการของคุณมากที่สุด
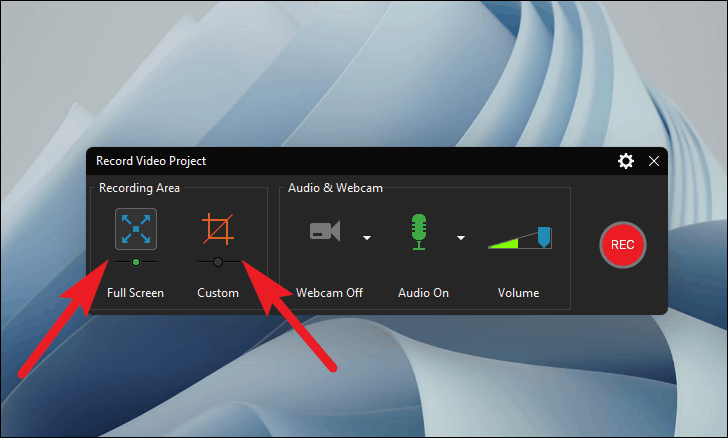
ตอนนี้ หากต้องการบันทึกทั้งหน้าจอ ให้คลิกที่ตัวเลือก”เต็มหน้าจอ”จาก”พื้นที่บันทึก”มิฉะนั้น ให้คลิกตัวเลือก”กำหนดเอง”เพื่อตั้งค่าพื้นที่คงที่ที่คุณต้องการ
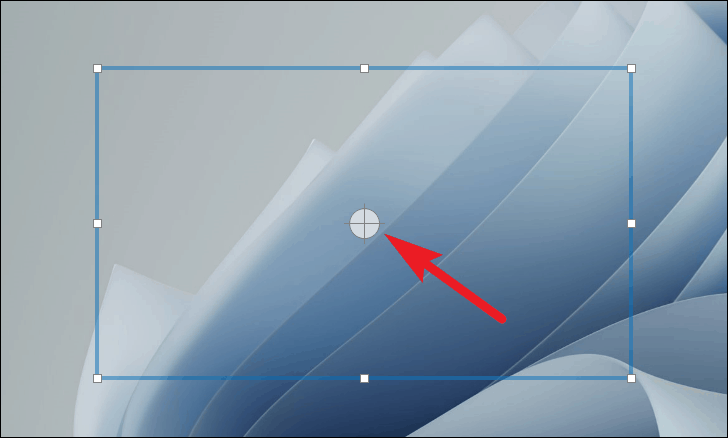
เมื่อตั้งค่าขอบเขตคงที่ที่กำหนดเองแล้ว คุณสามารถคลิกปุ่มเมาส์ขวาค้างไว้แล้วลากพื้นที่บันทึกหน้าจอจากไอคอน’Crosshair’ที่อยู่ตรงกลางของพื้นที่เพื่อเปลี่ยนตำแหน่ง
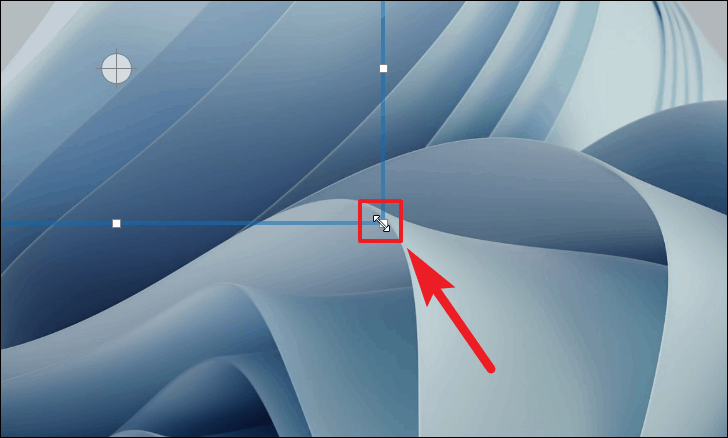
นอกจากนี้ หากต้องการปรับขนาดของพื้นที่บันทึกด้วยตนเอง ให้คลิกค้างไว้แล้วลากจุดยอดใดๆ ของพื้นที่บันทึกหน้าจอ
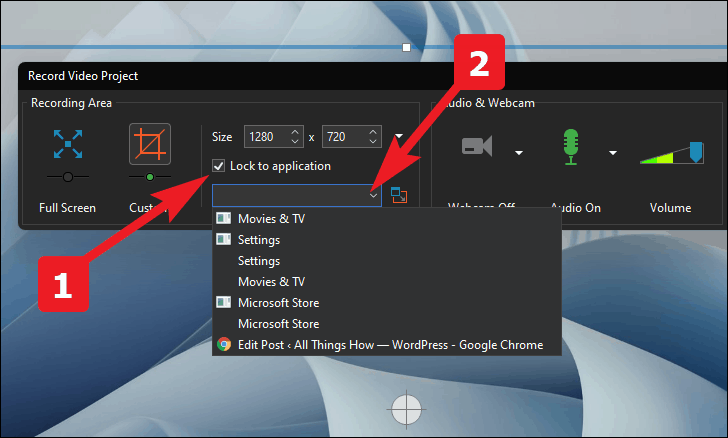
คุณยังสามารถล็อกการบันทึกหน้าจอไปยังแอปพลิเคชันเฉพาะโดยทำเครื่องหมายที่ตัวเลือก”ล็อกไปยังแอปพลิเคชัน”จากนั้นเลือกแอปพลิเคชันที่ต้องการโดยคลิกที่เมนูแบบเลื่อนลง
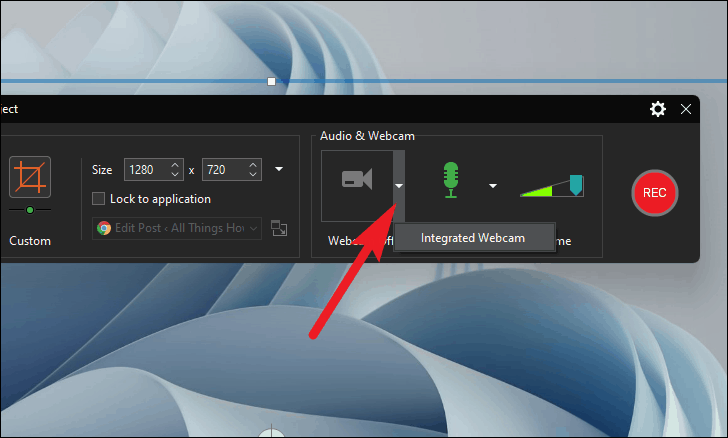
จากนั้น คลิกที่ตัวเลือก”เว็บแคม”เพื่อเปิดหรือปิดเว็บแคมสำหรับการบันทึก คุณยังสามารถเลือกเว็บแคมที่จะเปิด (หากคุณมีมากกว่าหนึ่ง) โดยคลิกที่ไอคอน”กะรัต”
ถัดไป คลิกไอคอน”กะรัต”ข้างไอคอน”ไมค์”เพื่อเลือกว่าคุณต้องการบันทึกเสียงระบบหรือเสียงภายนอกโดยใช้ไมโครโฟนในตัว
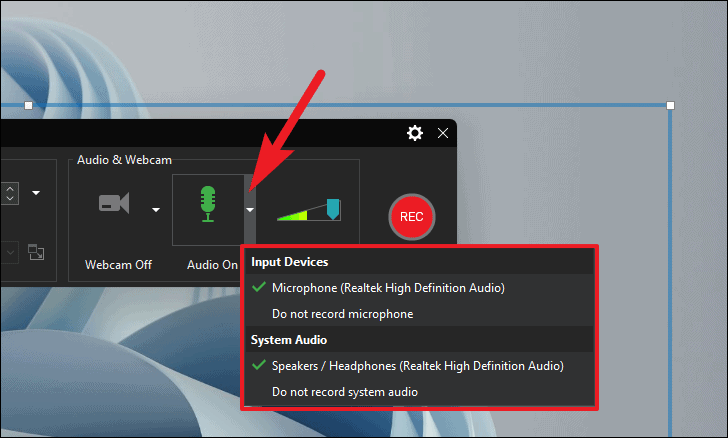
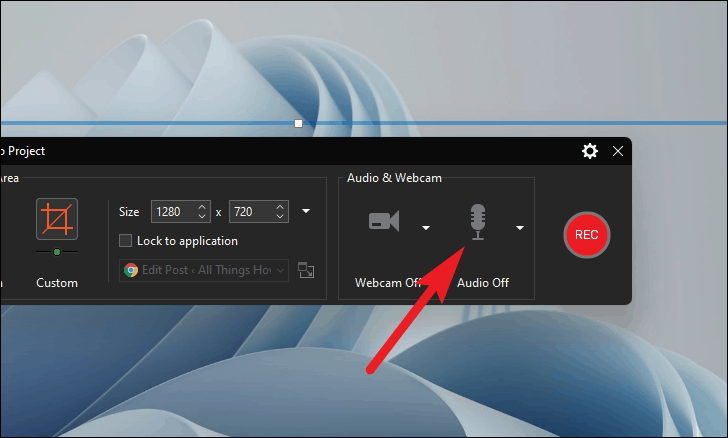
หากคุณไม่ต้องการบันทึกทั้งคู่ ให้คลิกที่ไอคอน”ไมค์”เพื่อไม่รวมทั้งสองรายการในการบันทึกหน้าจอ
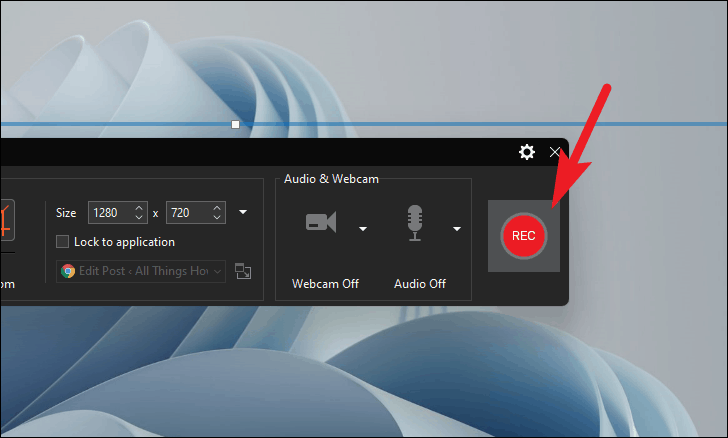
ในการเริ่มบันทึกหน้าจอ หลังจากตั้งค่ากำหนดทั้งหมดแล้ว ให้คลิกปุ่ม’REC’สีแดงขนาดใหญ่
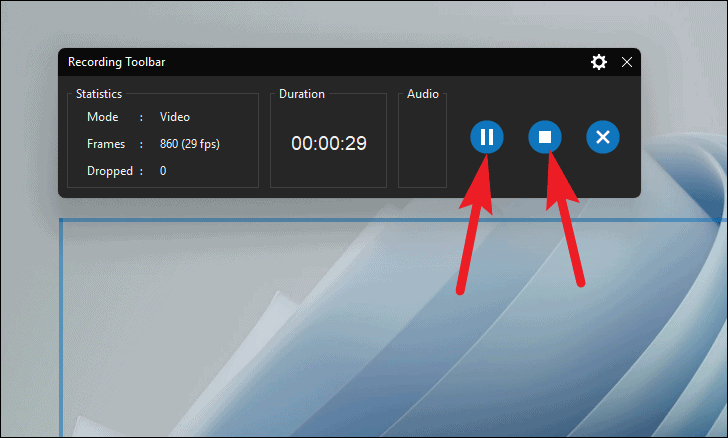
Once started, you can pause the screen recording by clicking on the ‘Pause icon’ button from the recording toolbar. To end the recording, click on the ‘Stop’ icon. Alternatively, you can also press Ctrl+End on the keyboard to end the recording.
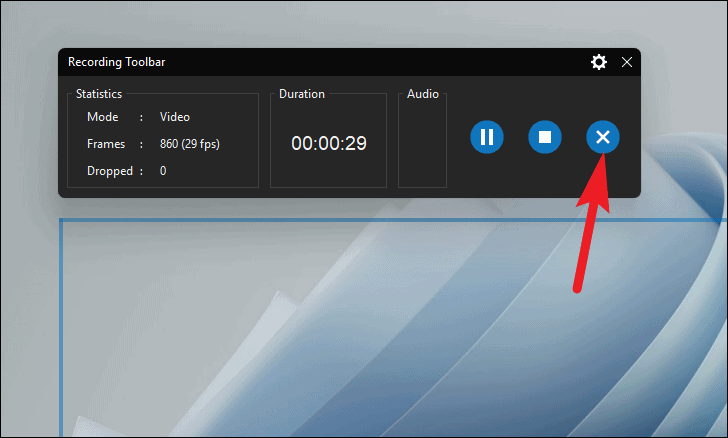
You can slo discard the recording by clicking on the ‘X’ icon present on the toolbar.
ActivePresenter offers one of the most comprehensive video editors out of all available options. The editor covers a very wide spectrum and can cater to a very wide audience requiring very different needs.
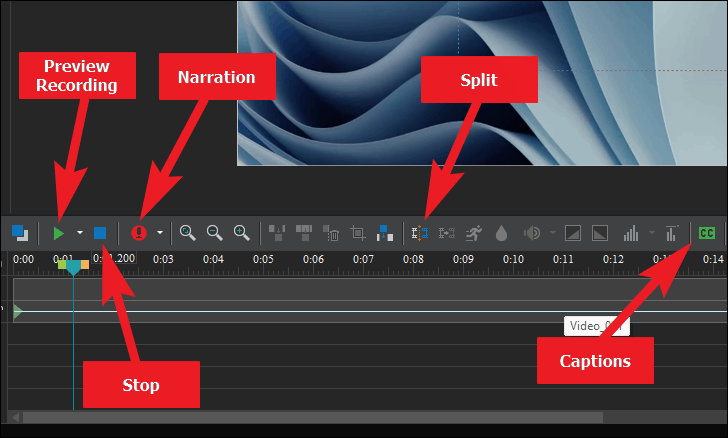
ActivePresenter video editor offers you complete control over each audio and video component’s individual timeline, just like a typical video editor. Some of the basic operations available, but definitely not limited to are:
- Preview Recording: Play all the audio and video components together.
- Stop: Stop playing all the audio and video components together.
- Narration: Record a narration for the screen recording.
- Split: Split selected audio or video objects in their timeline.
- Captions: Insert captions in the screen recording.
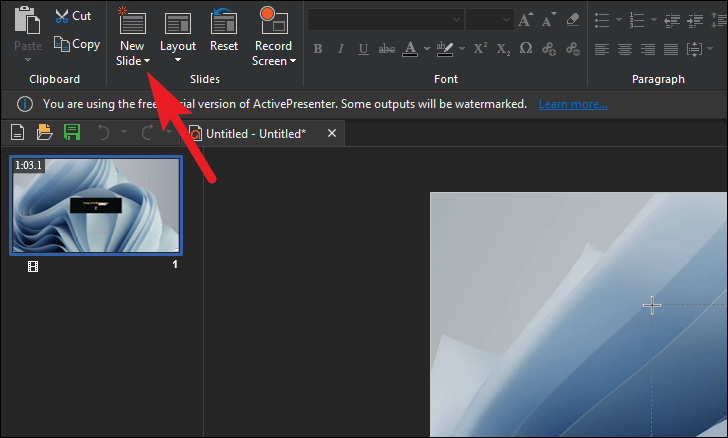
You can also create and add slides to your screen recordings using the ribbon menu present on the top section of the screen. Since it is almost identical to Microsoft PowerPoint, the majority of the users should not have any major issues navigating their way.
Once you are done editing your screen recording, click on the ‘Export’ option from the toolbar present on the top section of the screen.
Then, click on the ‘Video’ option from the ribbon menu.

Now, under the ‘General’ tab, check or uncheck fields appropriate for your video from ‘Rendering Options’.
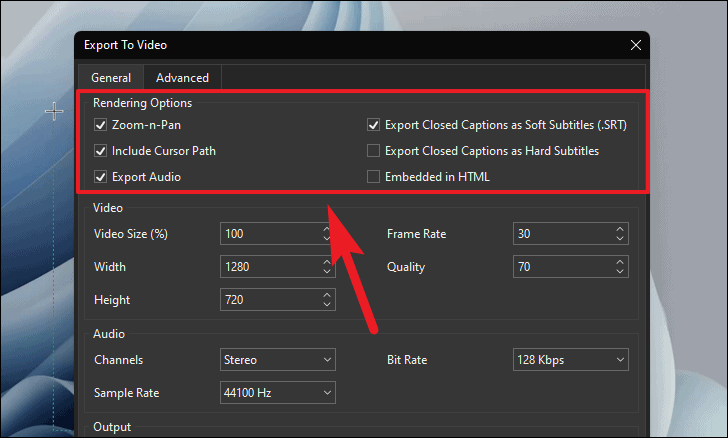
After that, there are plenty of options to control each and every aspect of your recording’s visual aspect. This one does require some explaining for the sake of better output.
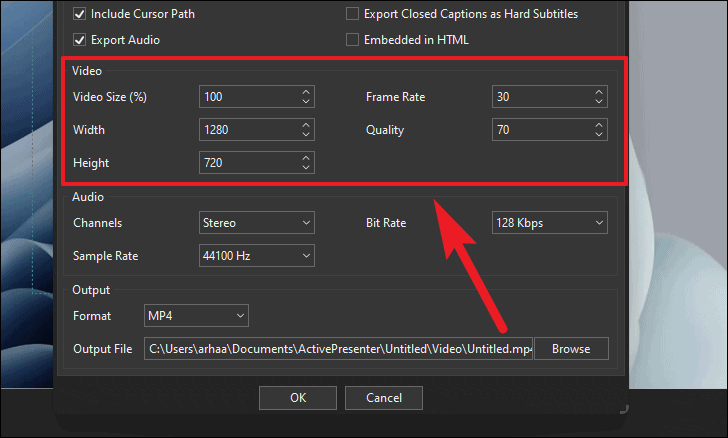
- Video Size(%): As the field depicts, the value is in percentage. This field will scale your screen recording to the entered value percentage relative to your recording’s original size.
- Frame Rate: Frame Rate is the playback speed of your video, while we are used to watching playback speed at 30 FPS, the higher the number the more fluid and natural the video feels. However, do remember to play a higher frame rate video, the screen playing the video should also support a higher refresh rate.
- Quality: The value here depicts the quality of your rendered video. The higher the number the better the quality, however as the quality increases, size also increases. (The value ranges between 1-100, higher being better.)
- Width/Height: These fields will typically alter themselves as you change the ‘Video Size (%)’ field. However, you can also manually alter the height or width yourself by changing the values in the field. That being said, please remember manually changing the values may disturb the aspect ratio of the screen recording and hamper the viewing experience.
Next section pertains to audio behavior of the recording. You can select the ‘Channels’, ‘Bit Rate’, and ‘Sample Rate’ by using their respective drop-downs. If you do not know to configure these options, or your recording is not audio intensive, feel free to leave this options at their default values.
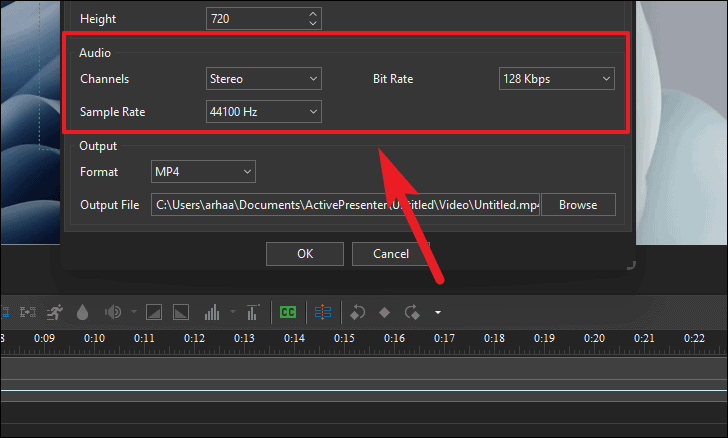
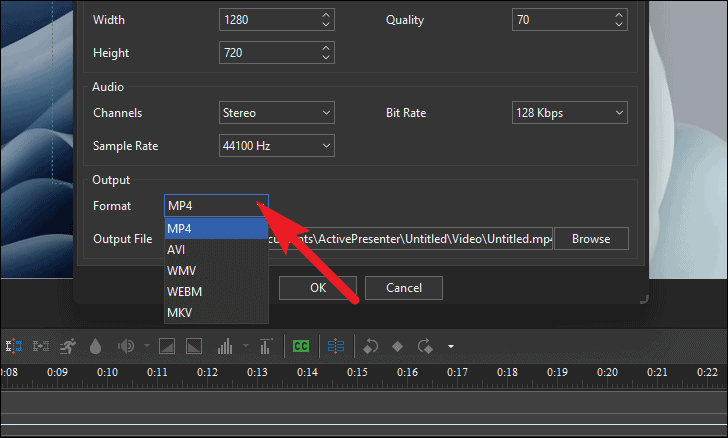
After that, from the ‘Output’ section, you can choose your preferred output format for the recording by clicking on the drop down menu.
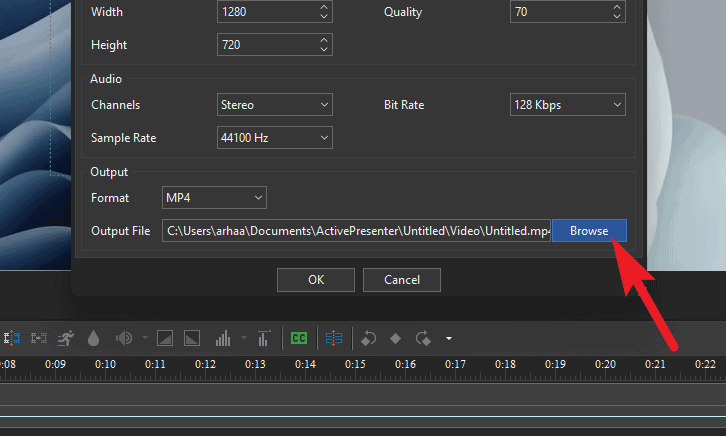
Finally, click on the ‘Browse’ option from the right most section of the pane to choose your destination on the local drive to save the screen recording. Then, click ‘OK’ button to save the video.
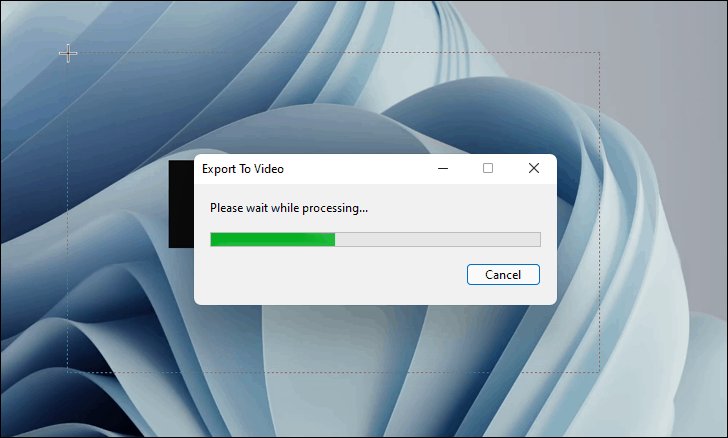
It might take few minutes to export the file depending on the size of your screen recording.
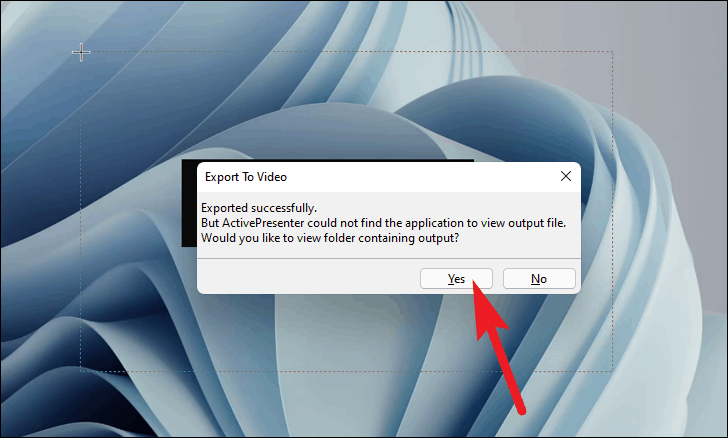
Once exported, ActivePresenter might give you an alert, read it and click on ‘Yes’ to view your exported file(s).
ActivePresenter is definitely not for the average joey to create a quick screen recording. ActivePresenter has the potential to churn out professional-level screen recordings or how-to presentations and is best suited for content creation enthusiasts or professionals.
Ezvid
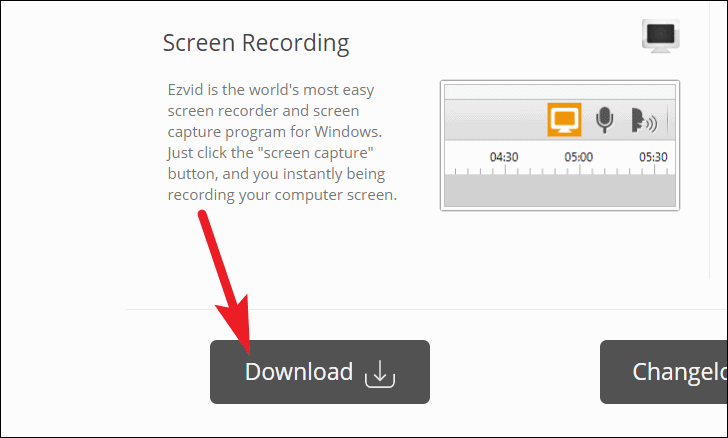
The Ezvid is one of the most easy-to-use screen recording freeware, and probably one of the lightest too. That being said, Ezvid does pack a punch when it comes to performance and is pretty fast compared to its competition.
Along with basic functionalities like a recording from an in-built webcam, adding a self-narration in the video, or adding background music in the recording, Ezvid also offers a ‘Speech Synthesis’ option which is capable of making a computer narration for your recording using a text slide.
To start using Ezvid, first, go to their official website ezvid.com/download and click on the ‘Download’ button (as seen in the screenshot below).
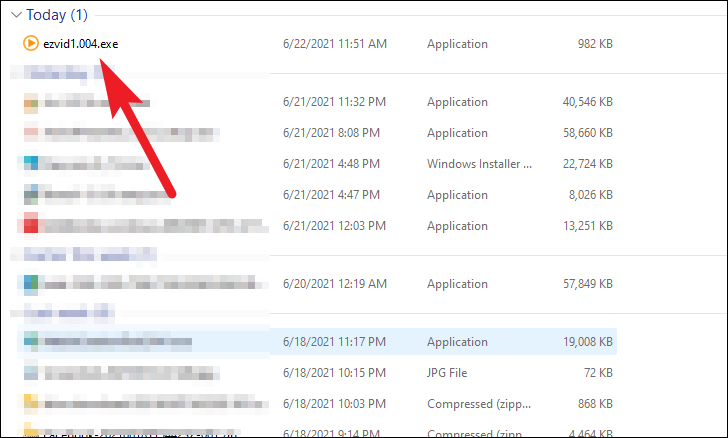
Once downloaded, Install the Ezvid software on your Windows machine. You can find the setup file in your browser’s download directory set by you. The default directory is your ‘Downloads’ folder.
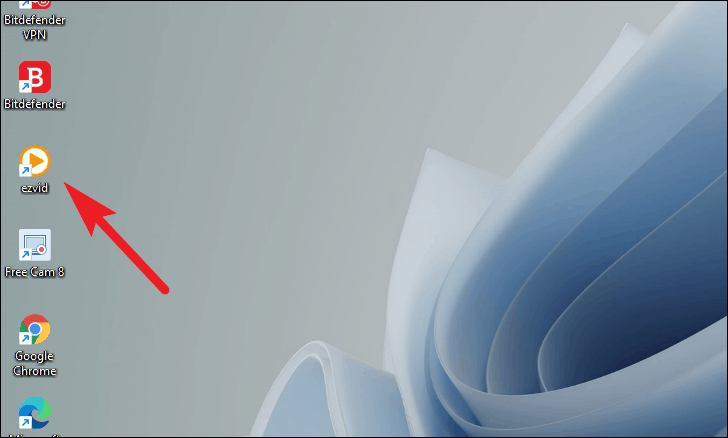
After installation, run the Ezvid software by either double-clicking the shortcut present on the desktop or from the Start Menu of Windows.
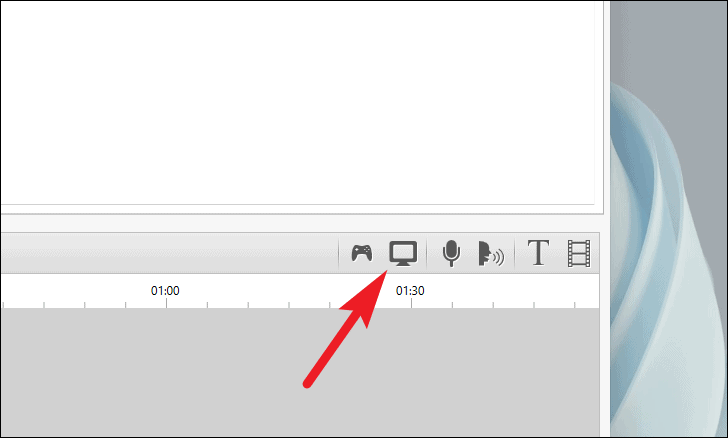
Now to start recording your screen using Ezvid, click on the ‘Capture’ button from the main screen of Ezvid.
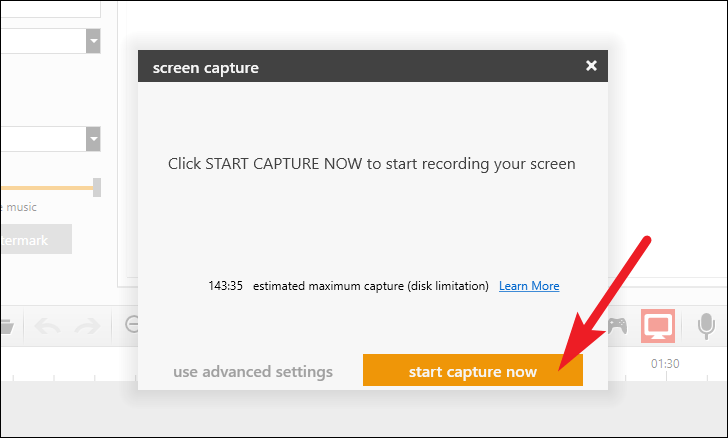
Then, if you want to record the screen using the default settings (which is full-screen recording without any audio input), click on the ‘start capture now’ button.
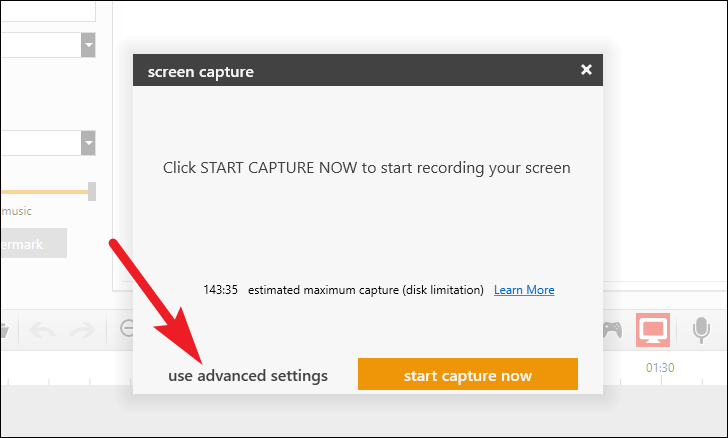
If you want to tailor your screen recording according to your experience, click on the ‘use advanced settings’ button from the overlay pane.
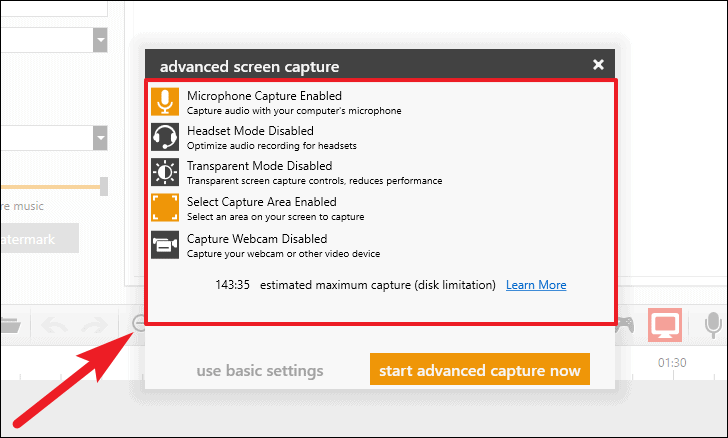
Then, you can click on the icon of each individual option to toggle it on or off. Turned on options will be highlighted in yellow.
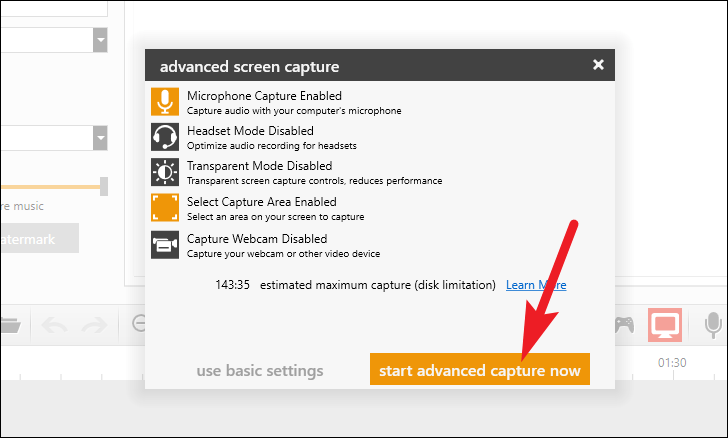
Once you have all the options set to your preference, click on the ‘start advanced capture now’ to start recording your screen.
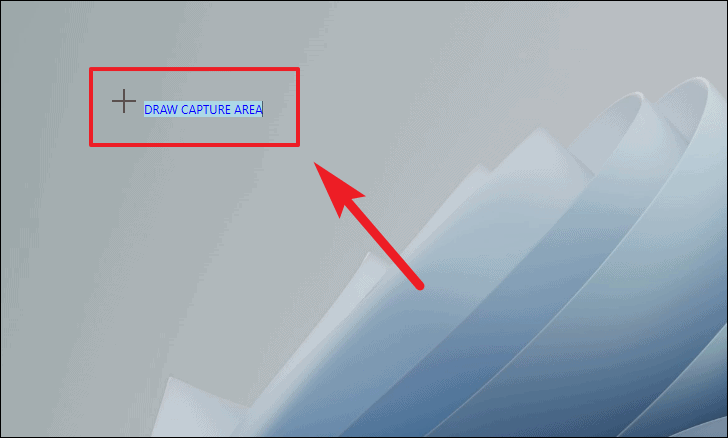
If you have turned on the ‘Select Capture Area Enabled’ option, you will need to draw the area for your screen capture. Click-hold your right button on the mouse, and then drag it across the screen to adjust the size.
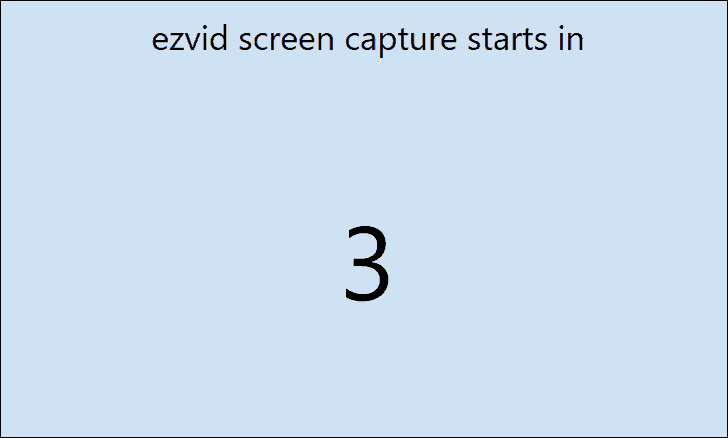
After that, a countdown of 3 seconds will be visible before the screen recording commences. If you wish to cancel the recording or want to go back to change some preferences, you can do that by pressing Esc on your keyboard.
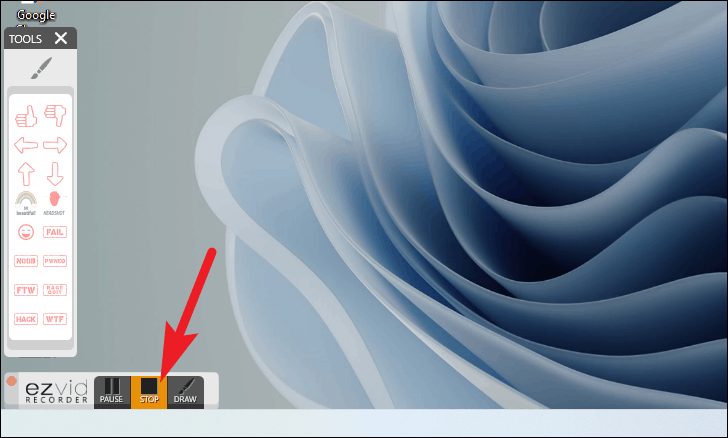
Once the screen record has started, you will be able to see the Ezvid toolbar on the bottom left corner of your screen. You can either, pause, stop, or draw a shape on the screen using the toolbar.
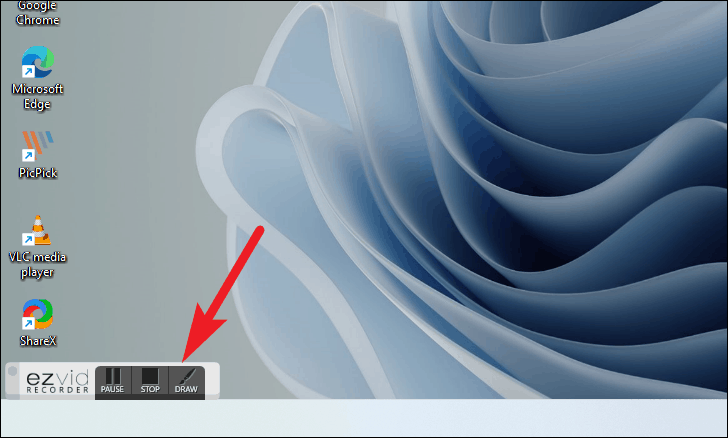
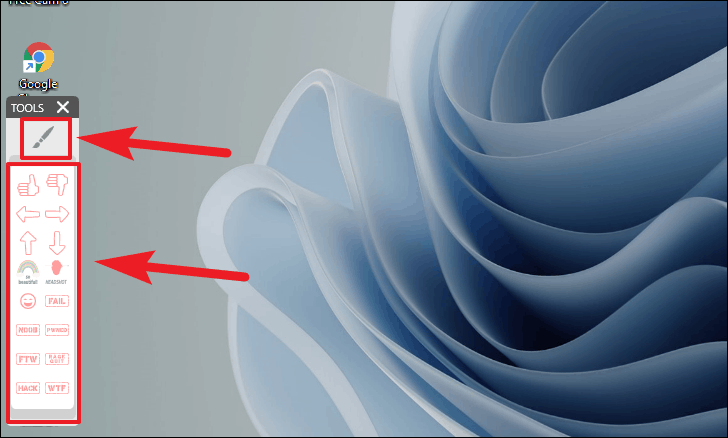
To draw on the screen, click the ‘DRAW’ option from the toolbar.
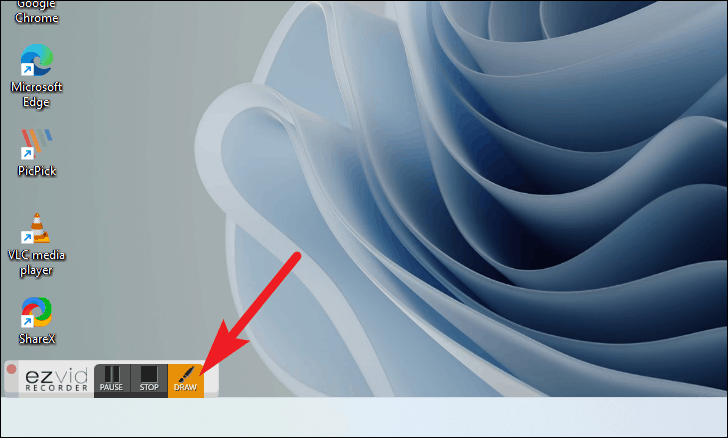
Then either select a shape to insert from the provided options, or click on the ‘Paint On Screen’ option present on the top of the ‘TOOLS’ overlay menu.
To stop recording, click on the ‘STOP’ button from the toolbar present on the bottom left corner of the screen.
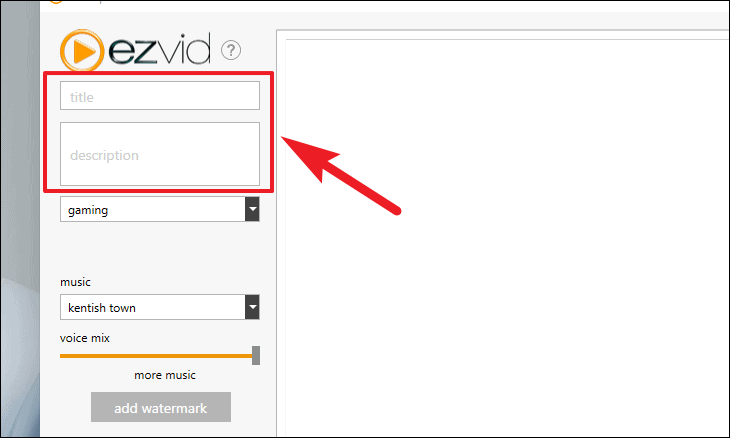
After that, Ezvid will open your screen recording in the preview space you already saw on the main screen before starting the recording.
Now, enter an appropriate title and description for the video from their respective text areas.
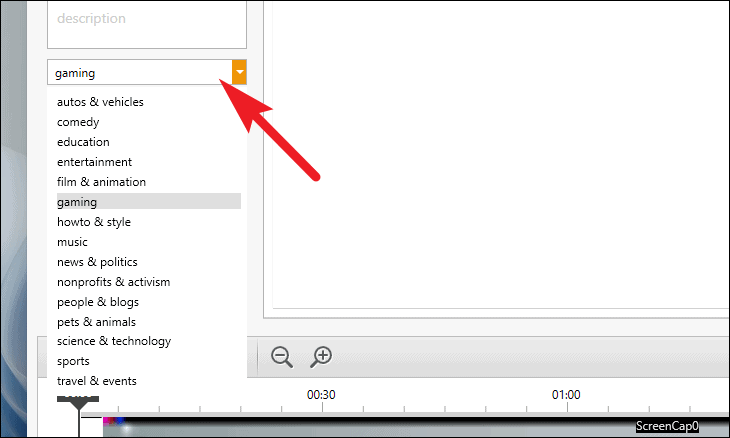
Next, choose a video category by clicking on the drop-down menu situated under the description box on the screen.
Then, you can also add pre-loaded background music to your recording as well from the drop-down menu under the ‘music’ field from the left section of the window.
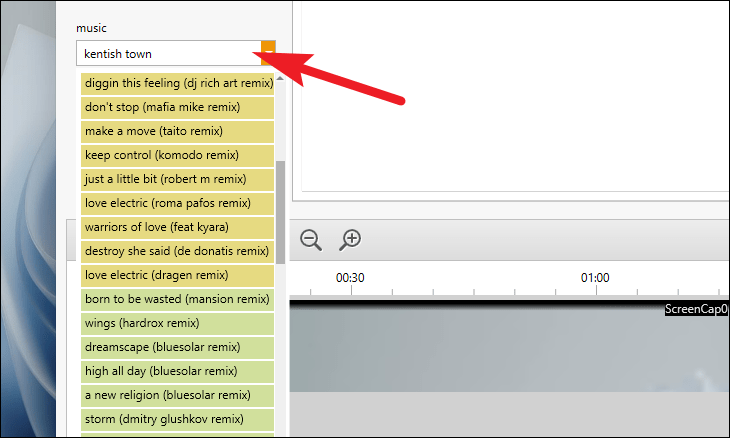
After that, use the slider to control the background music volume in the screen recording.

You can also add a watermark of your choice by clicking on the ‘add watermark’ button, then locating the file on your local storage to import.

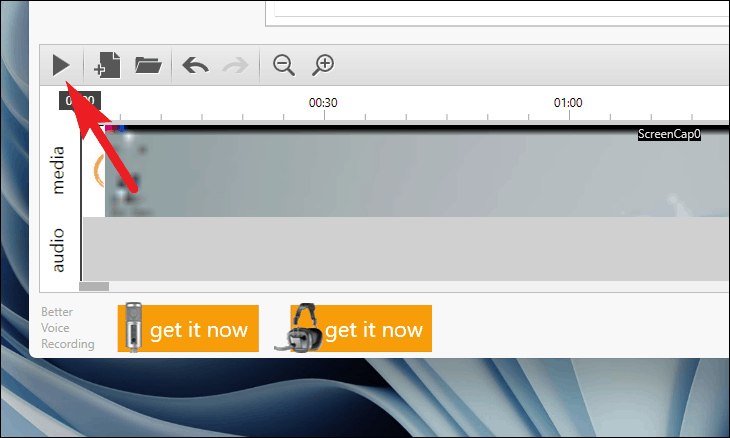
Now, to preview your recording, press the ‘Play’ icon present on the lower-left section of the Ezvid window.
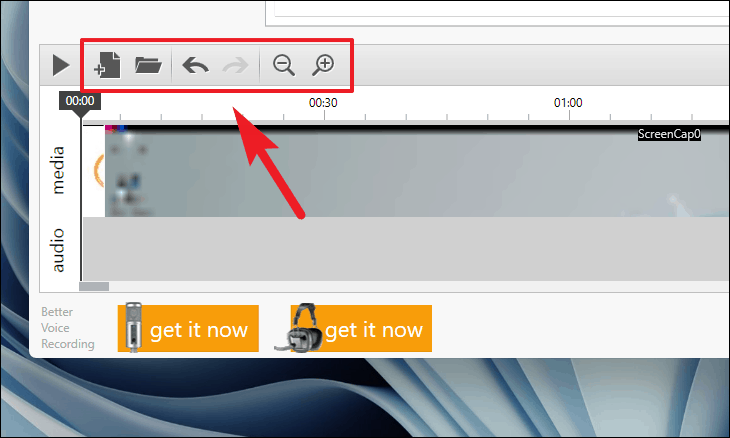
You can also create a new project, load an existing project, undo your last action, redo an action, and zoom in/zoom out on the editor timeline from the options available.
Then, to add narration to your video, click on the ‘Mic’ icon present at the lower right section of the Ezvid window.
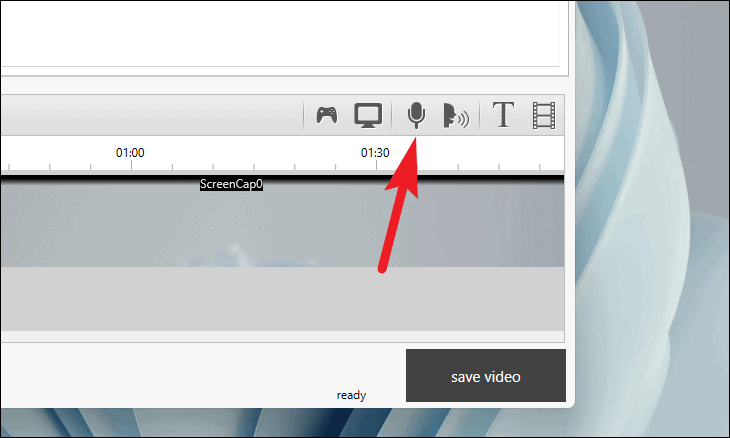
You can also add synthesized speech, text slides, or add existing videos and pictures from your local storage to your screen recording.
Note: Synthesized speech will only convert the text added using the ‘add text’ button from the toolbar.
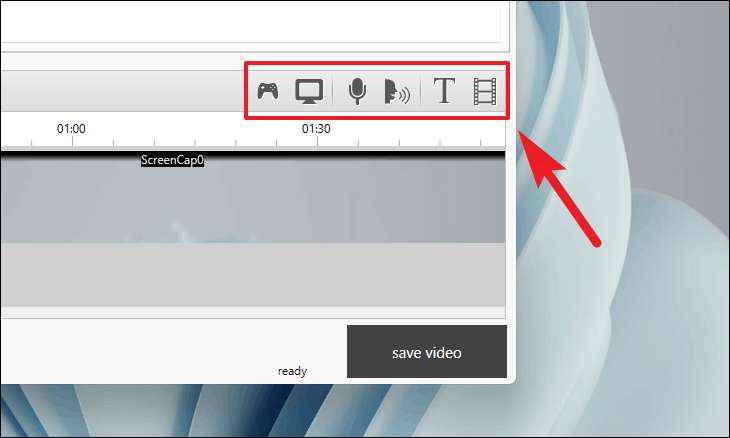
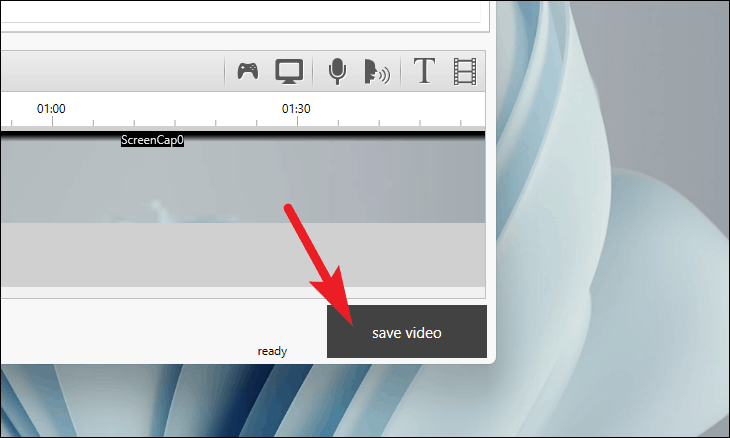
Finally, to save the screen recording, click the ‘save video’ button from the bottom right corner of the windows
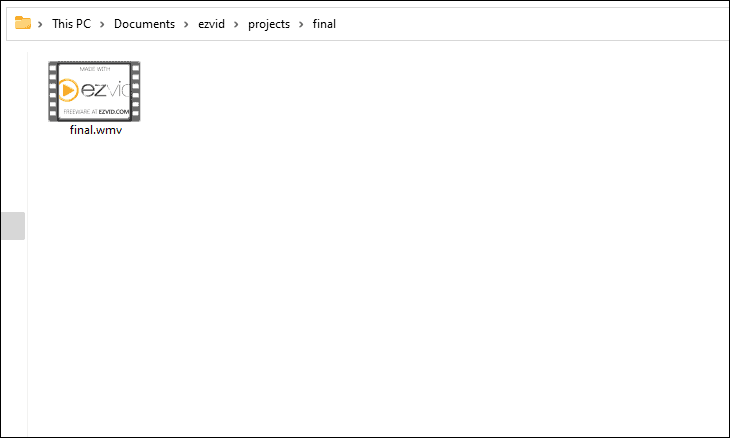
Once the video is rendered, you will be able to locate them in the following directory.
C:\Users\Parth\Documents\ezvid\projects\final
Well people, these were some of the great options available to record screens on Windows 11. You can choose anyone depending on the intricate features required by you.