Google ชีตเป็นแอปสเปรดชีตยอดนิยมที่มีฟีเจอร์ที่มีประโยชน์มากมาย หนึ่งในนั้นคือความสามารถในการสร้างรายการดรอปดาวน์ภายในเซลล์หรือช่วงของเซลล์ใดๆ เมื่อคุณเพิ่มรายการแบบเลื่อนลงแล้ว การแชร์เอกสาร Google ชีตนั้น ง่ายใน Google ไดรฟ์


เหตุผลหนึ่งในการเพิ่มรายการอาจเป็นการถามคำถามแบบปรนัยกับผู้ใช้ เพื่อให้พวกเขาเลือกคำตอบตาม ความชอบของพวกเขา นอกจากนี้ยังสามารถใช้เพื่อรวบรวมความคิดเห็นได้อีกด้วย ไม่ว่าในกรณีการใช้งานของคุณ การสร้างรายการดรอปดาวน์และแก้ไขในภายหลังนั้นง่ายมากทั้งในเว็บเบราว์เซอร์และเวอร์ชันมือถือของ Google ชีต
มาเริ่มกันเลย
สร้างเมนูแบบเลื่อนลง แสดงรายการใน Google ชีตใน Web App
เราลองใช้เบราว์เซอร์ Edge ในเครื่อง Windows และคุณสามารถใช้เบราว์เซอร์ใดก็ได้ทั้งบน Windows และ Mac อย่างไรก็ตาม Google ขอแนะนำเบราว์เซอร์ Chrome เพื่อผลลัพธ์ที่ดีที่สุด
ขั้นตอนที่ 1: พิมพ์ sheets.new ในแถบที่อยู่เพื่อสร้างและเปิด Google ใหม่ เอกสารชีตได้อย่างรวดเร็วหรือเปิดจากบัญชี Google ไดรฟ์ของคุณ

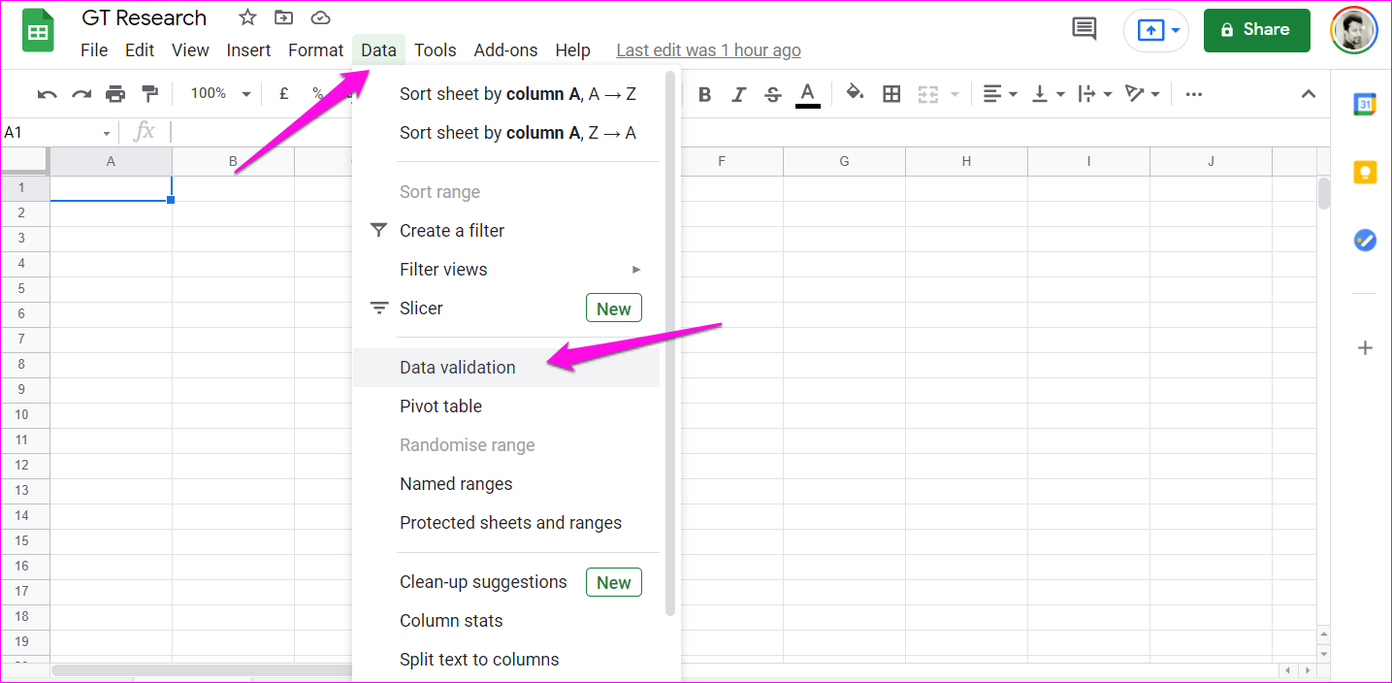
ขั้นตอนที่ 2: เลือกการตรวจสอบความถูกต้องของข้อมูลภายใต้เมนูข้อมูล

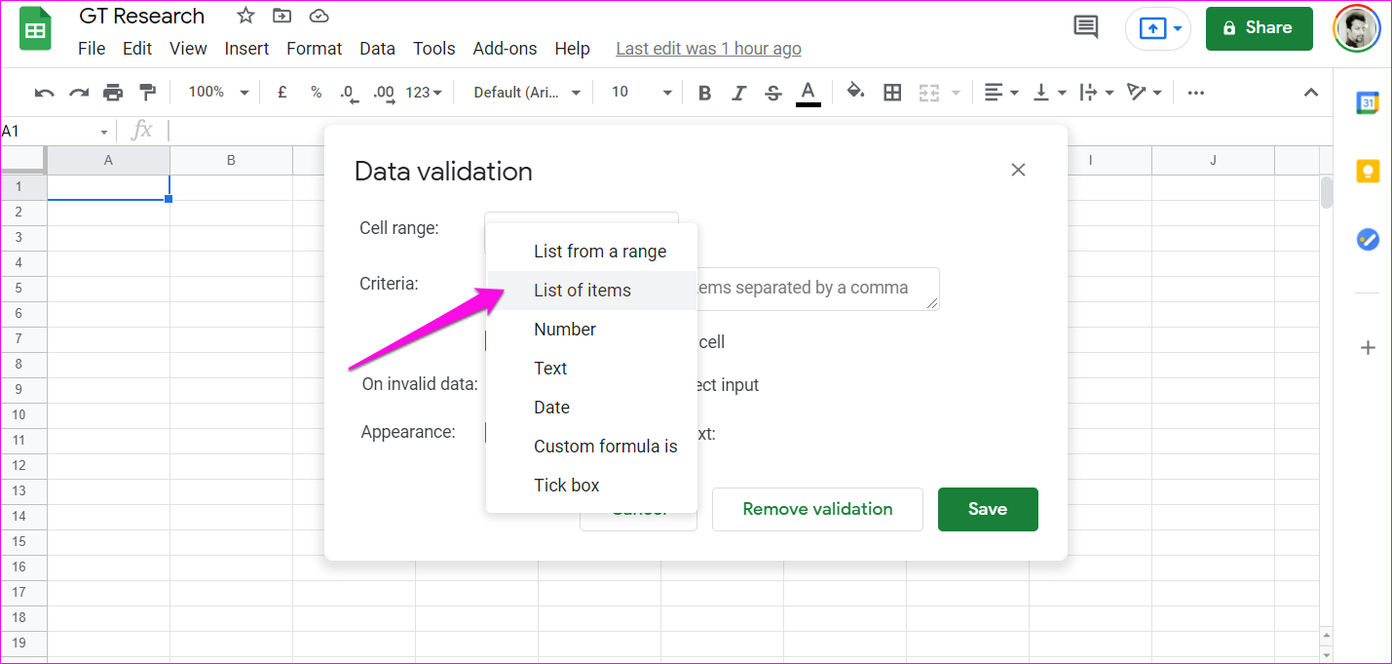
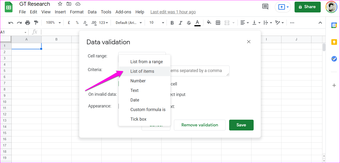
ขั้นตอนที่ 3: ในป๊อปอัปที่ตามมา ให้เลือกเกณฑ์ซึ่งสามารถเป็น’List ของรายการ’หรือ’รายการจากช่วง’ตัวเลือกแรกหมายความว่าผู้ใช้สามารถเลือกรายการจากรายการที่กำหนดไว้ล่วงหน้าได้ ตัวเลือกที่สองหมายความว่าผู้ใช้สามารถเลือกรายการจากเซลล์อื่นในแผ่นงานเดียวกันหรือแม้แต่แผ่นงานอื่นภายในเอกสารเดียวกัน เราจะไปกับ List of items เพื่อให้ง่าย
ขั้นตอนที่ 4: ถัดไป ให้ป้อนรายการทั้งหมดที่คุณต้องการให้ปรากฏในรายการที่คั่นเท่านั้น โดยเครื่องหมายจุลภาคในช่องที่สองถัดจากเกณฑ์


ขั้นตอนที่ 5: เปิดใช้งาน’แสดงรายการดรอปดาวน์ในเซลล์’เพื่อแสดงเมนูดรอปดาวน์ รายการลงในเซลล์ที่เลือกโดยมีลูกศรชี้ลง ทำให้ผู้ใช้สังเกตเห็นได้ง่ายขึ้นว่ามีรายการดรอปดาวน์ในเซลล์ที่ทำเครื่องหมายไว้

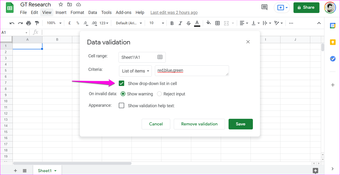
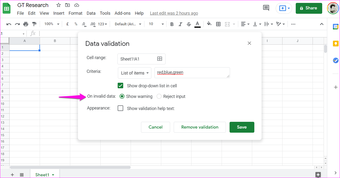
ขั้นตอนที่ 6: เลือกแสดงคำเตือนข้าง’ในข้อมูลที่ไม่ถูกต้อง’หากคุณต้องการอนุญาตให้ผู้ใช้ เพื่อป้อนข้อมูลที่ไม่ถูกต้อง (สิ่งที่ไม่ได้กำหนดไว้ล่วงหน้า) แต่จะทำเครื่องหมายรายการที่พิมพ์เพื่อเน้น เลือกปฏิเสธอินพุตเพื่อไม่อนุญาตให้เลือกสิ่งที่ไม่ได้กำหนดไว้ล่วงหน้า
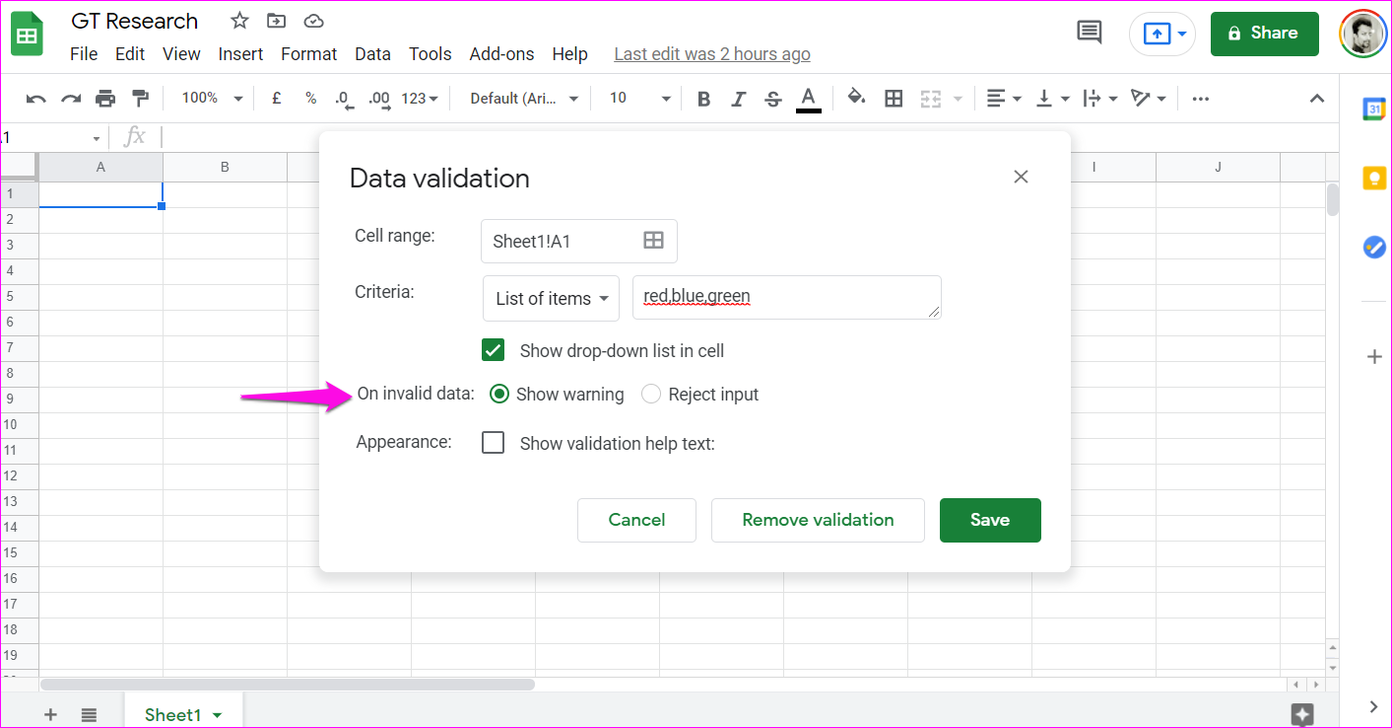
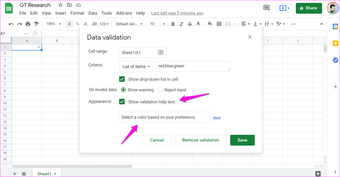
ขั้นตอนที่ 7: ทำเครื่องหมายที่’แสดงข้อความช่วยเหลือในการตรวจสอบความถูกต้อง’หากคุณต้องการเพิ่มบันทึกที่กำหนดเองลงใน ช่วยให้ผู้ใช้เข้าใจว่าควรทำอย่างไรกับรายการแบบเลื่อนลง กล่องข้อความจะปรากฏขึ้นเมื่อคุณเลือกตัวเลือกเพื่อป้อนบันทึก

<ประเภทแหล่งที่มา="image/webp"srcset="https://cdn.guidingtech.com/imager/assets/2021/07/2110253/How-to-Create-Edit-and-Delete-Drop-Down-List-ใน Google-ชีต-7_4d470f76dc99e18ad75087b1b8410ea9.webp 1392w, https://cdn.guidingtech.com/imager/assets/2021/07/2110253/How-to-Create-Edit-and-Delete-Drop-Down-List-in-Google-ชีต-7_935adec67b324b146ff212ec4c69054f.webp 700w, https://cdn.guidingtech.com/imager/assets/2021/07/2110253/How-to-Create-Edit-and-Delete-Drop-Down-List-in-Google-ชีต-7_40dd5eab97016030a3870d712fd9ef0f.webp 500w, https://br.atsit.in/th/wp-content/uploads/2021/07/e0b8a7e0b8b4e0b898e0b8b5e0b8aae0b8a3e0b989e0b8b2e0b887-e0b981e0b881e0b989e0b984e0b882-e0b981e0b8a5e0b8b0e0b8a5e0b89ae0b8a3e0b8b2e0b8a2-12.webp 340w"sizes="(min-width:976px) 700px, (min-width:448px) 75vw, 90vw"data-sizes="auto">
ขั้นตอนที่ 8: คลิกที่ปุ่มบันทึกเพื่อเสร็จสิ้นและตรวจสอบรายการแบบหล่นลงใน เซลล์ที่เลือก
นี่คือลักษณะเมื่อคุณคลิกที่ลูกศรชี้ลง
ตอนนี้คุณสามารถเลือกรายการที่กำหนดไว้ล่วงหน้าจากรายการแบบเลื่อนลงได้โดยคลิกที่ลูกศรและเลือกรายการ
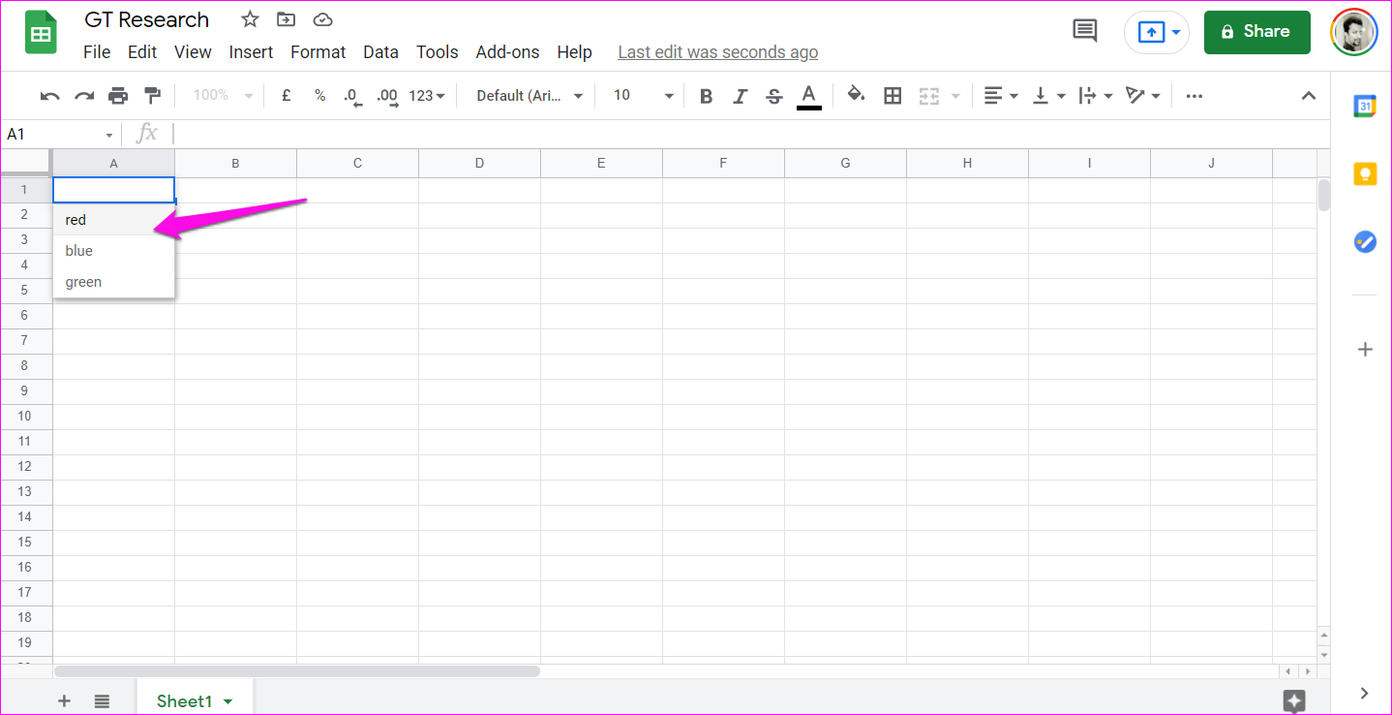
นอกจากนี้ คุณสามารถป้อน (พิมพ์) สิ่งที่ไม่ได้กำหนดไว้ล่วงหน้าได้


เซลล์จะถูกตั้งค่าสถานะทันทีด้วยสัญลักษณ์สีแดงและข้อความที่จะปรากฏขึ้นเมื่อคุณเลื่อนตัวชี้ของเมาส์ไปด้านบน
สร้างรายการแบบเลื่อนลงใน Google ชีตในแอปบนอุปกรณ์เคลื่อนที่
ขั้นตอนสำหรับทั้งเวอร์ชัน Android และ iOS คือ เหมือน. เราจะใช้ Android ในตัวอย่างด้านล่าง
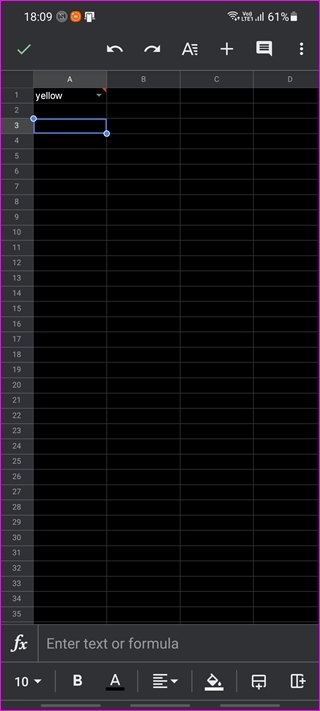
ขั้นตอนที่ 1: เปิดแอป Google ชีต และเปิด/สร้างเอกสารชีตใหม่ เลือกเซลล์ที่คุณต้องการเพิ่มรายการดรอปดาวน์ ตอนนี้แตะที่ไอคอนเมนูสามจุดที่มุมบนขวาและเลือกการตรวจสอบข้อมูล


Step 2: Choose a Criteria for the drop-down list. It can be either’List of items’or’List from a range’. Then tap on the Add button to input items separated by comma that you want to appear in the drop-down list.


Step 3: Enable’Show drop-down menu in cell’to display an arrow to let the users know that the cell contains a drop-down menu. Enable’Show validation help text’to display a custom message to help users understand what they need to do. When you enable that, an Edit button will appear. Tap on that to add a message.


Step 4: Under the’On invalid data’heading, choose Show warning if you want others to input something that’s not predefined. Select Reject input if you want to force users to select one of the items from the list. Tap on Save button when you are done.

You will notice an arrow at the bottom corner of the screen upon selecting the cell that contains a drop-down menu. Tap on it to choose an item from the list that will slide from the bottom up.


If you wish to enter a different value instead of what’s predefined, tap on the keyboard icon instead and type your answer.


Just like the web app, entering a different answer than predefined will flag the cell to mark it.
Edit or Delete Drop-Down Lists in Google Sheets on Web App
The first few steps will remain the same. Select the cell where you have added the drop-down list in Sheets and go to Data > Data validation menu. You can now edit the criteria, selected cells, and all other options or simply click on Remove validation button to delete the list. Click on the Save button to save changes.

Note that deleting the drop-down list will remove validation but not the user’s input manually.
Edit or Delete Drop-Down Lists in Google Sheets on Mobile App
The steps for editing or deleting the drop-down lists in Google Sheets’mobile apps also remain the same. Select the cell containing the drop-down list and from the three-dot menu, select Data validation. Tap on Remove rule to delete the list or edit the list as you see fit.


Drop-Down Lists are Fun
Creating and managing drop-down lists in Google Sheets is pretty easy. It takes less than a few minutes to create a list, but a lot would also depend on the number of items. And if you have set the criteria to’List from a range’, that may require some more time.
You can also collaborate with other users on the same Google Sheet document by allowing multiple users to edit the same document. This shall save you some valuable time, especially if some drop-down lists are involved or too much data to parse through.
The above article may contain affiliate links which help support Guiding Tech. However, it does not affect our editorial integrity. The content remains unbiased and authentic.