Put simply, adding animations to your mobile app enhances the user experience. A well-choreographed animation can make the app look and feel more intuitive. Apps that we use on a daily basis, such as WhatsApp, Twitter, and Google Maps, all have animation somewhere, even if it’s so subtle that you barely notice. This includes everything from loading screens to transitions.
Adding animations to your Flutter app influences users to use the app again. It reduces the frustration associated with data loading and plays an important role in reducing churn rate and improving engagement rate.
If you’re a Flutter developer looking to implement animations in your app but not sure where to start — or if you’re confused about which animation widget would be best for your particular use case — this guide is for you. We’ll introduce you to the types of animations in Flutter and help you decide which ones to use based on the goals and requirements of your project.
Here’s what we’ll cover:
- Types of animation in Flutter
- Implicit animation
- Explicit animation
- Creating animations in Flutter using Rive
Types of animation in Flutter
There are two main categories of animation in mobile apps: code-based and drawing-based animations.
Code-based animations
Code-based animations tend to focus on animating the existing widget, such as container, row, column, stack, etc. It allows you to change the size, scale, position, etc. of the widget.
For example, you can move a picture of a product from the shopping list to the cart icon with code-based animations. In Flutter, you can create code-based animations using either implicit or explicit animations.
Drawing-based animations
Drawing-based animations are, quite simply, used to animate drawings. It is usually done using a custom painter or any other animation framework, such as Rive.
Next, let’s take a closer look at implicit and explicit animations, including when to use each type and some practical examples.
Implicit animations
Implicit animation falls under code-based animations. It’s usually very simple to implement compared to other types of animation. All you need to do is set a new value and hit a setState to animate the widget to the new value.
When to use implicit animations in Flutter
If you’re looking to develop a simple animation for any widget, I’d recommend trying to find an implicit animated widget on the Flutter website. If you just want to move something once, for example, tsimply wrap it inside the AnimatedContainer or AnimatedPositioned.
Implicit animated widgets for Flutter include:
Implicit animation example
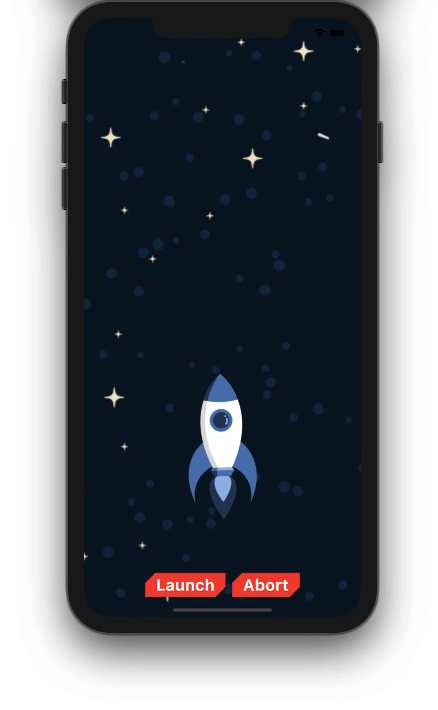
The aim is to make the rocket fly with the click of the launch button. Technically, you just have to change the position of the rocket when the button is clicked:
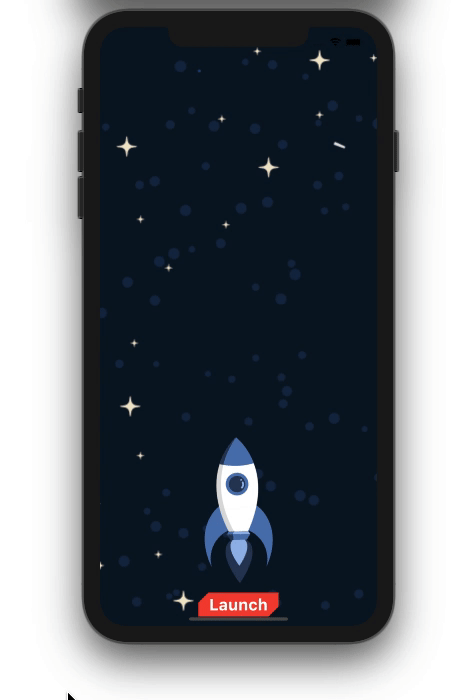
Wrap the rocket image inside the AnimatedContainer.
duration: Duration(milliseconds: 500),
Stack( alignment: AlignmentDirectional.bottomCenter, children: <Widget>[ // Night sky image here AnimatedContainer( duration: Duration(milliseconds: 500), height: 350, width: 250, margin: EdgeInsets.only(bottom: bottomMargin), child: Image.asset('assets/images/rocket.png'), ), // Launch button here ],
)
For any implicit widget, the duration argument is required to determine the time to finish the animation.
In this example, we’re asking the rocket to reach the top in half a second by setting the duration parameter to 500 milliseconds:
duration: Duration(milliseconds: 500),
The bottom margin is currently set to the bottomMargin variable, which is 0 when the app starts.
double bottomMargin = 0;
Once the button is clicked, the only thing left is to set the new value. In this case, we’ll increase the bottomMargin to 500:
RaisedButton( onPressed: () { _flyRocket(); }, child: Text( 'Launch', style: TextStyle(fontWeight: FontWeight.bold, fontSize: 24), ),
)
void _flyRocket() { setState(() { bottomMargin = 500; });
}
Explicit animations
Explicit animations also fall under the category of code-based animations. It’s called explicit because you have to explicitly start it.
You may find yourself writing more code for explicit animations compared to implicit animations, but that has its own benefits. For example, it gives you more control over the animation being carried out on a widget.
When to use explicit animations in Flutter
You should use explicit animations when you need an animation to run forever or in reverse order or when you want to animate multiple widgets in the same manner. For example, if you want to move something and bring it back to its original position. you can use SlideTransition to move and AnimationController to get to the starting position.
Below are some examples of explicit animation widgets:
FadeTransitionRotationTransitionPositionedTransitionScaleTransitionSizeTransitionSlideTransition
Explicit animation example
To demonstrate the concept of explicit animation, we’ll use the same example, but this time with a new feature of aborting the flight.
First, add AnimationController and Animation:
Animation<Offset> animation;
AnimationController animationController;
AnimationController is the main actor here; it can control the animation at any given time, such as play, pause, stop, listening to current animation values, etc.
Next, initialize AnimationController and Animation. Duration is specified while creating AnimationController.
A tween generates the values between Offset(0, 0) and Offset(0, -1.2). You can create a tween of any object. This gives the higher level flexibility to animate almost any property of the widget.
@override
void initState() { super.initState(); animationController = AnimationController(vsync: this, duration: Duration(seconds: 1)); animation = Tween<Offset>(begin: Offset(0, 0), end: Offset(0, -1.2)) .animate(animationController);
}
The next step is to write a widget to animate. SlideTransition is a widget that consumes the animation values.
SlideTransition( position: animation, child: Container( height: 350, width: 250, decoration: BoxDecoration( image: DecorationImage( image: AssetImage('assets/images/rocket.png'), )), ))
Now let’s launch our rocket. The rocket is moved using animationController.forward();:
RaisedButton( onPressed: () { animationController.forward(); }, child: Text( 'Launch', style: TextStyle(fontWeight: FontWeight.bold, fontSize: 24), ), color: Colors.red, textColor: Colors.white, shape: BeveledRectangleBorder( borderRadius: BorderRadius.only( topLeft: Radius.circular(15), bottomRight: Radius.circular(15))),
)
To make the rocket abort, we’ll bring it back to its starting point using animationController.reverse();:
RaisedButton( onPressed: () { if (animationController.isCompleted) { animationController.reverse(); } }, child: Text( 'Abort', style: TextStyle(fontWeight: FontWeight.bold, fontSize: 24), ), color: Colors.red, textColor: Colors.white, shape: BeveledRectangleBorder( borderRadius: BorderRadius.only( topLeft: Radius.circular(15), bottomRight: Radius.circular(15))),
)
Creating animations in Flutter using Rive
Animations created with Rive fall under the drawing-based animations category. Rive is an animation framework designed to help you create stunning visuals for any platform. At the time of writing, Rive is currently in beta and supporting animation for Flutter, Android, iOS, Web, and C++.
In this section, we’ll demonstrate how to create a simple rocket animation in Rive and integrate it into the Flutter app.
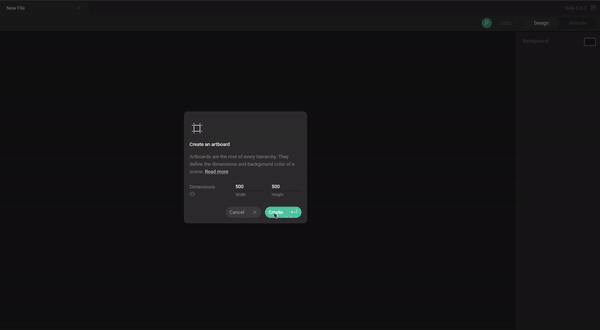
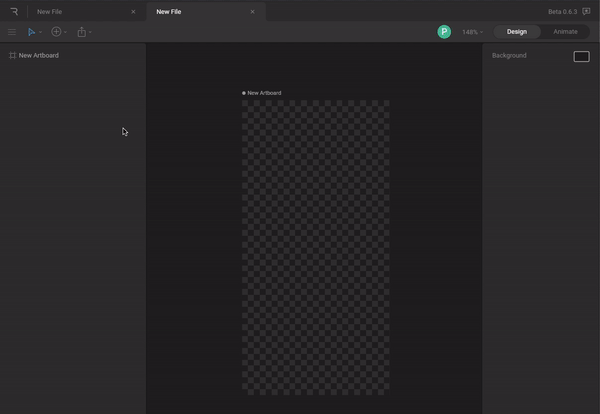
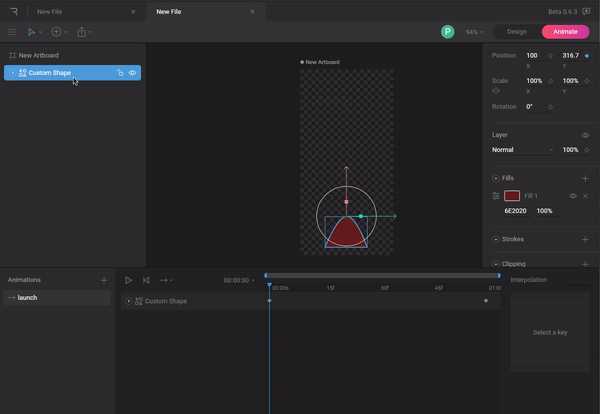
Create and configure the artboard
Select the appropriate artboard size and make it transparent:
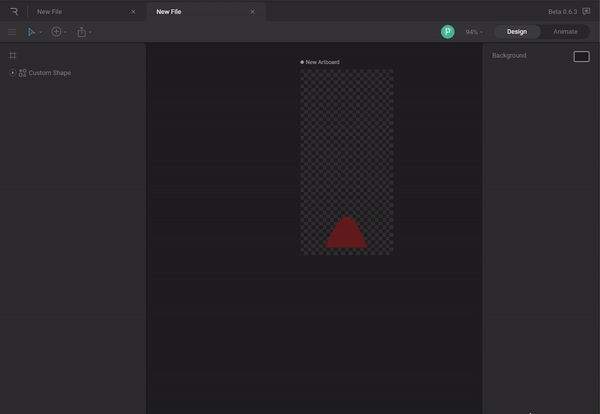
Design the rocket
For the purpose of this demonstration, we’ll create only the nose of a rocket using the pen tool. There are also predefined shapes you can play with.
Animate the rocket
Switch to the animate tab and define where the rocket should be at the end of the animation using keys. You should also give the animation a proper name, which we’ll use to start the animation in our Flutter app.
Export the Rive file
Click the Export menu on the left and select the runtime:
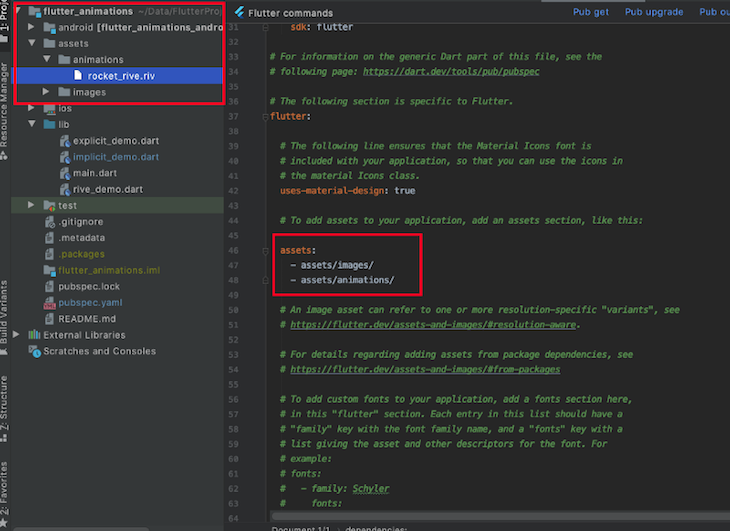
Install rive in your Flutter app
Find the latest version of Rive and paste it in your pubspec.yaml file:
dependencies: flutter: sdk: flutter cupertino_icons: ^1.0.2 rive: ^0.7.0
To import Rive into the project, create a folder structure at the root of the project, such as assets/animation, and paste the .riv file there. You should also provide a reference to it in the pubspec.yaml file.
Load the Rive file
Load the .riv file into the artboard using the code below:
Artboard _riveArtboard;
RiveAnimationController _controller;
@override
void initState() { super.initState(); rootBundle.load('assets/animations/rocket_rive.riv').then( (data) async { final file = RiveFile.import(data); final artboard = file.mainArtboard; setState(() => _riveArtboard = artboard); }, );
}
RiveAnimationController controls the Rive animation at any given time.
Write a widget to show the Rive artboard
The whole artboard is shown using the Rive widget:
Center( child: _riveArtboard == null ? const SizedBox() : Rive(artboard: _riveArtboard),
)
Trigger the animation
We’ll use FloatingActionButton to start the animation:
FloatingActionButton( onPressed: _launchRocket, child: Icon(Icons.play_arrow),
)
Play the animation
We can play the animation simply by adding a controller with the animation name set as launch. launch is the name of the animation we created at rive.app:
void _launchRocket() { _riveArtboard.addController(_controller = SimpleAnimation('launch'));
}
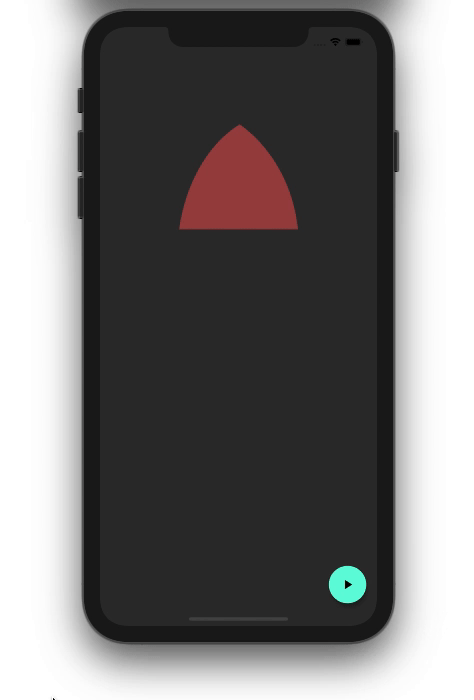
Here’s what the finished product should look like. You can find the complete source code on GitHub.
Conclusion
When building apps of any kind, thoughtful and well-choreographed animations can do wonders for the user experience. In this tutorial, we explained the differences between code- and drawing-based animation and walked you through how to use implicit and explicit animations in your Flutter app. We also listed the widgets that fall under each category of animation and outlined some tips to help you decide which ones to use in your next Flutter project.
The post Adding animations to your Flutter app appeared first on LogRocket Blog.