Se você tem experiência em web design e/ou desenvolvimento, deve estar familiarizado com Flexbox . É uma ferramenta CSS opcional que permite criar layouts com base em colunas e linhas.
No React Native, esta é a maneira padrão de construir layouts. Ele funciona maravilhosamente bem para o desenvolvimento móvel porque nos permite construir layouts que cabem em vários tamanhos de tela, graças ao design responsivo.
Flexbox: Desenvolvendo para React Native vs. a web
Flexbox é o padrão no React Native, mas não precisamos ativá-lo, o que significa que você não precisa definir display: flex em um estilo.
 const styles=StyleSheet.create ({ cartão: { display:'flex'//isso é desnecessário }
});
Existem também diferentes padrões que tornam o Flexbox mais propício para o desenvolvimento móvel:
| Propriedade | Padrão da web | React Native Default |
|---|---|---|
| flexDirection | linha | coluna |
| alignContent | esticar | flex-start |
| flexShrink | 1 | 0 |
Propriedades Flexbox primárias
Existem algumas propriedades do Flexbox que você usará regularmente e que vale a pena lembrar. Aqui está um resumo sobre eles e o que fazem.
-
flex-define quanto dessa visualização preencherá a tela. Os valores disponíveis são inteiros maiores ou iguais a 0 -
flexDirection-determina em qual direção-vertical ou horizontal-os filhos são dispostos. Os valores disponíveis incluemcoluna,linha,coluna reversaerow-reverse -
justifyContent-determina como um item deve ser renderizado ao longo do eixo primário (determinado pela propriedadeflexDirection). Os valores disponíveis sãoflex-start,flex-end,center,space-between,space-em torno deespace-evenly -
alignItems-determina como um item deve ser renderizado ao longo do eixo secundário (determinado pela propriedadeflexDirection). Os valores disponíveis sãoflex-start,flex-end,centerebaseline -
alignSelf-determina como um filho deve se alinhar e substituialignItems. Os valores disponíveis sãoflex-start,flex-end,centerebaseline
Você pode aprender mais sobre layouts no Flexbox nos documentos oficiais . Agora, vamos mergulhar no que cada propriedade faz e como usá-la.
Usando a propriedade flex no Flexbox e no React Native
A propriedade flex determina como a visualização preenche a tela. Para ilustrar, vamos dar uma olhada em dois exemplos com código muito semelhante.
Observe que os valores disponíveis incluem inteiros maiores ou iguais a 0.
import React from"react";
import {StyleSheet, View} de"react-native"; função padrão de exportação App () { Retorna ( <>
Aqui está o resultado:
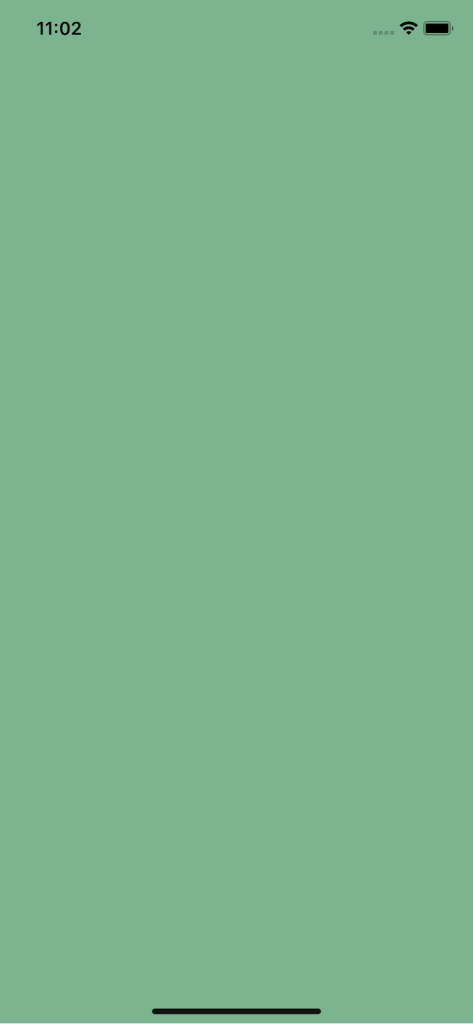
Nesse caso, a visualização ocupará a tela inteira. Por quê? Por ter uma propriedade de flex: 1 e como o espaço é dividido em um grupo (1/1), ele ocupará 100% da tela.
Vejamos um segundo exemplo usando o seguinte código:
import React from"react";
import {StyleSheet, View} de"react-native"; função padrão de exportação App () { Retorna ( <>

Como alternativa, podemos ver que a área verde agora ocupa apenas um quarto da tela, apesar de ter o mesmo valor de flex . Isso ocorre porque a tela agora está dividida em quatro blocos (1 + 3), então a propriedade flex é a fração da tela que deve ocupar.
Usando flexDirection no Flexbox
FlexDirection determina a direção que os filhos devem renderizar. Você pode codificar com valores: coluna , linha , coluna reversa e linha reversa , mas o padrão é coluna .
 import React from"react";
import {StyleSheet, View} de"react-native"; função padrão de exportação App () { Retorna ( <>   );
} estilos const=StyleSheet.create ({ container: { backgroundColor:"# 7CA1B4", flex: 1, alignItems:"center",//ignore isso-voltaremos a ele justifyContent:"center",//ignore-vamos voltar a ele flexDirection:"coluna" }, quadrado: { backgroundColor:"# 7cb48f", largura: 100, altura: 100, margem: 4, },
});

Agora, vamos mudar a direção de uma coluna para uma linha usando flexDirection de linha .
 import React from"react";
import {StyleSheet, View} de"react-native"; função padrão de exportação App () { Retorna ( <>    );
} estilos const=StyleSheet.create ({ container: { backgroundColor:"# 7CA1B4", flex: 1, alignItems:"center",//ignore isso-voltaremos a ele justifyContent:"center",//ignore-vamos voltar a ele flexDirection:"row", }, quadrado: { backgroundColor:"# 7cb48f", largura: 100, altura: 100, margem: 4, },
});

Observe que usar *-reverse apenas inverte a ordem em que são renderizados.
Usando a propriedade justifyContent no Flexbox
justifyContent determina o conteúdo ao longo do eixo primário que é afetado pelo flexDirection . Se flexDirection for coluna , então é vertical. Se for classificado como linha , é horizontal.
Como um lembrete, aqui estão os valores disponíveis: flex-start , flex-end , center , espaço entre , espaço ao redor e espaço uniforme .
Abaixo, definimos justifyContent como center . Como o eixo principal é uma coluna, isso significa que centralizaremos o conteúdo verticalmente.
 import React from"react";
import {StyleSheet, View} de"react-native"; função padrão de exportação App () { Retorna ( <>       );
} estilos const=StyleSheet.create ({ container: { backgroundColor:"# 7CA1B4", flex: 1, justifyContent:"center", }, quadrado: { backgroundColor:"# 7cb48f", largura: 100, altura: 100, margem: 4, },
});

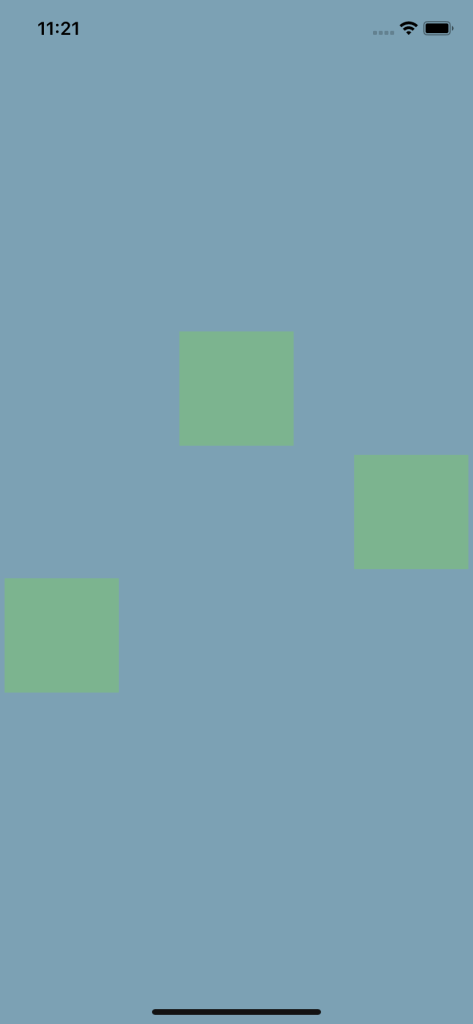
A seguir, usamos a propriedade espaço ao redor . Isso fará com que o layout divida os elementos ao longo do eixo primário (vertical) de maneira uniforme. Isso significa que haverá uma distância igual entre a parte superior e inferior da tela e a distância entre cada elemento.
 import React from"react";
import {StyleSheet, View} de"react-native"; função padrão de exportação App () { Retorna ( <>       );
} estilos const=StyleSheet.create ({ container: { backgroundColor:"# 7CA1B4", flex: 1, justifyContent:"space-around", }, quadrado: { backgroundColor:"# 7cb48f", largura: 100, altura: 100, margem: 4, },
});

Cada uma dessas propriedades permite que você crie um layout exclusivo. flex-start irá alinhar os itens na parte superior da tela, flex-end irá alinhar os itens na parte inferior e espaço entre irá maximizar a distância entre os itens (ou seja, a caixa 1 estará no topo da tela, a caixa 3 na parte inferior e a caixa 2 centralizada).
Usando alignItems
alignItems determina como um item deve ser renderizado ao longo do eixo secundário, que é determinado pela propriedade flexDirection . Este é o inverso de justifyContent . Portanto, se justifyContent está lidando com o alinhamento vertical, então alignItems está lidando com o alinhamento horizontal.
Valores disponíveis: flex-start , flex-end , center e baseline .
Abaixo, vemos como alignItems pode ser usado para centralizar o conteúdo horizontalmente ao usar o padrão flexDirection ( coluna ).
 import React from"react";
import {StyleSheet, View} de"react-native"; função padrão de exportação App () { Retorna ( <>       );
} estilos const=StyleSheet.create ({ container: { backgroundColor:"# 7CA1B4", flex: 1, justifyContent:"center", alignItems:"center", }, quadrado: { backgroundColor:"# 7cb48f", largura: 100, altura: 100, margem: 4, },
});

Da mesma forma, ao definir alignItems como flex-end , vemos que os elementos se movem para o final da área flexível, na extrema direita.
 import React from"react";
import {StyleSheet, View} de"react-native"; função padrão de exportação App () { Retorna ( <>       );
} estilos const=StyleSheet.create ({ container: { backgroundColor:"# 7CA1B4", flex: 1, justifyContent:"center", alignItems:"flex-end", }, quadrado: { backgroundColor:"# 7cb48f", largura: 100, altura: 100, margem: 4, },
});

Usando alignSelf
alignSelf determina como um filho deve se alinhar e substitui alignItems . Os valores disponíveis para alignSelf são flex-start , flex-end , center , baseline .
A seguir, definimos uma propriedade alignItems padrão e a substituímos usando alignSelf .
import React from"react";
import {StyleSheet, View} de"react-native"; função padrão de exportação App () { Retorna ( <>
Esta é a aparência:
Construindo uma grade Flexbox
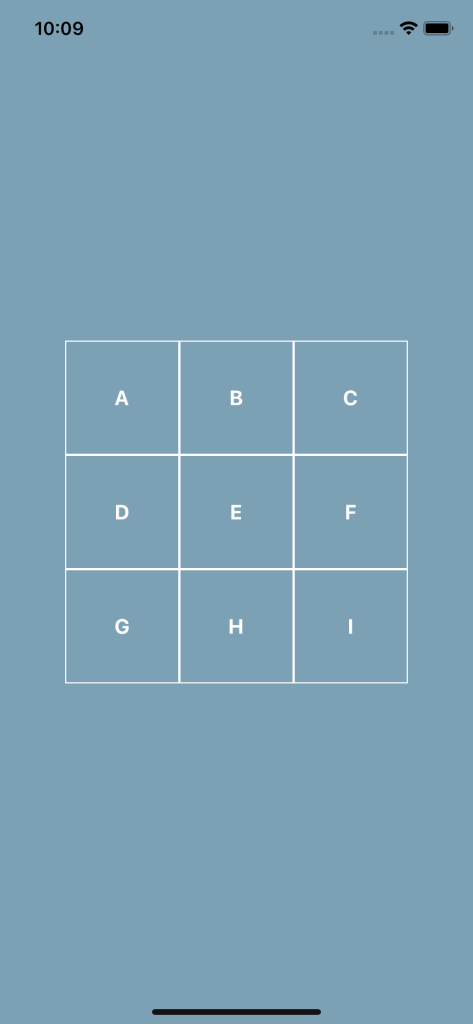
Agora que sabemos o que cada propriedade do Flexbox faz, vamos criar uma grade usando o Flexbox. Nosso objetivo final é o que você vê na próxima imagem. Sinta-se à vontade para pegar o código inicial e testá-lo antes de prosseguir.
//starter.js importar React de"react";
import {StyleSheet, View, Text} de"react-native"; função padrão de exportação App () { return  ;
} estilos const=StyleSheet.create ({ container: { flex: 1, backgroundColor:"# 7CA1B4", alignItems:"center", justifyContent:"center", },
});
Olhando para a imagem de exemplo, podemos dividi-la de modo que tenhamos três linhas, cada uma com suas próprias três colunas. Cada quadrado deve renderizar seu texto vertical e horizontalmente.
Vou criar um componente Square para economizar em algumas repetições:
import React from"react";
import {StyleSheet, View, Text} de"react-native"; const Square=({text})=> ( {text}
); função padrão de exportação App () { Retorna (

Adicionamos algumas propriedades de estilo aqui, a saber styles.row e styles.square .
We know the row should render its items in a row, so let’s set its flexDirection:'row'.
const styles=StyleSheet.create({ container: { flex: 1, backgroundColor:"#7CA1B4", alignItems:"center", justifyContent:"center", }, row: { flexDirection:"row", },
});

Next, we’ll create the square itself with the appropriate border, height and width, and text color. We can then use justifyContent and alignItems on that square to vertically and horizontally center the text within it. Check it out:
const styles=StyleSheet.create({ container: { flex: 1, backgroundColor:"#7CA1B4", alignItems:"center", justifyContent:"center", }, row: { flexDirection:"row", }, square: { borderColor:"#fff", borderWidth: 1, width: 100, height: 100, justifyContent:"center", alignItems:"center", }, text: { color:"#fff", fontSize: 18, fontWeight:"bold", },
});
This leaves us with the final code:
//finished.js import React from"react";
import { StyleSheet, View, Text } from"react-native"; const Square=({ text })=> (  {text}
); export default function App() { return (                  );
} const styles=StyleSheet.create({ container: { flex: 1, backgroundColor:"#7CA1B4", alignItems:"center", justifyContent:"center", }, row: { flexDirection:"row", }, square: { borderColor:"#fff", borderWidth: 1, width: 100, height: 100, justifyContent:"center", alignItems:"center", }, text: { color:"#fff", fontSize: 18, fontWeight:"bold", },
});
If you’re interested in a slightly more complex example that uses a FlatList, which makes it scrollable, I’ve covered that topic over on React Native School.
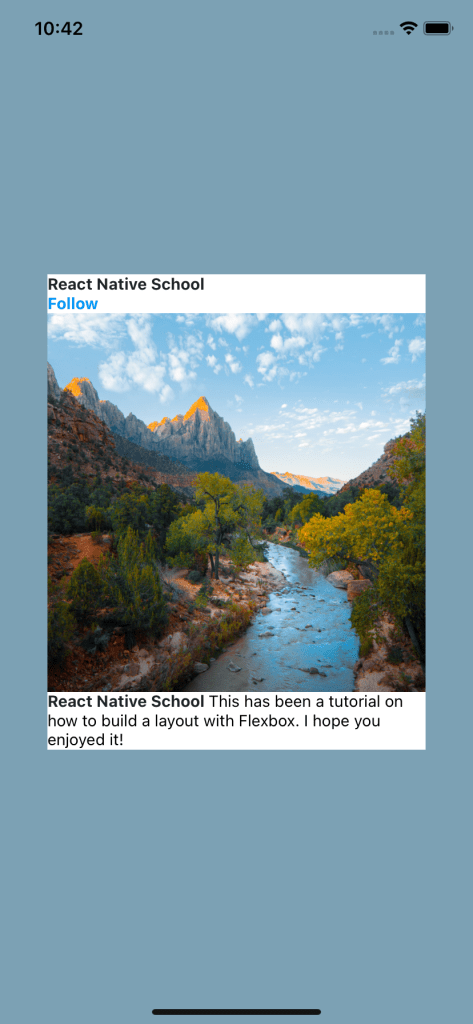
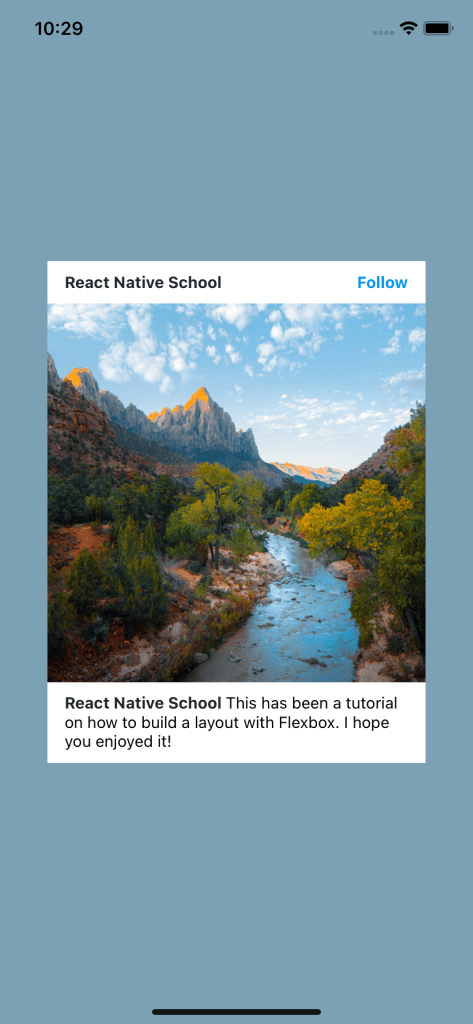
Designing a Flexbox card
Next let’s try to build a card layout using Flexbox. Again, feel free to take the starter code and try it on your own first.
//start.js
import React from"react";
import { StyleSheet, View, Text, Image, Dimensions } from"react-native"; export default function App() { return (    React Native School Follow  ", }} />   {`React Native School `} This has been a tutorial on how to build a layout with Flexbox. eu hope you enjoyed it!     );
} const screen=Dimensions.get("screen");
const styles=StyleSheet.create({ container: { flex: 1, backgroundColor:"#7CA1B4", }, image: { height: screen.width * 0.8, }, nameText: { fontWeight:"bold", color:"#20232a", }, followText: { fontWeight:"bold", color:"#0095f6", },
});
Let’s get the card and container situated first. First, we horizontally and vertically align the card. We also set a width for the card to be 80% of the screen’s width, like so:
export default function App() { return (   {/*... */}   );
} const screen=Dimensions.get("screen");
const styles=StyleSheet.create({ container: { flex: 1, backgroundColor:"#7CA1B4", alignItems:"center", justifyContent:"center", }, card: { backgroundColor:"#fff", width: screen.width * 0.8, }, image: { height: screen.width * 0.8, }, nameText: { fontWeight:"bold", color:"#20232a", }, followText: { fontWeight:"bold", color:"#0095f6", },
});
Now let’s handle the header. We want the text to render in a single line and “stick” to each edge. We can accomplish this by defining the flexDirection and justifyContent. We’ll also set some vertical and horizontal padding.
import React from"react";
import { StyleSheet, View, Text, Image, Dimensions } from"react-native"; export default function App() { return (    React Native School Follow  {/*... */}   );
} const screen=Dimensions.get("screen");
const styles=StyleSheet.create({ //... header: { flexDirection:"row", justifyContent:"space-between", paddingHorizontal: 15, paddingVertical: 10, },
});
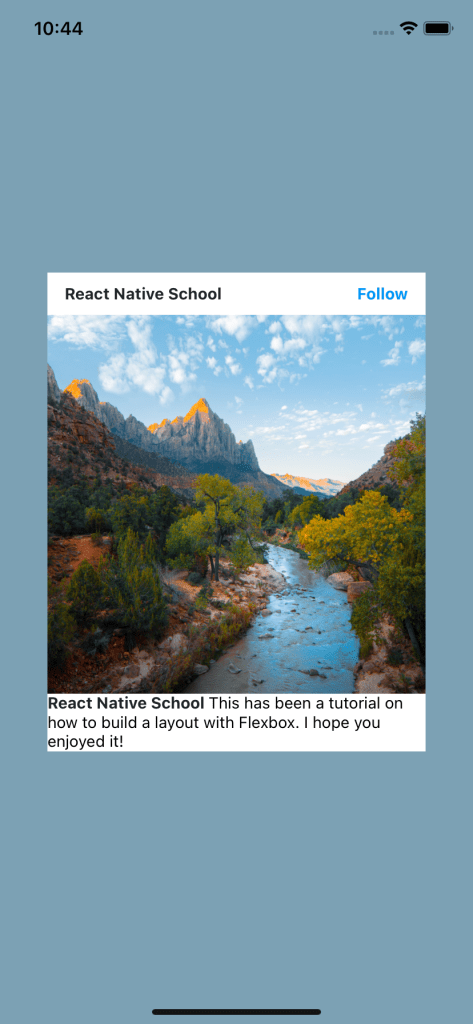
Finally, the footer. All we need to do here is set the padding! Por que é que? Because we’ve nested our Text components and applied styling to the name part so we don’t need to worry about the layout here. Work smarter, not harder! Here’s the final result:
//finished.js import React from"react";
import { StyleSheet, View, Text, Image, Dimensions } from"react-native"; export default function App() { return (    React Native School Follow  ", }} />   {`React Native School `} This has been a tutorial on how to build a layout with Flexbox. eu hope you enjoyed it!     );
} const screen=Dimensions.get("screen");
const styles=StyleSheet.create({ container: { flex: 1, backgroundColor:"#7CA1B4", alignItems:"center", justifyContent:"center", }, card: { backgroundColor:"#fff", width: screen.width * 0.8, }, header: { flexDirection:"row", justifyContent:"space-between", paddingHorizontal: 15, paddingVertical: 10, }, image: { height: screen.width * 0.8, }, footer: { paddingHorizontal: 15, paddingVertical: 10, }, nameText: { fontWeight:"bold", color:"#20232a", }, followText: { fontWeight:"bold", color:"#0095f6", },
});
And that’s an introduction to using Flexbox in React Native to build layouts! Flexbox is a dynamic and powerful tool that fits perfectly into the mobile environment.
To learn more about some more obscure properties, check out React Native’s documentation.
The post A guide to Flexbox properties in React Native appeared first on LogRocket Blog.