Sia che tu sia interessato a una carriera nella sicurezza informatica, o semplicemente desideri saperne di più su Linux e sui computer, Kali è un buona distribuzione Linux da usare . È gratuito, proviene da una rinomata società di sicurezza informatica, Offensive Security , ed è precaricato con la maggior parte degli strumenti di ricerca sulla sicurezza di cui una persona ha bisogno. Impariamo come installare e utilizzare Kali Linux.
Kali Linux si installa su dispositivi ARM come Raspberry Pi , host di macchine virtuali come VMWare e VirtualBox , o direttamente su hardware come un laptop o un PC. L’installazione è più o meno la stessa per Kali Linux su VMWare, VirtualBox, Raspberry Pi o come sistema operativo principale del tuo laptop o computer desktop.
Installazione di Kali Linux su un laptop o un computer desktop
Un ISO è un file che è una copia dei dati che troveresti su un DVD di installazione, incluso il filesystem. Quindi, se avessi un disco per installare Kali Linux e ne facessi una copia che potresti usare per installarlo, quella copia sarebbe un file ISO.
Ci sono alcuni modi per installare Kali da una ISO. Potresti creare un unità USB avviabile o DVD, quindi installalo su hardware come un laptop o un PC. Utilizza il nostro articolo Come creare, montare e masterizzare file immagine ISO gratuitamente per aiutare. Oppure puoi usarlo per creare una macchina virtuale (VM).
- Vai alla pagina Download di Kali Linux di Offensive Security e seleziona il download giusto per te. Useremo il programma di installazione di Kali Linux a 64 bit. Puoi eseguire un download diretto o utilizzare il loro Link Torrent .
Utilizza l’ISO per creare un’unità USB o un DVD avviabile o utilizzalo come disco di installazione per una VM.
- Avvia il dispositivo su cui stai installando Kali Linux. Se hai creato un USB o un DVD avviabile, assicurati che sia inserito per primo. In pochi istanti, viene visualizzato il programma di installazione di Kali Linux. Per i principianti, seleziona Installazione grafica .
Potrebbe essere visualizzato quello che sembra un messaggio di errore di errore. Lascia che continui.
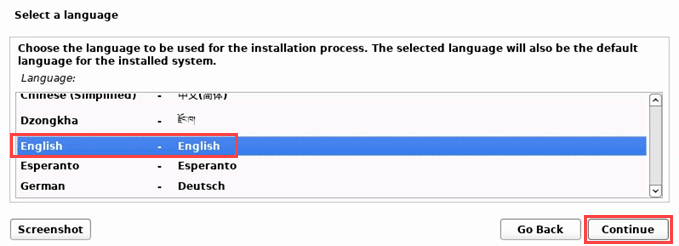
- Seleziona una lingua, quindi Continua
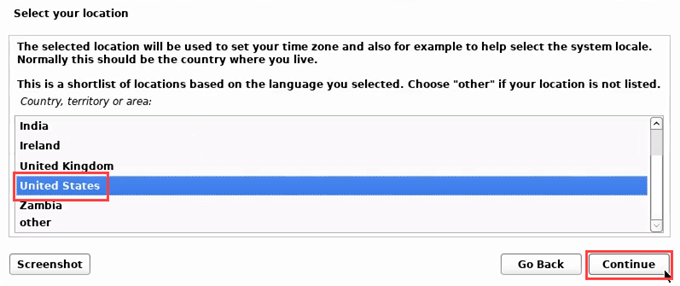
- Seleziona la tua posizione. Se il fuso orario che desideri utilizzare non si trova in quella località, non selezionarlo. È normale che i canadesi usino solo gli Stati Uniti. Se lo fanno, perderanno alcuni fusi orari, come l’Atlantico (UTC-4). Seleziona Continua
- Seleziona una mappa di tasti da utilizzare con la tastiera, ce ne sono molte tra cui scegliere.
Seleziona Continua e rileverà e monterà l’ISO. Una volta trovato, eseguirà alcune procedure automatiche.
- Per mettere la macchina Kali Linux sulla rete, imposta un nome host .
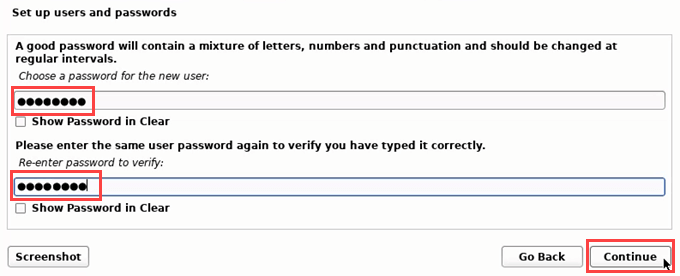
- Ora configura utenti e password. Non sono per utenti amministratori, ma per utenti normali.
- Crea un password sicura .
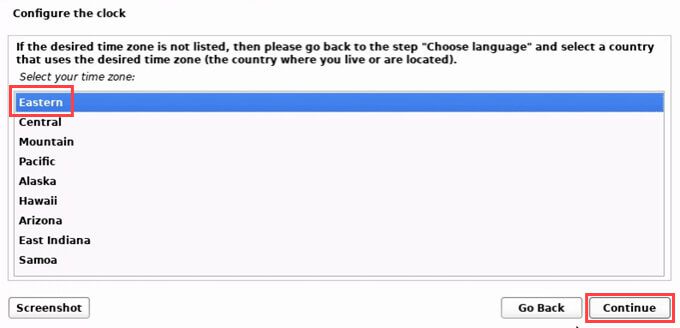
- Scegli il tuo fuso orario.
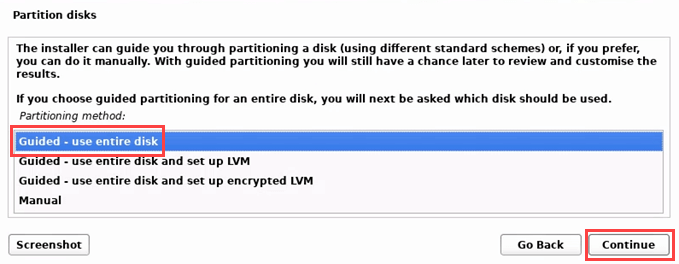
- Ora l’installazione di Linux Kali ti porterà attraverso partizionamento del disco . Se utilizzi il dispositivo solo per Kali, scegli Guidato: utilizza l’intero disco .
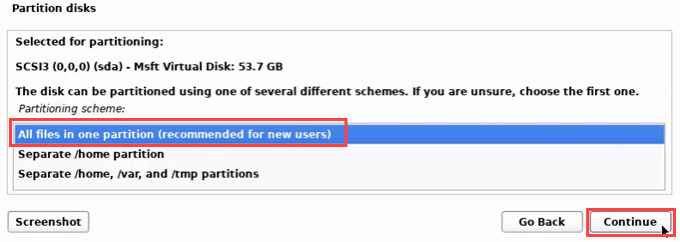
- Il disco può essere partizionato, ma un’installazione di base non lo richiede.
- Scegli il tipo di partizione. Per i nuovi utenti, scegli Tutti i file in una partizione .
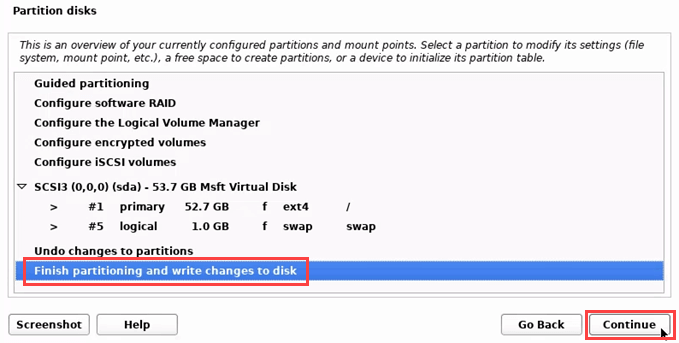
- Poiché non viene partizionato, scegli Termina partizionamento e scrivi le modifiche sul disco.
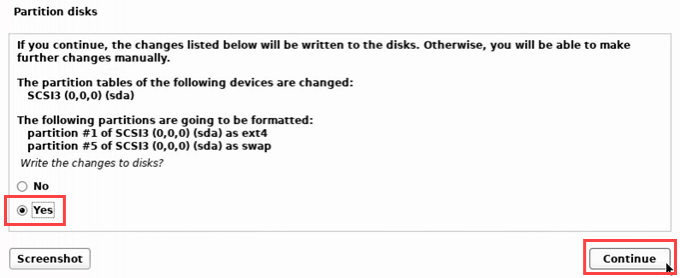
- Ti chiederà se sei sicuro. Seleziona Sì e Continua
Linux Kali verrà installato ora.
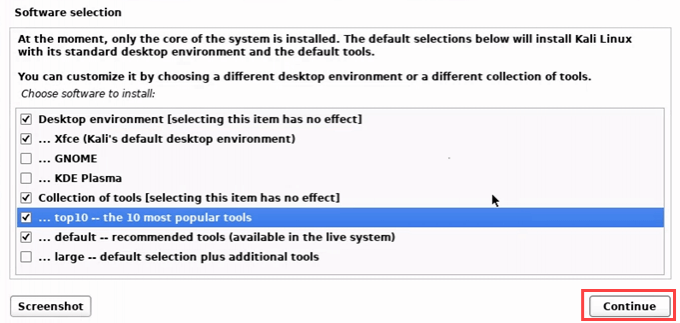
- Ora puoi scegliere quali strumenti installare. Se non sei sicuro, vai con le impostazioni predefinite. Questo ti darà un’eccellente selezione di strumenti per imparare.
Gli strumenti verranno installati.
- Ora Kali Linux chiederà di installare o meno il bootloader GRUB. Sì è l’impostazione predefinita.
Chiederà su quale dispositivo installare GRUB. Ce n’è solo uno, quindi selezionalo.
- Al termine dell’installazione, assicurati di espellere l’unità USB o il DVD. Seleziona Continua per finirlo.
L’installazione inizierà a finire. Sì, la dicitura è strana durante l’installazione.
Potrebbe scorrere del testo bianco su sfondo nero. Aspetta e basta.
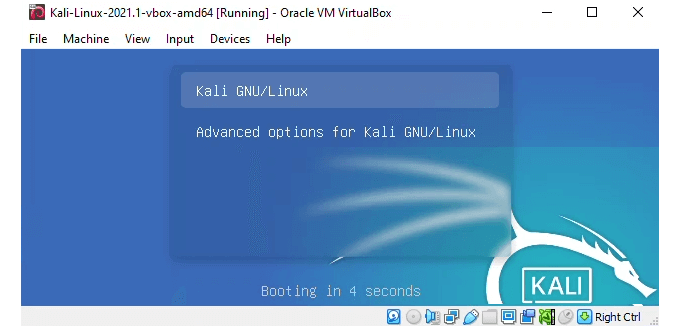
Kali Linux si avvierà e darà la possibilità di avviarsi in Kali GNU/Linux o Opzioni avanzate per Kali GNU/Linux . Il primo è il valore predefinito e verrà selezionato automaticamente se non lo scegli.
- Accedi a Kali Linux e divertiti.
Installazione di Kali Linux come macchina virtuale
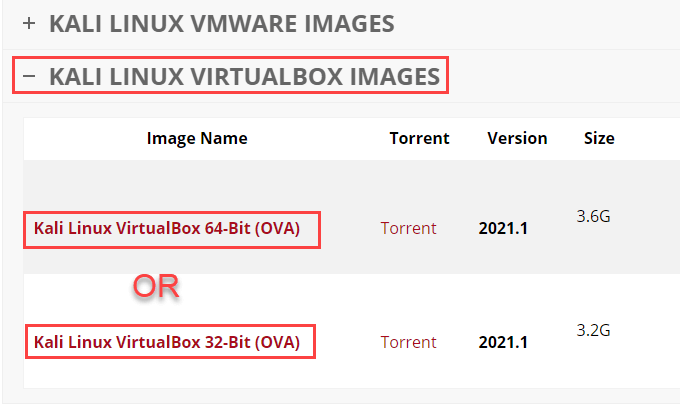
Un’immagine VM personalizzata è il modo più veloce per creare una macchina virtuale Kali Linux. Offensive Security fornisce immagini da utilizzare su VirtualBox o VMWare. Useremo VirtualBox per questa installazione e presumeremo che tu abbia VirtualBox già installato .
Prepare by downloading the Kali Linux image from Offensive Security’s site. Note that all images have the username kali and the password kali already set. Change that when you log in for the first time.
- In Oracle VM VirtualBox Manager, select Import.
- Source defaults to Local File System. Leave it as it is. Select the yellow folder icon to navigate to the downloaded image. Then select Next.
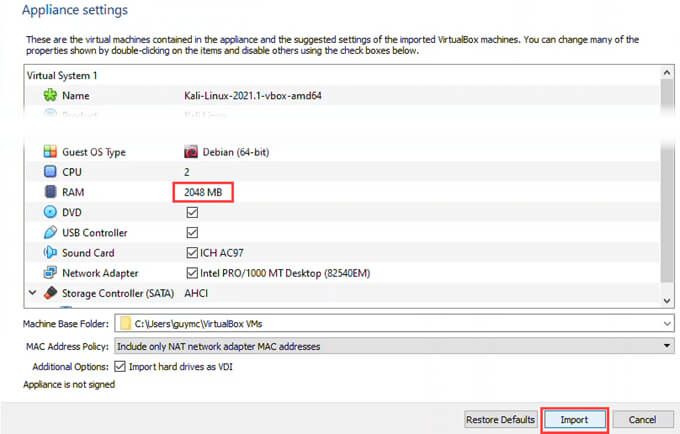
- The default Appliance settings will work, barely. Increase the RAM and CPU if you can. Select Import.
- After you’ve read the Software License Agreement, select Agree to continue.
Importing will begin. This could finish in under 10 minutes.
- Once the import finishes, you’ll see the Kali Linux install listed in VirtualBox. Select it and then select Start.
- It will briefly give you the option to boot into Kali Gnu/Linux or Advanced options for Kali Gnu/Linux. It will default to the first option.
Log in to your new Kali Linux VM using the username kali and password kali. Remember to change them immediately.
What Can You Do With Kali Linux?
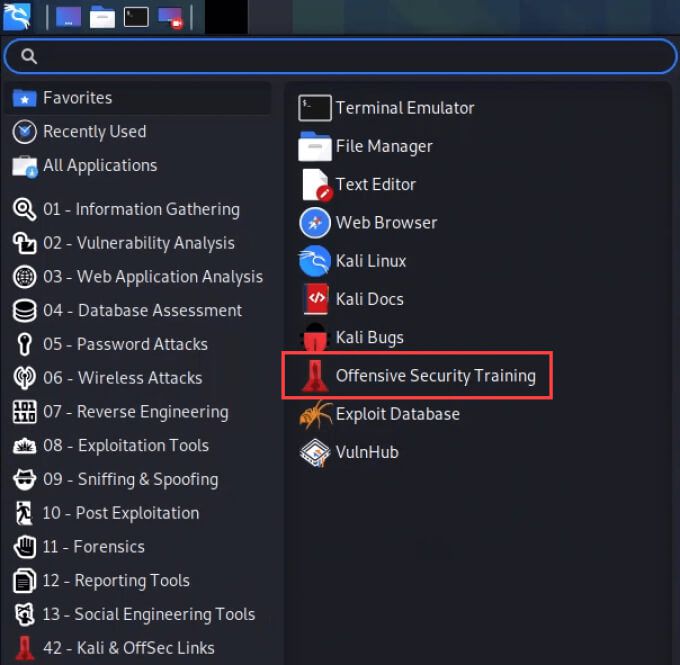
Kali is essentially ordinary Linux with a bunch of security tools already installed and ready to go. You can also add more tools to Kali easily. Some are free and fully featured, while some require a paid upgrade to get all the functions. All have their place in security research. In the Applications menu, notice how the tools are grouped by function.
Also, notice there is a link to Offensive Security’s training. These are tools, not toys and will require serious study. Let’s look at a few of the most popular tools in Kali Linux.
Wireshark
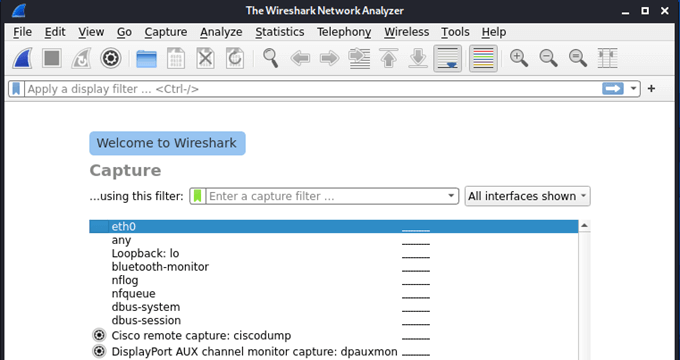
If you want to work in IT, learn to use Wireshark. It’s the best-known network analyzer. Use Wireshark to see what’s happening on a network, and knowing Wireshark looks good on a resume.
You can capture packets to analyze the contents and figure out how the network functions and the data traveling on it, like usernames and passwords. Wireshark has great built-in documentation and the Wireshark community is large and helpful.
Aircrack-ng
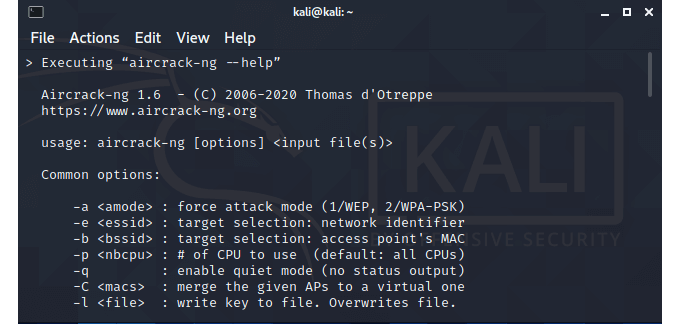
As the name suggests, Aircrack-ng can gather Wi-Fi data that’s flying around and help crack the security keys being transmitted. This helps you get into a network without being in the building.
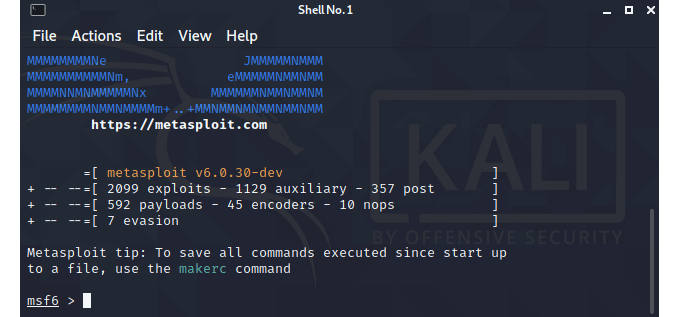
Metasploit
It’s not a single tool, but more a framework or platform to help you find and validate vulnerabilities. It can discover devices, collect evidence, gain access and take control of systems. The free version is great for most pen-testing beginners, but you’ll want to upgrade when you go pro. Pen testers rely heavily on Metasploit.
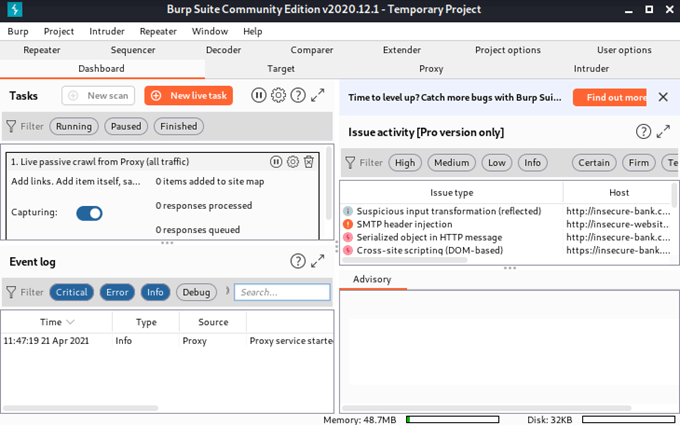
Burp Suite
This tool has been around for a long time, and for good reason. It’s the go-to tool for testing web application security. If you develop web apps, learn Burp Suite and use it to make sure your end project is watertight.
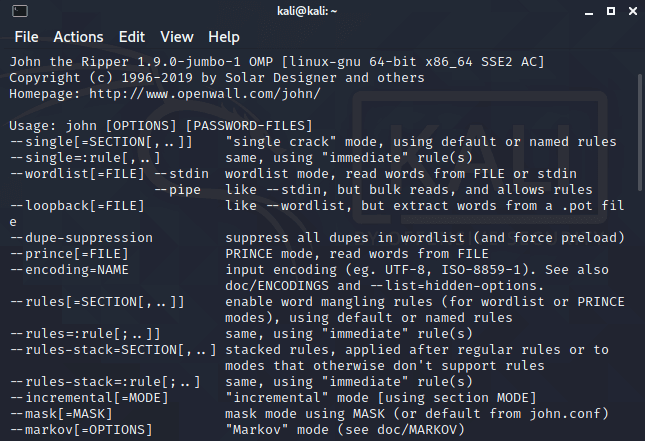
John the Ripper
Cracking passwords is what gets most of us into things like Kali Linux. You can use John the Ripper to test passwords that people have and let them know to make better passwords.
It can also be used to recover forgotten passwords for things like Excel. It does this by deciphering hashed passwords stored by your system. You can see how this is valuable to computer forensics and security professionals.
What Will You Do With Kali Linux?
Whether it’s for securing your network, penetration testing, white-hat hacking, computer forensics, or becoming a security professional, Kali Linux is the ultimate multi-tool. The price is right, and you can be up and running in minutes. What will you do with Kali Linux?


