Windows 8 a introduit une barre de recherche impressionnante qui vous permet de localiser n’importe quel fichier, processus, service, fonctionnalité système ou application installée sur votre ordinateur. Il peut également rechercher des informations sur le Web. Et cela ne fait que s’améliorer avec Windows 10.
Malheureusement, de nombreux utilisateurs rencontrent des problèmes, signalant que la barre de recherche de Windows 10 ne fonctionne plus . Dans certains cas, cela fonctionne mais n’affiche pas de résultats précis.
La barre de recherche de Windows 10 ne fonctionne pas
Ce type de problème peut finir par affecter l’ensemble de votre expérience informatique, car vous devez utiliser la barre de recherche pour à peu près tout ce qui n’a pas de raccourci sur le bureau. C’est pourquoi de nombreux utilisateurs choisissent de supprimez la barre de recherche de la barre des tâches de Windows 10 , afin qu’elle ne les gêne pas.
Cependant, tout problème a une solution et la barre de recherche de Windows 10 ne fait pas exception. Si vous souhaitez trouver un moyen de le réparer, consultez les instructions ci-dessous.
Comment réparer la recherche Windows 10 ne fonctionne pas
Il existe de nombreuses solutions que vous pouvez essayer pour restaurer l’état normal de la barre de recherche. Cependant, avant de commencer, vous devez créer un point de restauration système . En cas de problème, vous pourrez restaurer Windows 10 à un état antérieur.
1. Exécutez l’utilitaire de résolution des problèmes de recherche et d’indexation
Microsoft a préparé des outils de dépannage pour toutes sortes d’événements malheureux, même si la barre de recherche de Windows 10 ne fonctionne pas. Voici comment l’exécuter facilement.
- Cliquez avec le bouton droit sur le menu Démarrer et accédez à Paramètres

- Sélectionnez Mise à jour et sécurité
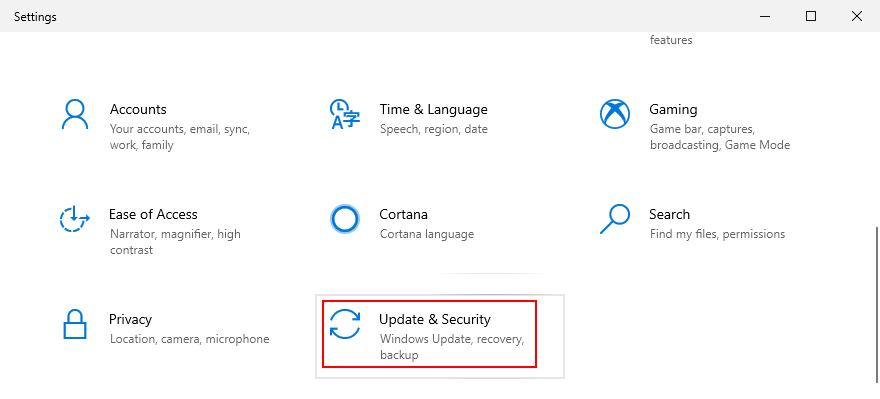
- Cliquez sur Dépanner sur le côté gauche
- Sélectionnez Recherche et indexation , puis cliquez sur Exécuter l’utilitaire de résolution des problèmes
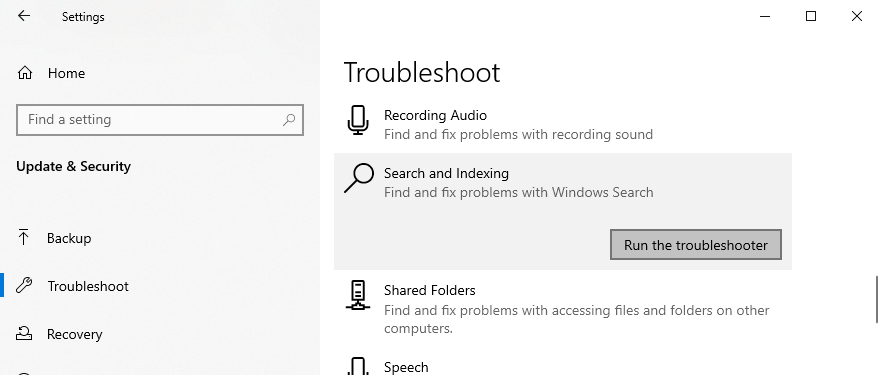
- Suivez les instructions à l’écran
- Redémarrez votre ordinateur
2. Téléchargez les dernières mises à jour de Windows
Windows Update apporte les dernières fonctionnalités, améliorations, correctifs et correctifs de sécurité pour l’édition exacte de votre système d’exploitation. Si d’autres utilisateurs de PC rencontrent les mêmes problèmes de barre de recherche que vous et que Microsoft en prend conscience, vous devez vous attendre à une mise à jour qui corrige tout.
Comment exécuter Windows Update:
- Cliquez sur le bouton Démarrer , saisissez Rechercher les mises à jour et appuyez sur Entrée
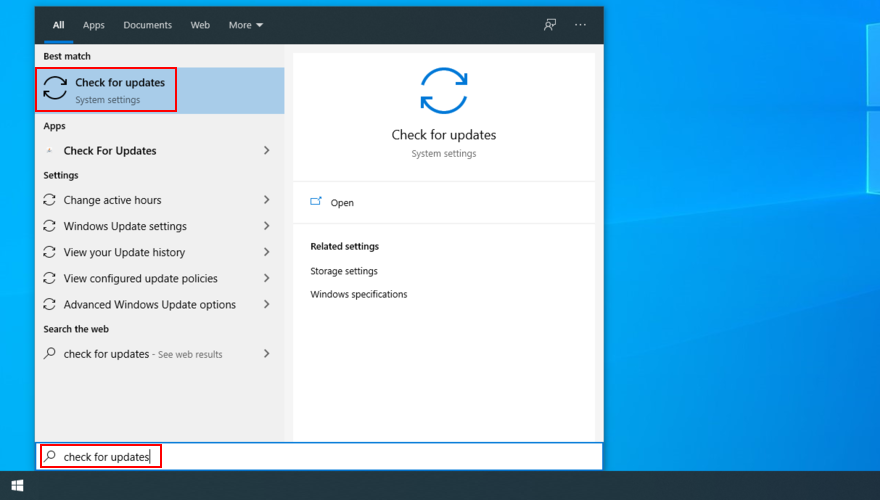
- Le contrôle doit commencer immédiatement. Attendez la fin et cliquez sur Télécharger s’il y a des mises à jour en attente
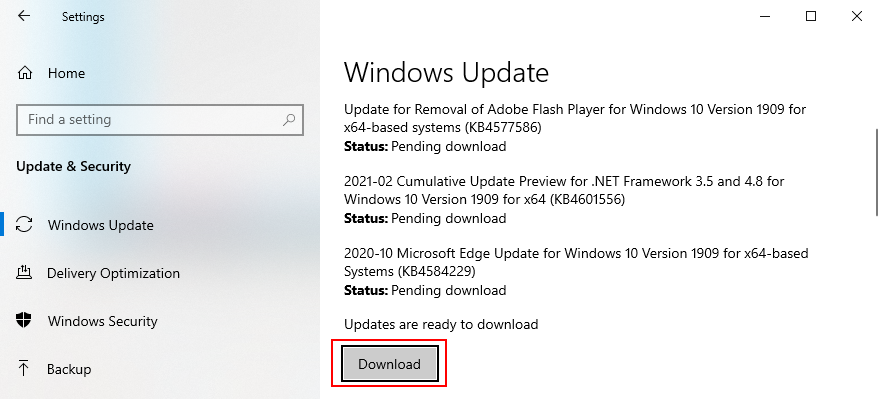
- Cela peut prendre beaucoup de temps. Une fois terminé, redémarrez votre ordinateur et essayez d’utiliser la barre de recherche
3. Redémarrez le service Windows Search
Pour que la barre de recherche fonctionne correctement, son service correspondant doit également fonctionner correctement.
- Appuyez sur Ctrl + R , saisissez services.msc et appuyez sur Entrée

- Recherchez et double-cliquez sur le service Windows Search pour afficher ses propriétés
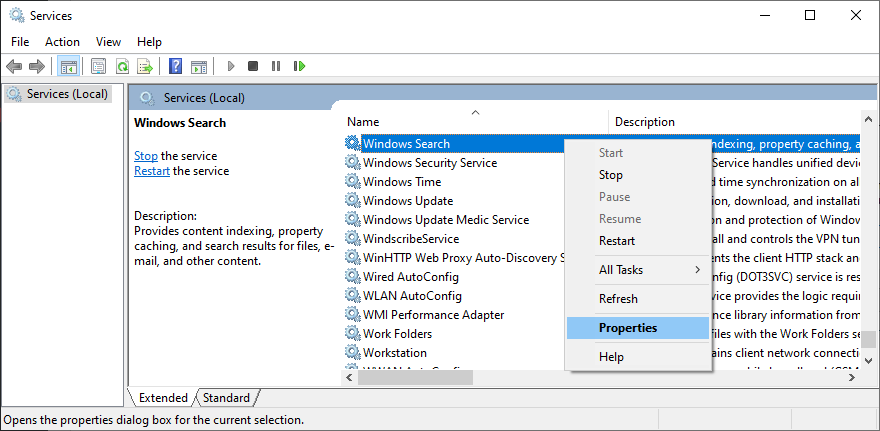
- Définissez le type de Démarrage sur Automatique (démarrage différé)
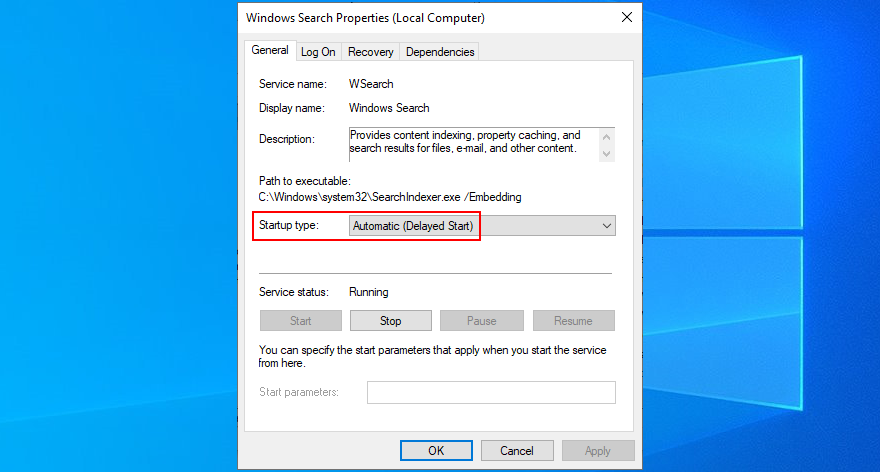
- Si le service n’est pas en cours d’exécution, cliquez sur Démarrer
- Cliquez sur Appliquer pour valider toutes les modifications
- Essayez d’utiliser la barre de recherche maintenant
4. Redémarrez ou terminez quelques processus
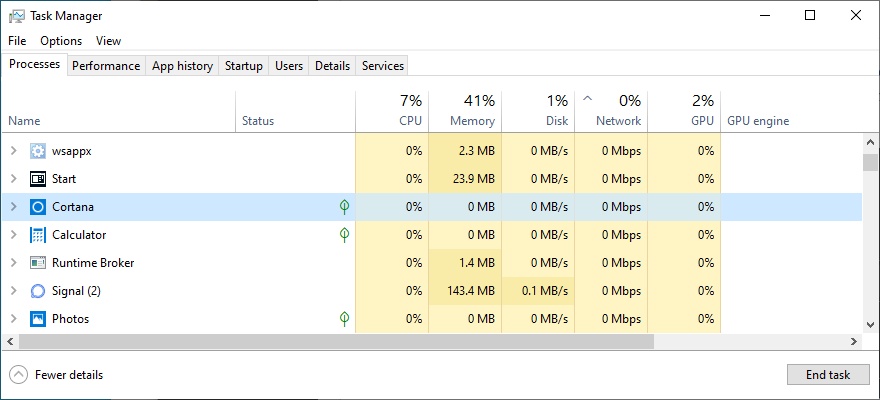
L’utilisation de la barre de recherche de Windows 10 est similaire à l’utilisation d’une application: elle a un processus qui s’exécute en arrière-plan, qui peut être consulté et contrôlé à partir du Gestionnaire des tâches.
En ce qui concerne la barre de recherche, plusieurs processus sont impliqués dans son exécution, notamment SearchUI.exe, Windows Explorer, Cortana et CTF Loader (ctfmon.exe). Tout ce que vous avez à faire est de leur donner une secousse.
- Cliquez avec le bouton droit sur la barre des tâches Windows et sélectionnez Gestionnaire des tâches

- Dans l’onglet Processus , sélectionnez l’Explorateur Windows et cliquez sur Redémarrer
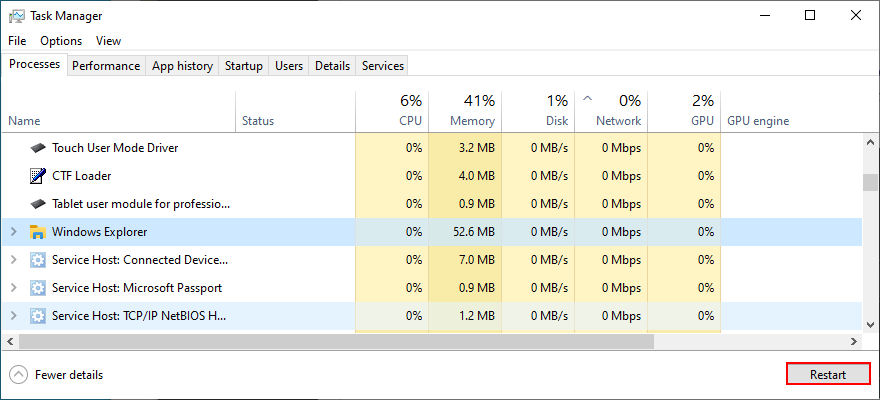
- Dans le même onglet, sélectionnez Cortana et cliquez sur Terminer la tâche
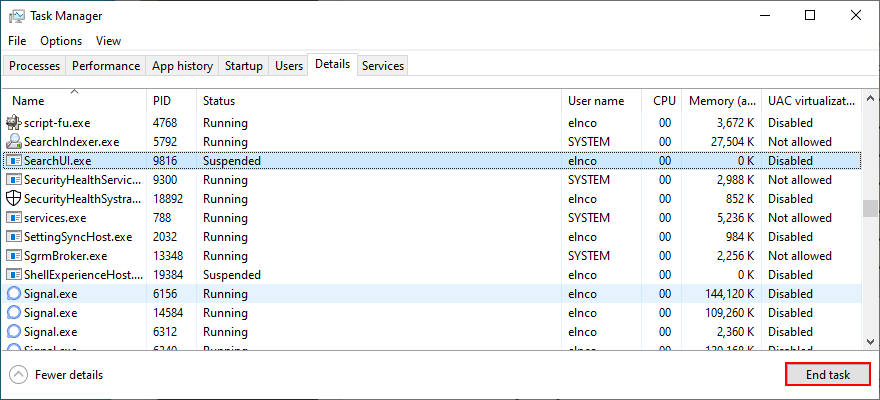
- Passer à l’onglet Détails
- Cliquez sur Fin de tâche pour SearchUI.exe , SearchIndexer.exe et ctfmon.exe
- Activez Cortana à partir du menu Démarrer
- Essayez d’utiliser la barre de recherche maintenant
Vous devrez peut-être redémarrer votre ordinateur pour pouvoir utiliser la barre de recherche de Windows 10.
5. Réinitialiser la recherche Windows
Il est possible de réinitialiser Windows Search à partir de PowerShell, afin d’actualiser tous ses paramètres. Mais d’abord, vous devez connaître l’édition exacte de votre copie de Windows 10 car les instructions varient légèrement.
Ne vous inquiétez pas, vous ne perdrez aucun fichier personnel ni aucune application installée.
- Cliquez avec le bouton droit de la souris sur le bouton Démarrer et sélectionnez Système
- Accéder à À propos de
- Dans les spécifications Windows , notez votre version

- Pour Windows 10 version 1809 et antérieure:
- Cliquez sur le bouton Démarrer , cliquez avec le bouton droit sur Cortana et accédez à Plus > Paramètres de l’application
- Sélectionnez Réinitialiser
- Pour Windows 10, version 1903 et ultérieure:
- Connectez-vous à Windows 10 en tant qu’administrateur
- Télécharger Réinitialiser le script Windows Search PowerShell
- Cliquez avec le bouton droit sur le fichier téléchargé et sélectionnez Exécuter avec PowerShell
- Cliquez sur Oui si vous y êtes invité par UAC (contrôle de compte d’utilisateur)
- Tapez r et appuyez sur Entrée pour confirmer
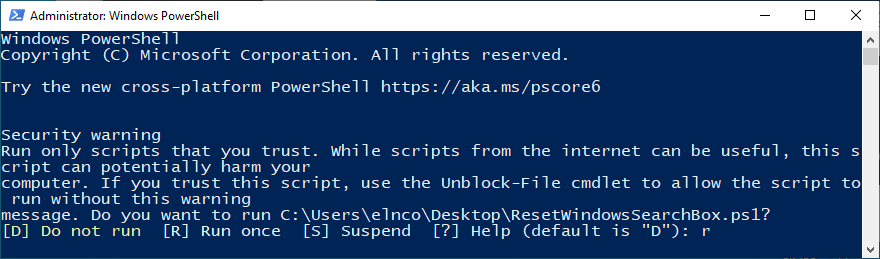
- Si Windows Search a été réinitialisé avec succès, vous recevrez le message Terminé
- Ou, si vous obtenez le message Ne peut pas être chargé car l’exécution des scripts est désactivée sur ce système , entrez
Get-ExecutionPolicydans PowerShell et appuyez sur Entrée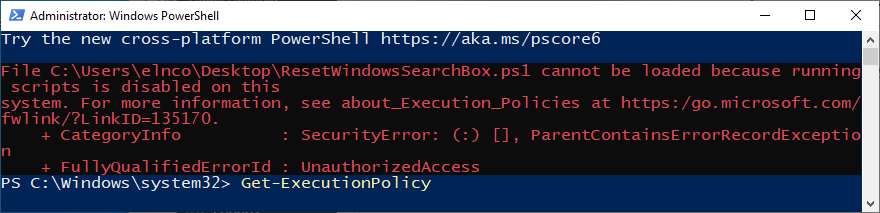
- Ensuite, exécutez
Set-ExecutionPolicy-Scope CurrentUser-ExecutionPolicy Unrestricted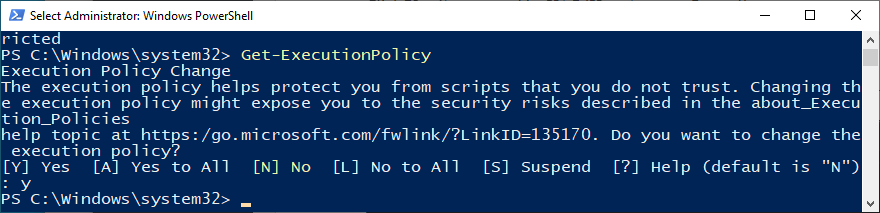
- Tapez y et appuyez sur Entrée pour confirmer
- Une fois la stratégie modifiée, vous devriez pouvoir exécuter le script ci-dessus dans PowerShell
- Après avoir reçu le message Terminé , appuyez sur n’importe quelle touche pour continuer
- Exécutez
Set-ExecutionPolicy-Scope CurrentUser-ExecutionPolicypour restaurer votre stratégie d’origine - Tapez y et appuyez sur Entrée pour confirmer
- Accéder à À propos de
6. Reconstruire l’index Windows Search
L’index de recherche représente la portée entière. En d’autres termes, Windows se limite à rechercher uniquement les résultats dans l’index spécifié. Ainsi, si un fichier que vous recherchez ne fait pas partie de l’index, Windows n’aura aucun moyen de le retrouver.
Pour résoudre ce problème, vous devez reconstruire l’index. Heureusement, vous n’avez pas besoin d’outils spéciaux.
- Assurez-vous que vous êtes connecté en tant qu’administrateur du PC
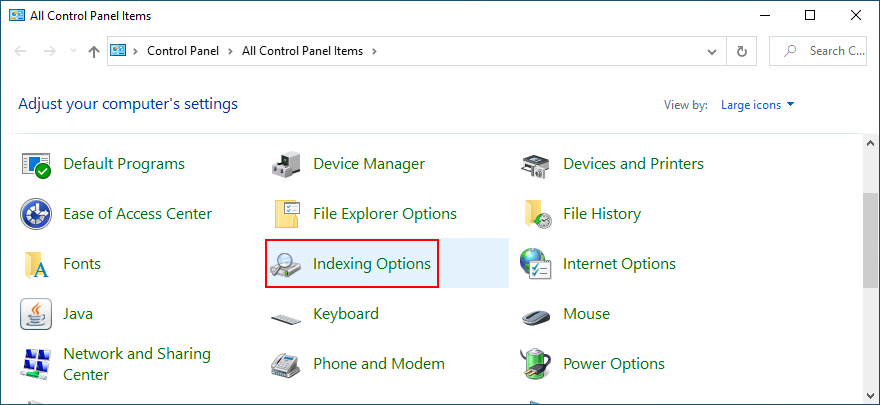
- Appuyez sur Ctrl + R , saisissez panneau de configuration et appuyez sur Entrée

- Cliquez sur Options d’indexation
- Cliquez sur Avancé
- Dans Dépannage – Supprimer et reconstruire l’index , cliquez sur Reconstruire
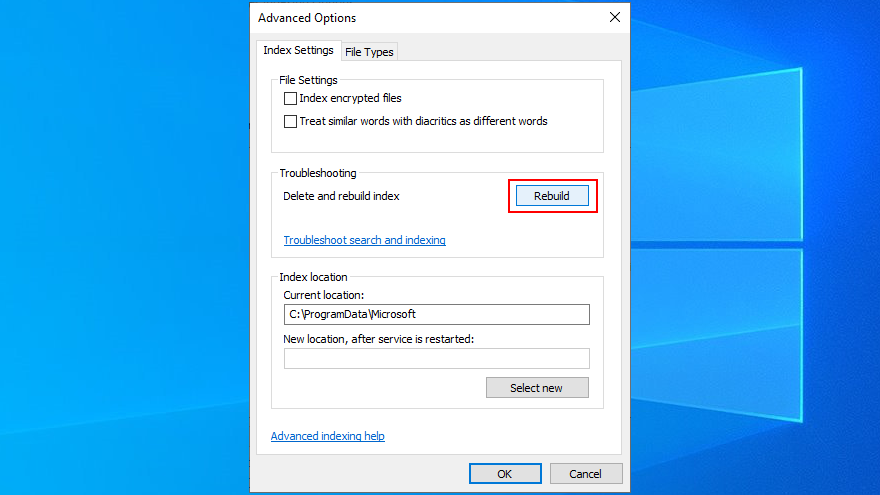
- Cliquez sur OK pour confirmer et attendez patiemment la fin de la tâche
- Redémarrez votre PC et essayez d’utiliser la barre de recherche
- Dans Dépannage – Supprimer et reconstruire l’index , cliquez sur Reconstruire
7. Supprimer Bing de Windows Search
Certains utilisateurs ont signalé que la suppression de l’intégration Bing de la barre de recherche de Windows 10 a résolu leur problème. Cependant, ce n’est pas idéal pour les utilisateurs de PC qui préfèrent rechercher les résultats de recherche sur Bing. Si vous en faites partie, vous devez ignorer cette solution.
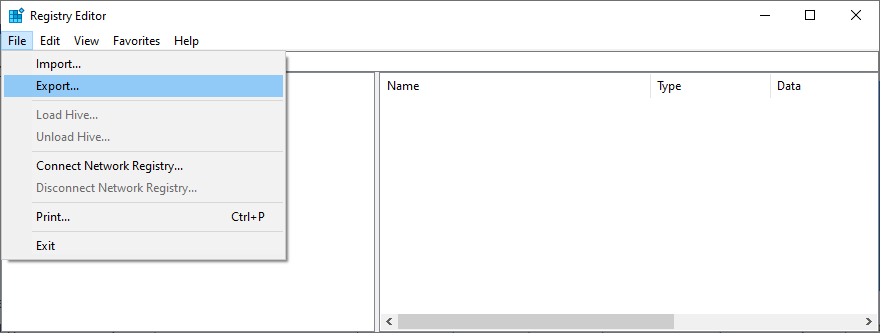
- Appuyez sur Ctrl + R , saisissez regedit et appuyez sur Entrée

- Ouvrez le menu Fichier et cliquez sur Exporter
- Spécifiez le nom et la destination du fichier de sauvegarde du registre
- Copiez et collez l’adresse suivante pour visiter cet emplacement
Ordinateur \ HKEY_CURRENT_USER \ Software \ Microsoft \ Windows \ CurrentVersion \ Search
- Ouvrez le menu Édition , accédez à Nouveau et sélectionnez Valeur DWORD (32 bits)
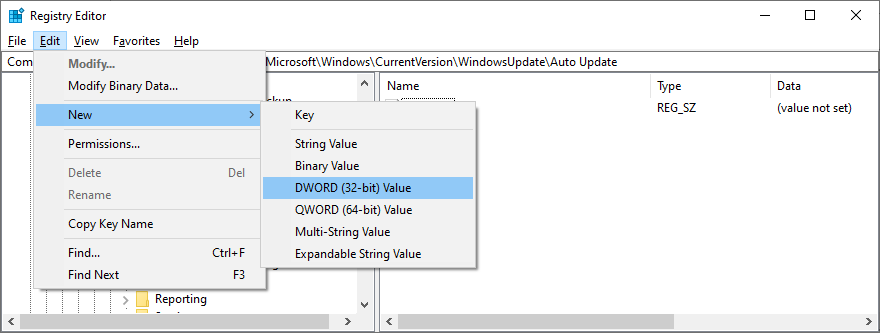
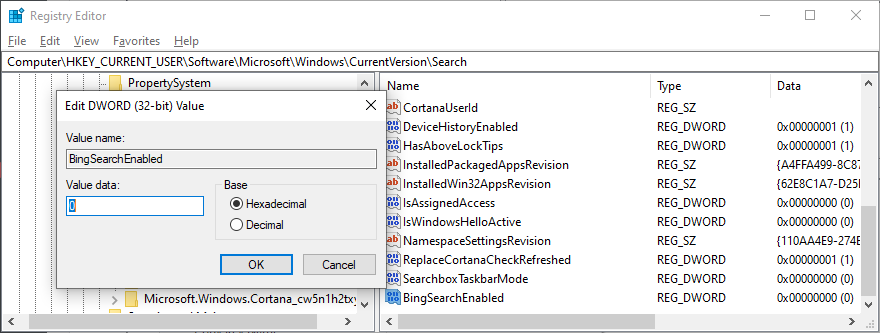
- Définissez le nom de la nouvelle entrée sur BingSearchEnabled
- Double-cliquez sur BingSearchEnabled , définissez Données de la valeur sur 0 et appuyez sur OK
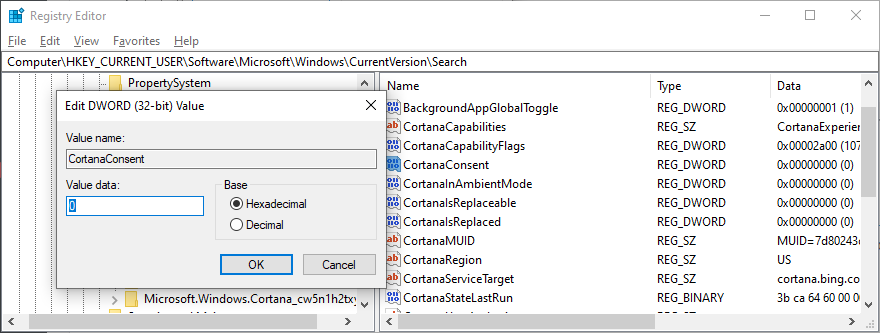
- Au même endroit, double-cliquez sur CortanaConsent
- Définissez Données de la valeur sur 0 et appuyez sur OK
- Redémarrez votre PC et essayez d’utiliser la barre de recherche
- Spécifiez le nom et la destination du fichier de sauvegarde du registre
La solution ci-dessus devrait corriger la barre de recherche de Windows 10 si elle ne fonctionnait pas auparavant. Mais la portée de la recherche sera limitée aux résultats hors ligne. Si vous changez d’avis et que vous n’êtes pas à l’aise avec les nouvelles modifications, double-cliquez sur la sauvegarde de registre que vous avez créée précédemment et elle restaurera les paramètres de registre d’origine.
8. Désinstaller les dernières mises à jour Windows
Ce n’est un secret pour personne que Microsoft finit par faire plus de mal que de bien avec certaines mises à jour Windows qu’il essaie de diffuser, même si cela signifie bien. Si vous avez remarqué que la barre de recherche Windows a cessé de fonctionner juste après une mise à jour du système, vous devez la désinstaller de votre PC.
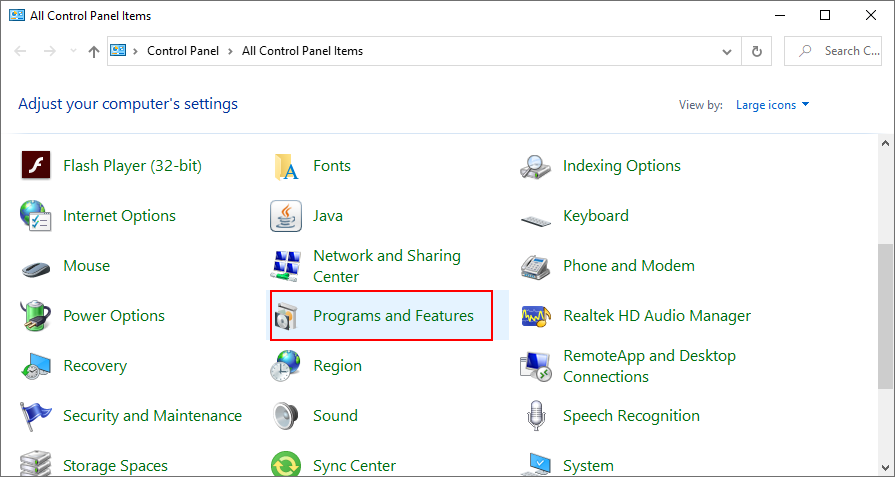
- Appuyez sur Ctrl + R , saisissez panneau de configuration , puis appuyez sur Entrée
- Cliquez sur Programmes et fonctionnalités
- Click View installed updates on the left side

- Click the Installed On column to sort the updates by date (newest first)
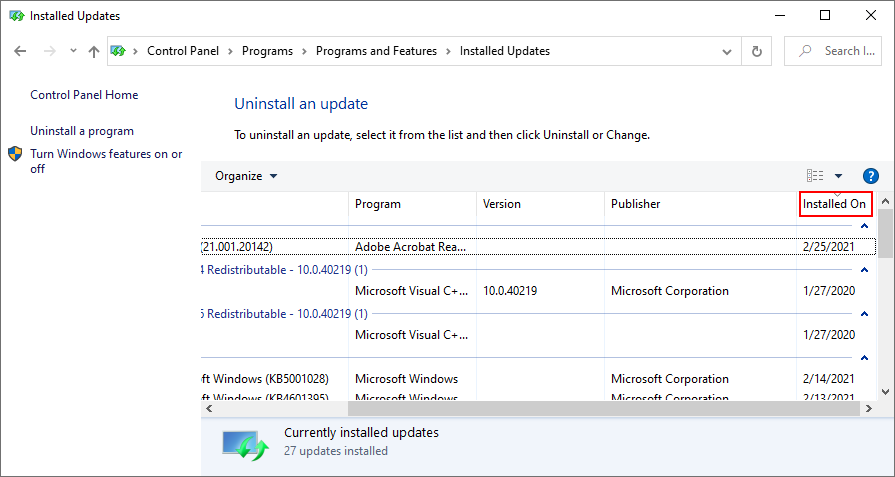
- Double-click the first update in the list and click Yes to confirm the uninstall
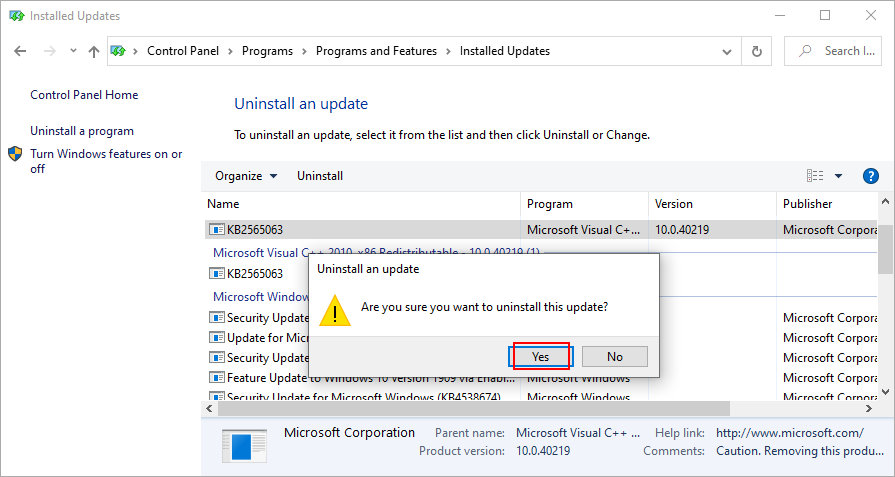
- Restart your computer and try using the search bar now
9. Check your Internet connection
If your Internet connection quality is poor, then you shouldn’t be surprised if the search bar is not working on Windows 10, especially when it comes to finding online results.
Here are a few suggestions for checking your Internet connection:
- Temporarily switch from router to cable
- Reboot your router
- Disable QoS and bandwidth limitations on your router’s administration page
- Check how many devices are connected to your Wi-Fi
- Flush your DNS servers
- Use the built-in Internet connection troubleshooter
- Disable third-party security tools, VPNs, or proxy servers
- Disable IPv6 connectivity if you don’t use it
- Measure your Internet download and upload speed
- Turn off any torrenting clients, downloading managers, streaming apps, and online games
- Set custom DNS servers to speed up your Internet connection
- Temporarily suspend system updates
10. Use System Restore
The Windows search bar could have been affected by any unforeseen software event that recently occurred on your computer: a corrupt driver, a significant system registry modification, a new application, or anything else.
Trying to identify the guilty party can become overwhelming and nerve-wracking. Luckily, there’s a simple solution for undoing all recent computer changes: Recovery mode.
There’s only one problem here: all new programs installed beyond the restore point will disappear, so you will have to reinstall them and re-register the ones you have a premium license for. Some applications don’t support re-registration, so you should do your research first.
How to use Recovery mode:
- Log in to Windows 10 with your administrator account
- Press Ctrl + R, type control panel, and press Enter
- Click Recovery
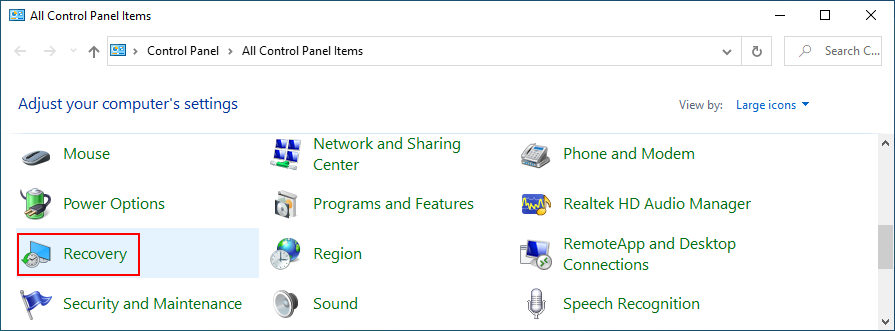
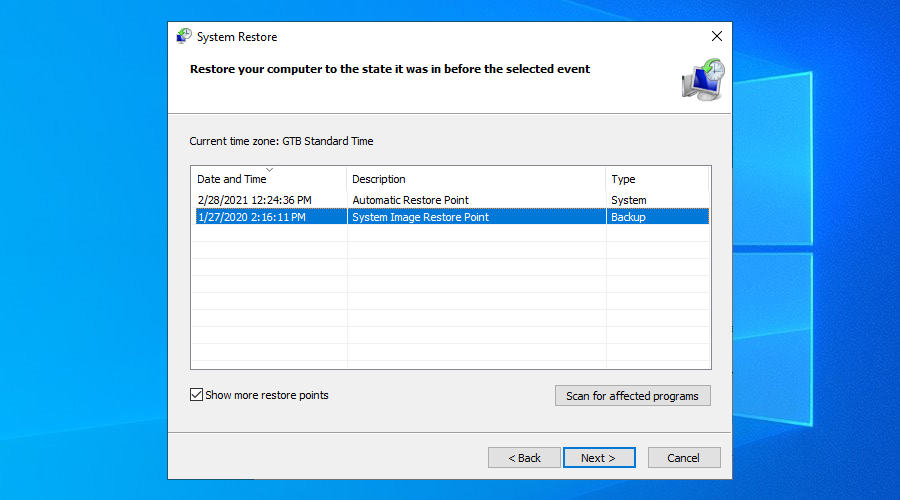
- Click Open System Restore
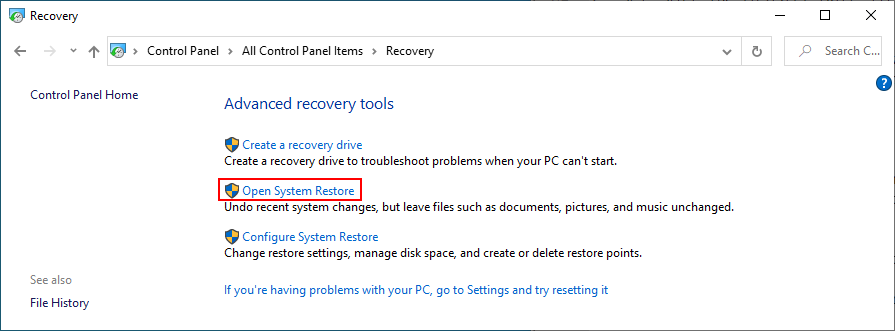
- Select a recent checkpoint from the list, click Next, and follow the on-screen instructions
- Restart your PC and try using the search bar
- If nothing changes, try restoring Windows 10 to an older checkpoint
11. Enable background apps
When Windows 10 Creator’s Update rolled out, there was a problem with the search bar. Specifically, it stopped working properly if apps weren’t allowed to run in the background.
Theoretically, this issue should be fixed by now, especially in newer Windows 10 editions. That doesn’t mean you shouldn’t try it. Besides, it’s harmless.
How to enable background apps:
- Right-click the Start button and go to Settings
- Select Privacy

- Scroll down until you can select Background apps on the left side
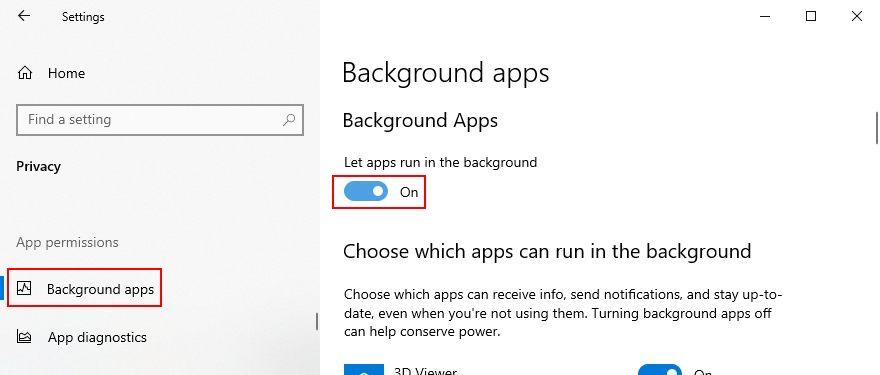
- Enable Let apps run in the background
- Allow all apps from the list to run in the background
- Reboot your PC and try to use the search bar now
12. Use SFC and DISM
If your operating system has any corrupt files, it could have a negative impact on an unpredictable amount of apps and features, including the Windows 10 search bar. However, you should be able to solve this problem without outside help and without creating OS recovery media.
SFC (System File Checker) is a command-line tool that repairs any damaged system files. And, if the problem is a bit more serious, you can turn to DISM (Deployment Image Servicing and Management). It restores data in the component store of the Windows image.
How to use SFC:
- Press Ctrl + R, type cmd, and press Ctrl + Shift + Enter to launch Command Prompt as admin

- Run
sfc/scannowand wait until the task is complete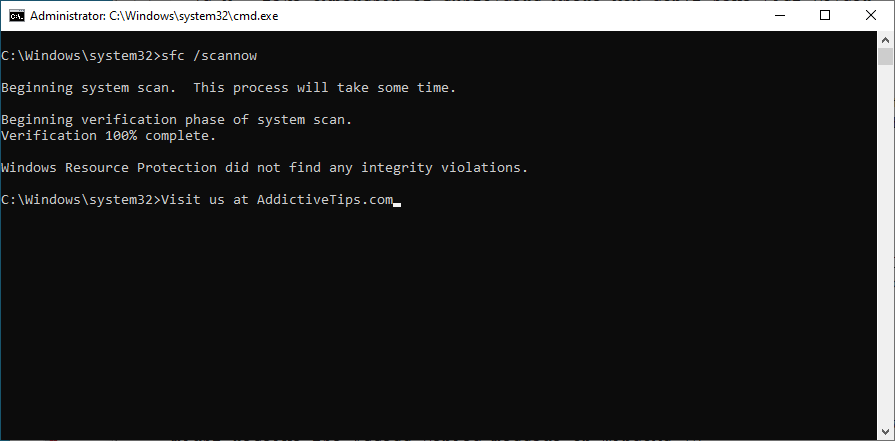
- Restart your PC
If the Windows 10 search bar is still not working after SFC, then you can run DISM.
How to use DISM:
- Open a Command Prompt window as admin
- Run
DISM/online/cleanup-image/scanhealthand hit Enter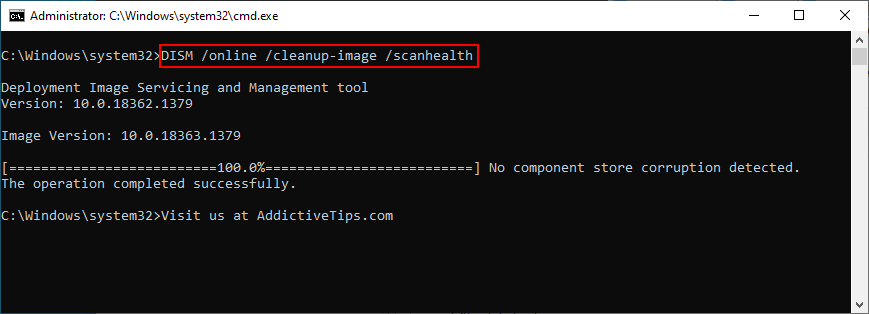
- If DISM returns any errors, fix them with
DISM/online/cleanup-image/restorehealth - Restart your PC and open CMD as admin
- Run
sfc/scannowand wait until it finishes - Reboot your computer and try using the search bar
13. Temporarily disable your firewall
If you or someone else with access to your computer has messed up the inbound and outbound rules of the firewall, perhaps this lead to network connectivity and search bar problems. It’s difficult to tell, but you can temporarily disable your firewall to confirm this.
How to disable Windows Firewall:
- Log in as the computer administrator
- Press Ctrl + R, type control panel, and press Enter
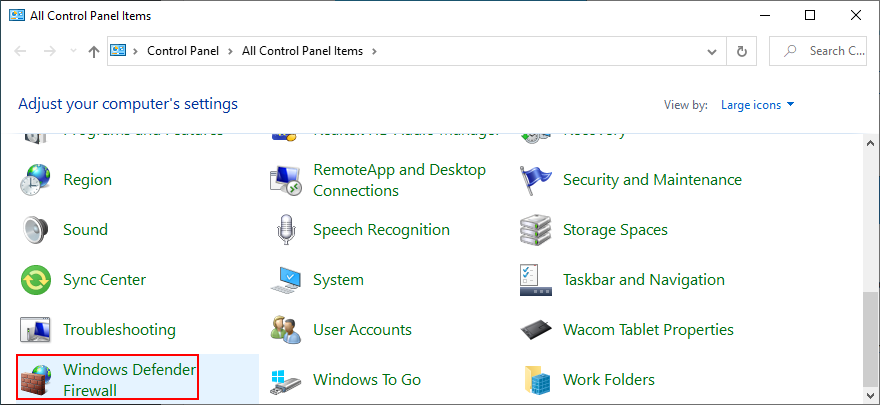
- Find and select Windows Defender Firewall
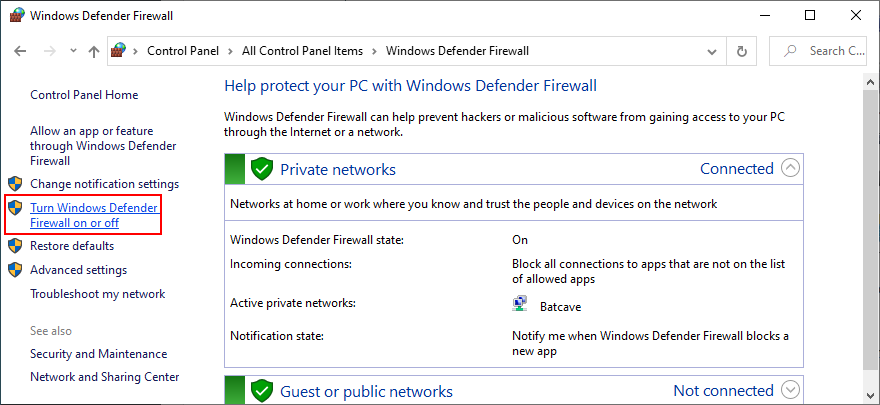
- Click Turn Windows Defender on or off
- At Private and Public network settings, select Turn off Windows Defender Firewall (not recommended)
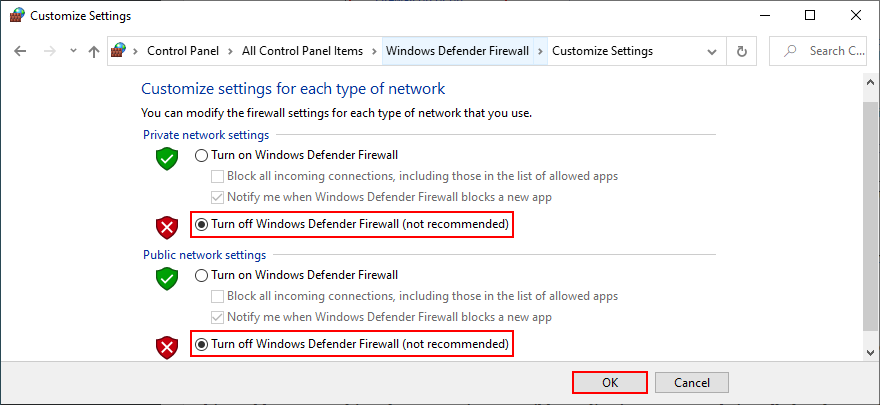
- Click OK to confirm
- Try to use the search bar now
If you have a third-party firewall installed, make sure to adjust the steps above accordingly. And, after you can confirm that the search bar is working properly now, you should re-enable the firewall to maintain the safety of your computer. Deeper investigation is required to detect and solve the exact firewall problem.
14. Reinstall Cortana
Microsoft’s Cortana is intertwined with the Windows 10 search bar. Usually, one doesn’t work properly without the other. That doesn’t stop certain users from removing Cortana from their operating system if they feel it’s not needed.
Unfortunately, no Cortana could very well mean no more search bar. Or, no more accurate search results, to say the least. To solve this matter, it’s necessary to reinstall Cortana, which can be a bit challenging since it can’t be downloaded and installed from the Microsoft Store.
How to reinstall Cortana from PowerShell:
- Make sure you’re logged in as the PC administrator
- Right-click the Start button and select System
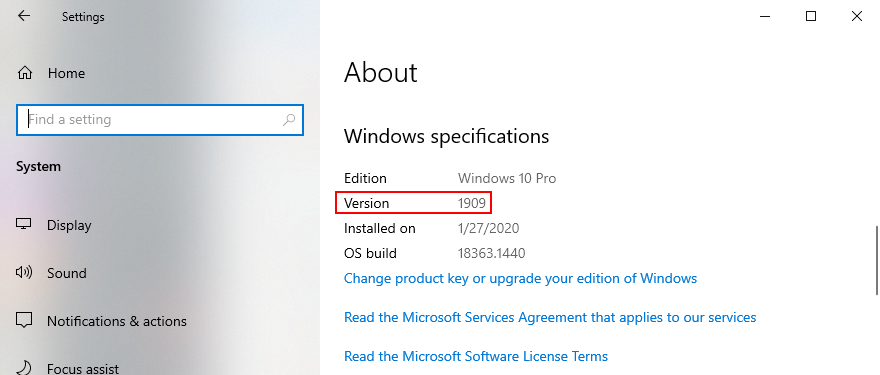
- Go to About
- At Windows specifications, take note of your Version
- Launch Windows PowerShell
- If you have Windows 10 version 2004 and higher, run the following command:
Get-AppxPackage Microsoft.549981C3F5F10 | Foreach {Add-AppxPackage-DisableDevelopmentMode-Register"$($_.InstallLocation)\AppXManifest.xml"} - Or, if you have Windows 10 version 1909 and lower, write the next line:
Get-AppxPackage Microsoft.Windows.Cortana | Foreach {Add-AppxPackage-DisableDevelopmentMode-Register"$($_.InstallLocation)\AppXManifest.xml"}
Rundown of fixes for Windows 10 search not working errors
To recap, if the Windows 10 search is no longer working properly or delivers inaccurate search results, you can try to fix this problem by running the Search and Indexing troubleshooter, downloading the newest Windows updates, and restarting the Windows Search service.
You should also restart or terminate several processes that affect the search bar, reset Windows Search, rebuild the Windows Search index, remove Bing from Windows Search, and uninstall recent Windows updates.
It’s also a good idea to check the quality of your Internet connection, use Recovery mode to roll back Windows 10, enable background apps, repair corrupt system files using SFC and DISM, temporarily disable your firewall, as well as reinstall Cortana.
Which solution fixed the search bar on your PC? Do you have any other suggestions that we missed? Let us know in our comment section below.