L’Explorateur de fichiers est le nom officiel donné à l’Explorateur Windows lorsque le système d’exploitation de Microsoft a atteint la version 10. Il représente l’application Windows 10 intégrée pour parcourir les fichiers et les dossiers, ainsi que pour effectuer diverses opérations telles que lancer, supprimer ou renommer des fichiers.
Malheureusement, de nombreux utilisateurs se plaignent que l’Explorateur de fichiers ne répond pas sous Windows 10, ce qui les empêche d’effectuer des activités de base sur leurs ordinateurs. Par exemple, L’Explorateur de fichiers affiche le message Travailler dessus et se bloque parfois.
Cela peut être causé par un large éventail de problèmes au niveau du logiciel. Quel que soit le problème, si vous ne pouvez pas exécutez l’Explorateur de fichiers avec les droits d’administrateur , vous devriez être en mesure de le réparer sans avoir à réinitialiser Windows 10 et perdre tous les fichiers personnels de vos applications.

Pourquoi l’explorateur de fichiers ne répond-il pas?
Si Explorateur de fichiers est trop lent ou ne répondant pas du tout aux commandes, vous pourriez être confronté à un certain nombre de problèmes imprévus. Ceux-ci incluent:
- Fichiers système corrompus
- Attaques de logiciels malveillants graves
- Mises à jour Windows défectueuses
- Un système d’exploitation obsolète
- Pilotes vidéo obsolètes ou incompatibles
- Problèmes de carte RAM
- Erreurs d’affichage de l’ordinateur
- Problèmes de Windows Search
- Problèmes de compte Microsoft ou administrateur
- Trop d’éléments de menu contextuel
Comment réparer l’explorateur de fichiers qui ne répond pas dans Windows 10
Si vous vous demandez quoi faire lorsque l’Explorateur de fichiers ne répond pas, ne vous inquiétez pas car il existe plusieurs solutions que vous pouvez essayer.
Avant de commencer, cependant, c’est une bonne idée de créer un point de restauration système . Vous pourrez restaurer Windows 10 à un état stable antérieur au cas où vous commettriez des erreurs. Si possible, vous devez effectuer une sauvegarde complète de l’ordinateur pour vous assurer de ne pas perdre de fichiers et de dossiers importants.
1. Redémarrez explorer.exe
Vous pouvez redémarrer explorer.exe , le processus responsable de l’explorateur de fichiers, pour lui donner un petit coup de pouce. C’est une solution simple qui résout souvent le problème. Après avoir terminé la tâche à partir du Gestionnaire des tâches, Windows 10 redémarre automatiquement le processus.
Depuis le gestionnaire de tâches:
- Cliquez avec le bouton droit sur la barre des tâches de Windows 10 et accédez au Gestionnaire des tâches

- Recherchez et sélectionnez Explorateur Windows
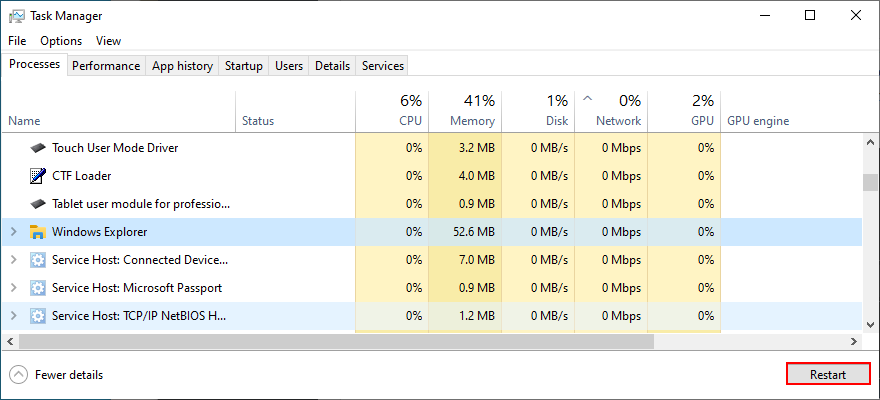
- Cliquez sur Redémarrer
Si vous ne pouvez pas accéder au Gestionnaire des tâches pour une raison quelconque, vous pouvez accéder à l’invite de commandes pour redémarrer explorer.exe.
Depuis le CMD:
- Appuyez sur Ctrl + R , saisissez cmd et appuyez sur Ctrl + Maj + Entrée pour ouvrir l’invite de commande en tant qu’administrateur (cliquez sur Oui si vous y êtes invité par l’UAC)

- Tapez
taskkill/f/im explorer.exeet appuyez sur Entrée (votre barre des tâches devrait disparaître) - Tapez
start explorer.exeet appuyez sur Entrée
- Essayez d’ouvrir l’Explorateur de fichiers
2. Mettre à jour Windows 10
Si l’Explorateur de fichiers a été affecté par une erreur Windows 10 sur l’ordinateur de nombreux utilisateurs, Microsoft en est probablement conscient et proposera probablement une mise à jour du système qui résout le problème. Tout ce que vous avez à faire est de mettre à jour Windows 10:
- Cliquez sur le bouton Démarrer , saisissez Rechercher les mises à jour , puis appuyez sur Entrée
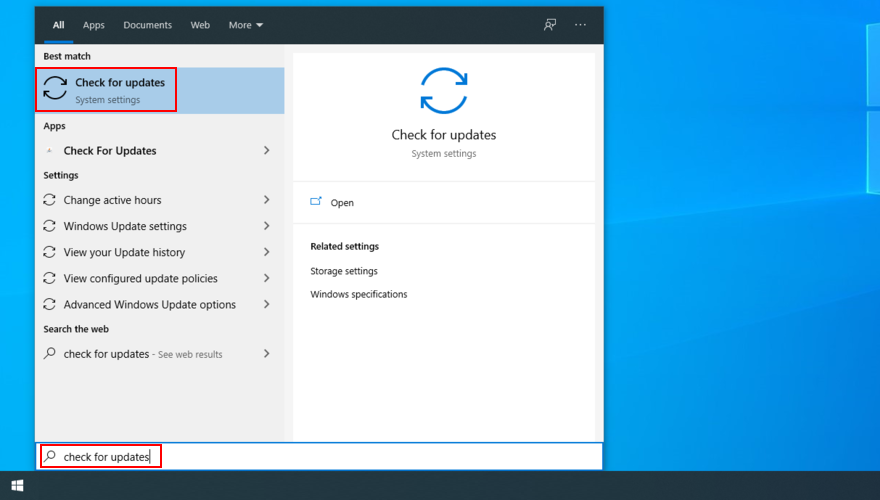
- Windows 10 commencera immédiatement à rechercher de nouvelles mises à jour. Attendez que l’analyse soit terminée
- Cliquez sur Télécharger s’il y a des mises à jour en attente
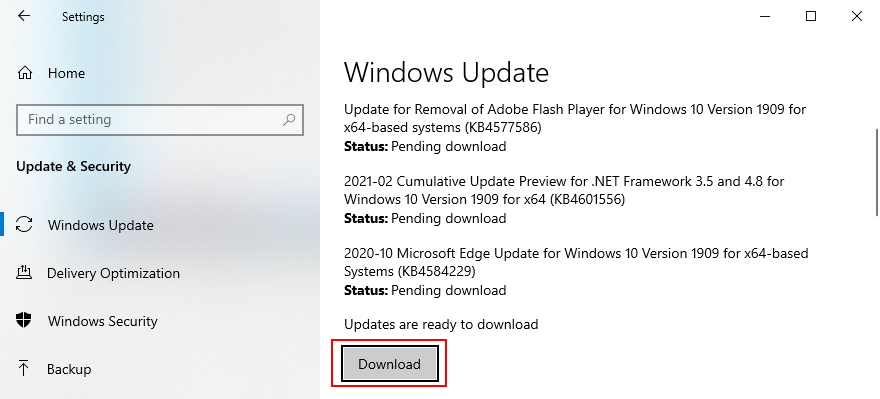
- Le téléchargement et l’installation peuvent prendre un certain temps. Assurez-vous de ne pas éteindre ni redémarrer votre ordinateur pendant cette période
- Redémarrez votre PC (vous devrez peut-être le faire plusieurs fois)
- Essayez d’ouvrir l’explorateur de fichiers maintenant
3. Effacer l’historique de l’explorateur de fichiers
L’Explorateur de fichiers dispose d’un cache pour stocker l’historique de tous les emplacements visités. Si l’application ne fonctionne plus correctement, effacer l’historique de l’explorateur de fichiers pourrait aider.
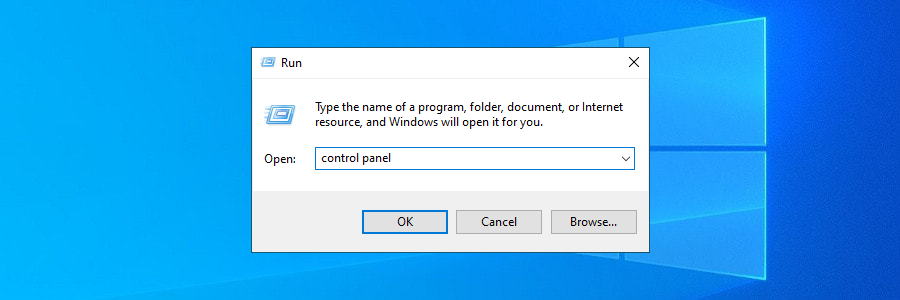
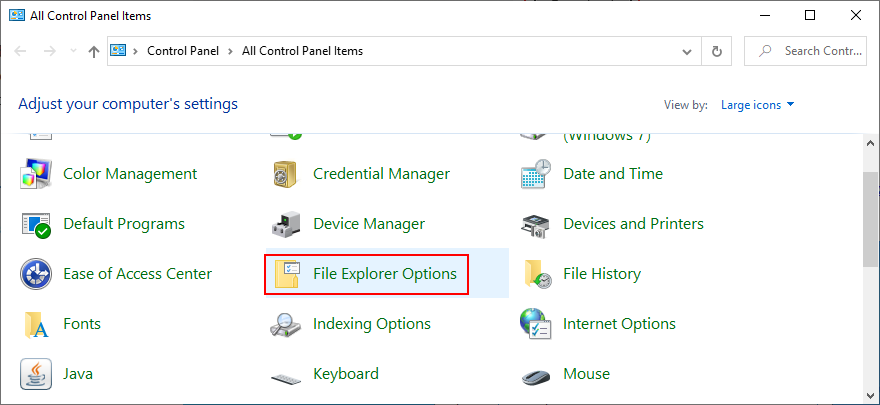
- Appuyez sur Ctrl + R , saisissez panneau de configuration , puis appuyez sur Entrée
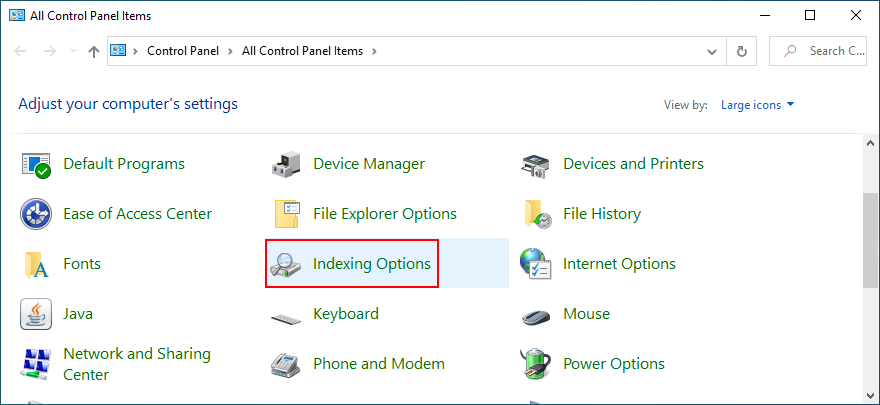
- Recherchez et sélectionnez les Options de l’explorateur de fichiers
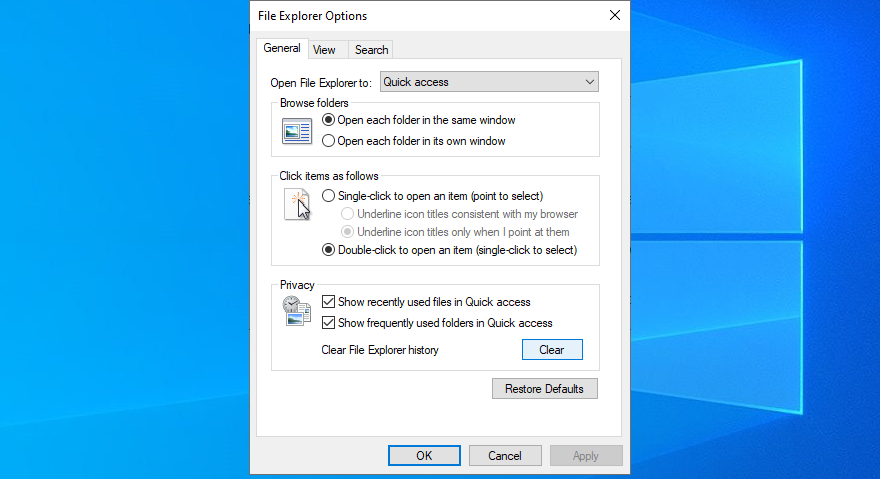
- Cliquez sur Effacer à côté de Effacer l’historique de l’explorateur de fichiers
- Essayez de lancer l’explorateur de fichiers maintenant
Si vous ne pouvez pas accéder au Panneau de configuration, vous pouvez vous tourner vers l’Éditeur du Registre pour supprimer facilement l’historique de l’Explorateur de fichiers.
- Appuyez sur Win + R , saisissez regedit et appuyez sur Entrée

- Cliquez sur Oui si vous y êtes invité par UAC (contrôle de compte d’utilisateur)
- Copiez et collez l’adresse suivante pour visiter cet emplacement
Ordinateur \ HKEY_CURRENT_USER \ Software \ Microsoft \ Windows \ CurrentVersion \ Explorer \ WordWheelQuery
- Cliquez avec le bouton droit sur la première clé et sélectionnez Supprimer
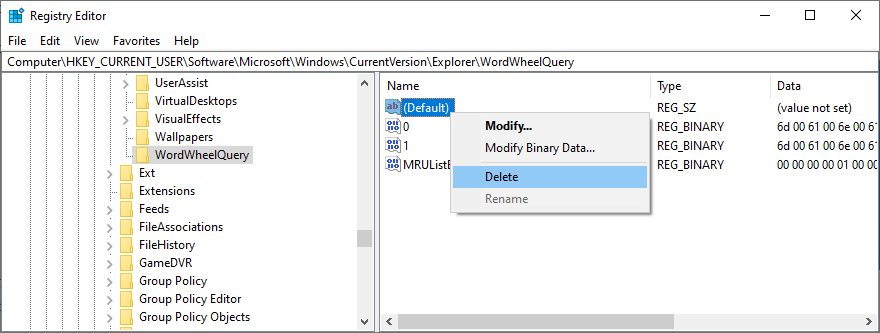
- Faites ceci pour toutes les clés
- Quitter l’éditeur de registre
- Cliquez avec le bouton droit de la souris sur la barre des tâches et sélectionnez Gestionnaire de tâches
- Sélectionnez le processus Explorateur Windows et cliquez sur Redémarrer
- Essayez d’ouvrir l’explorateur de fichiers maintenant
4. Réinitialiser l’explorateur de fichiers et les options de dossier
Si vous ou une autre personne ayant accès à votre ordinateur avez récemment personnalisé les options de l’Explorateur de fichiers, cela peut expliquer pourquoi l’application a cessé de fonctionner correctement. Mais vous pouvez facilement rétablir les paramètres par défaut.
- Appuyez sur Ctrl + R , saisissez panneau de configuration et appuyez sur Entrée
- Sélectionnez Options de l’explorateur de fichiers
- Cliquez sur Restaurer les paramètres par défaut

- Passer à l’onglet Affichage
- Cliquez sur Réinitialiser les dossiers et sur Oui pour confirmer
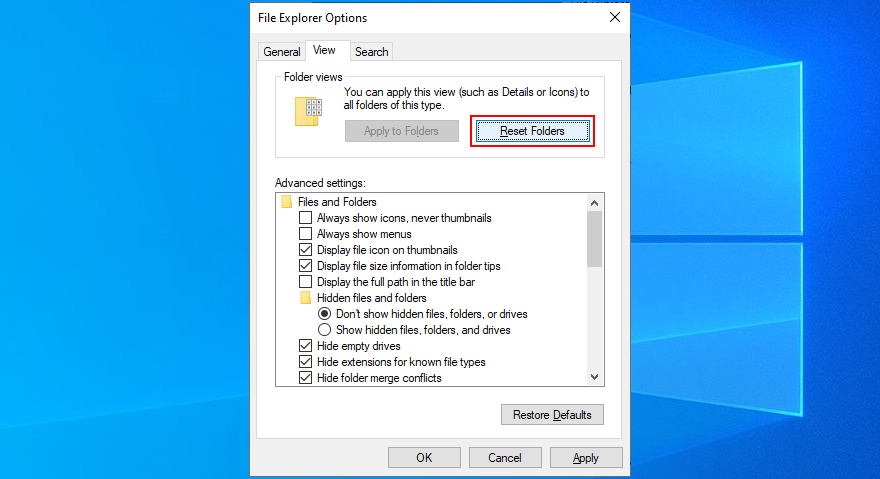
- Cliquez sur Appliquer et quittez
- Essayez d’ouvrir l’Explorateur de fichiers
5. Désinstaller les dernières mises à jour de Windows 10
Microsoft fait parfois des erreurs et envoie des mises à jour système qui gênent l’ordinateur et provoquent des problèmes de fonctionnalité avec certaines applications. Cela pourrait être la raison pour laquelle l’Explorateur de fichiers ne répond plus aux commandes de votre PC Windows 10.
Si vous avez remarqué que l’Explorateur de fichiers a commencé à fonctionner après une mise à jour récente de Windows, vous devez annuler les modifications et désinstaller la mise à jour coupable.
- Appuyez sur Ctrl + R , saisissez panneau de configuration , puis appuyez sur Entrée
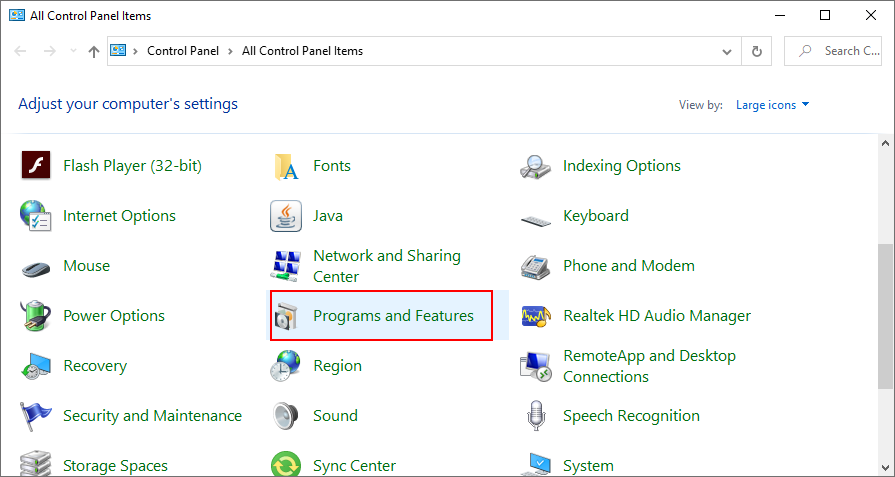
- Recherchez et sélectionnez Programmes et fonctionnalités
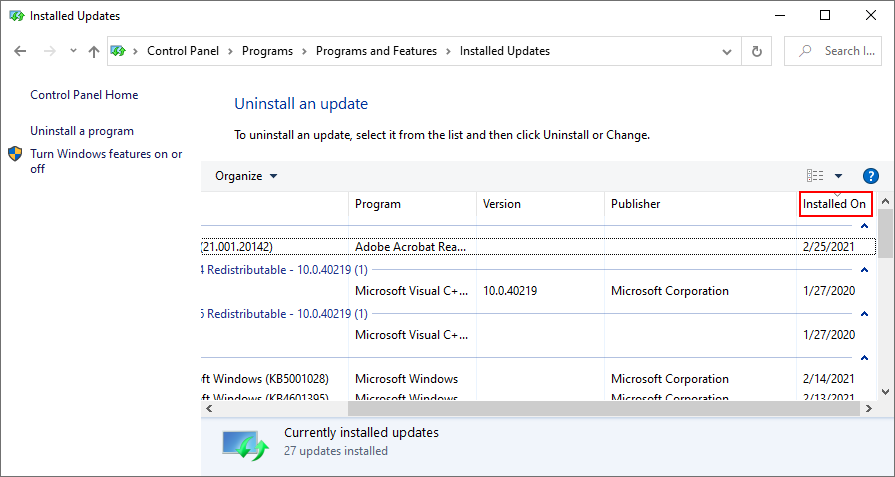
- Cliquez sur Afficher les mises à jour installées sur le côté gauche

- Cliquez sur la colonne Installé le pour trier les mises à jour par date d’installation (la plus récente en premier)
- Double-cliquez sur la première entrée de la liste et cliquez sur Oui pour confirmer la suppression
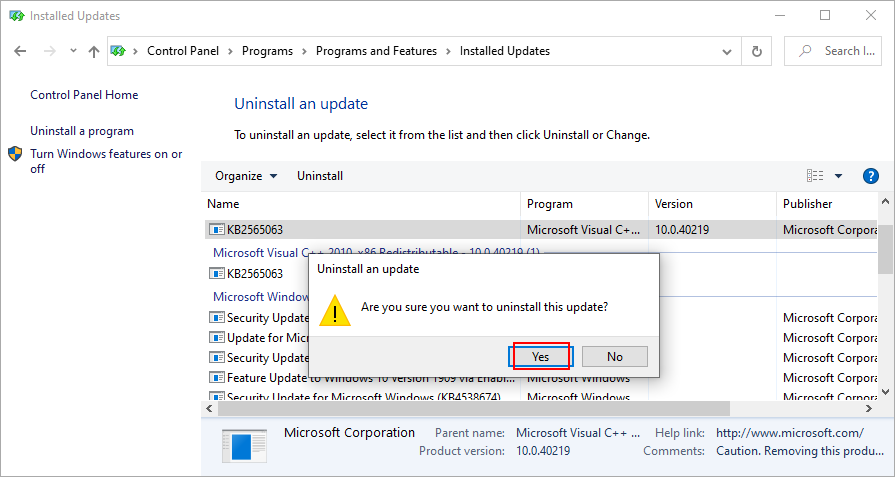
- Redémarrez votre ordinateur et essayez d’ouvrir l’Explorateur de fichiers
6. Reconstruire l’index de recherche
Windows Search est étroitement lié à l’Explorateur de fichiers, donc si le L’application de recherche Windows 10 ne fonctionne pas correctement , l’explorateur de fichiers risque de ne plus répondre correctement aux commandes. Vous pouvez essayer de résoudre ce problème en reconstruisant l’index de recherche.
- Connectez-vous à Windows 10 avec le rôle d’administrateur
- Appuyez sur Ctrl + R , saisissez panneau de configuration , puis appuyez sur Entrée
- Accédez à Options d’indexation et cliquez sur Avancé

- Cliquez sur Reconstruire et attendez
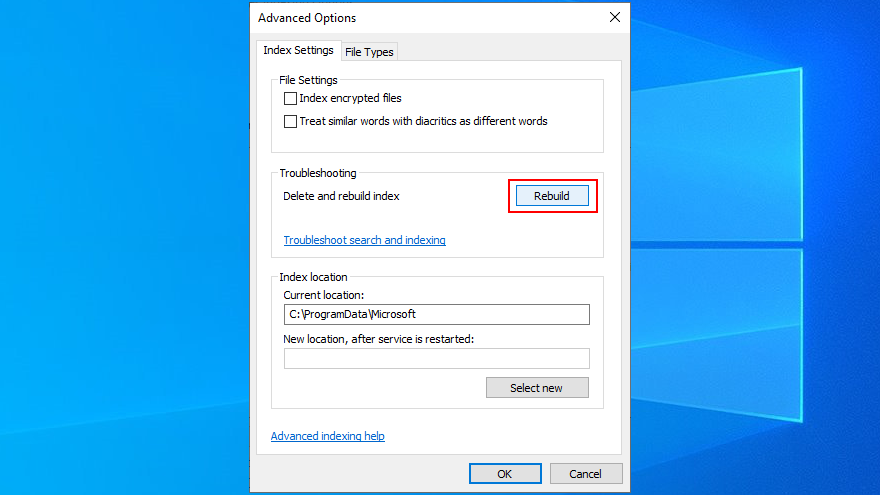
- Redémarrez votre PC et essayez d’ouvrir l’Explorateur de fichiers
7. Exécutez l’utilitaire de résolution des problèmes de recherche et d’indexation
Bien que nous soyons sur le sujet de la recherche Windows qui pourrait déclencher des erreurs de fonctionnalité de l’Explorateur de fichiers, il est également judicieux d’exécuter l’utilitaire de résolution des problèmes de recherche et d’indexation.
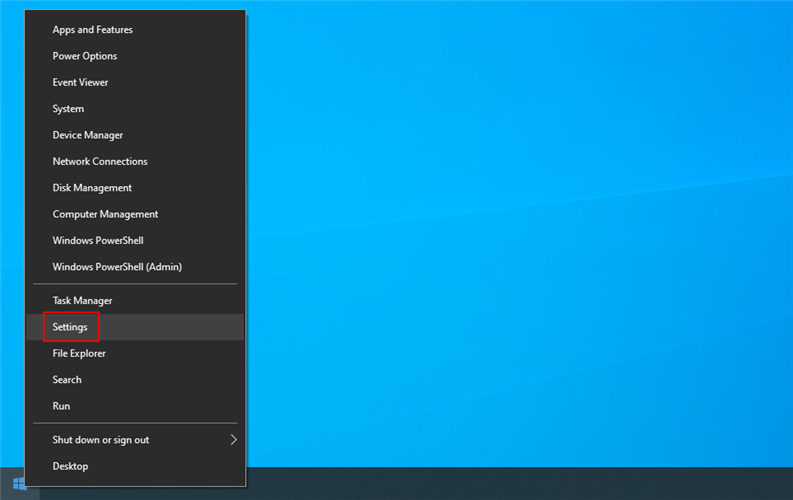
- Cliquez avec le bouton droit sur le bouton Démarrer et accédez à Paramètres
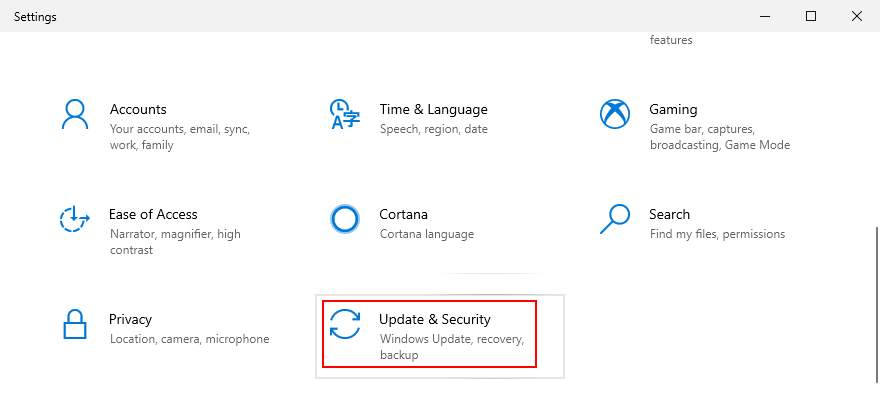
- Sélectionnez Mise à jour et sécurité
- Visit Troubleshoot on the left
- Select Search and Indexing and click Run the troubleshooter
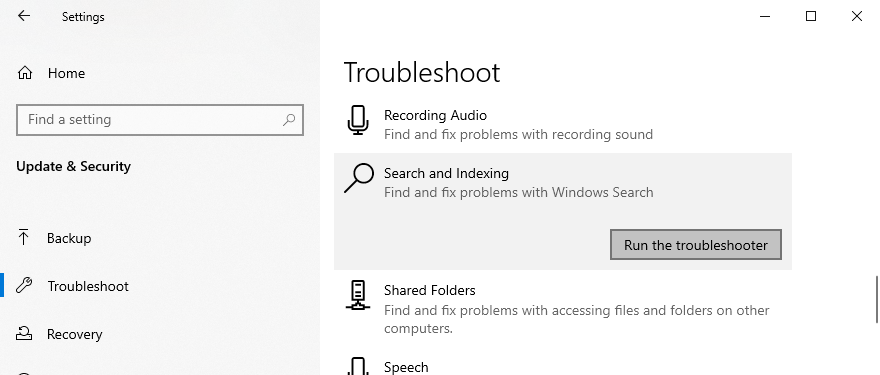
- Follow the instructions
- Reboot your PC and try to open File Explorer
8. Remove extra shell extensions
If you have installed many applications on your computer, they could have flooded your Windows Explorer right-click menu. It could be the reason why File Explorer is no longer responsive.
However, you should be able to solve this problem by identifying the extra context menu items and removing them from your PC. The easiest way to do it is by turning to a third-party app that’s free, lightweight, and easy to use: ShellMenuView.
How to use ShellMenuView:
- Download ShellMenuView from the official website
- Unzip the downloaded archive
- Launch ShellMenuView. It auto-loads all your context menu items
- Select all context menu items you don’t need, right-click, and select Disable Selected Items (or press F7)
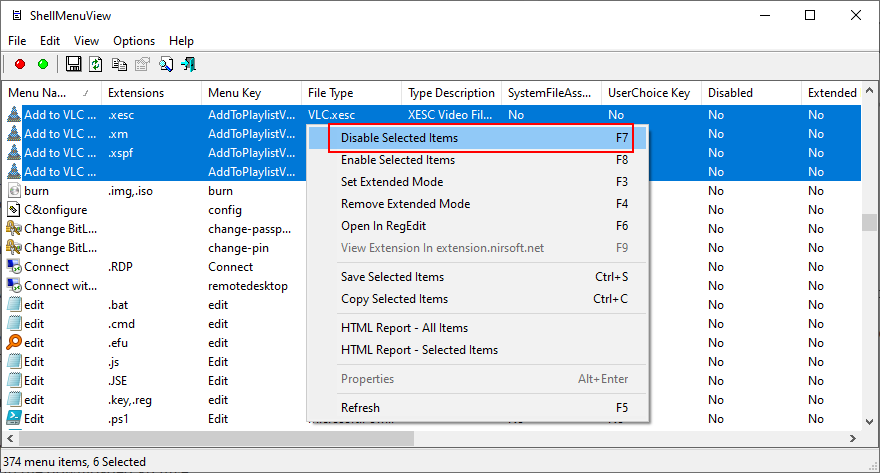
- Exit the tool
- Restart your machine and try to access File Explorer
9. Reset app associations to default
Microsoft is pretty stubborn when it comes to the default apps used to open certain types of files. And it’s always pushing you to use its own apps. So, if you have third-party apps set as the default ones, it could be the reason why File Explorer is not working properly.
How to reset app associations to default:
- Right-click the Start button and go to Settings
- Select Apps
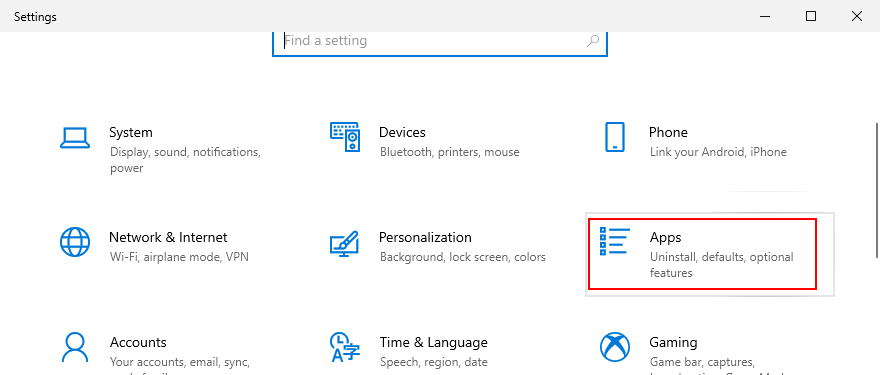
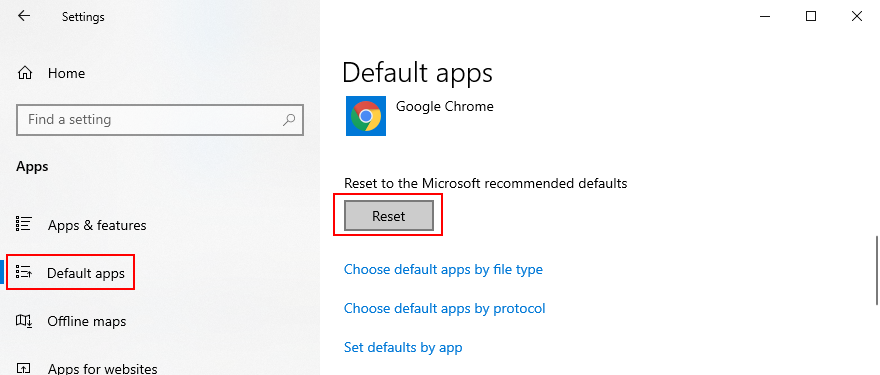
- Go to Default apps on the left side
- Under Reset to the Microsoft recommended default, click Reset
- Restart your PC and try to open File Explorer
10. Use System Recovery mode
Any number of unforeseen events could have caused File Explorer to stop working properly. Fortunately, you can roll back Windows 10 to a restore point to undo all changes made at the software level.
Keep in mind that it means all your games and applications installed after that restore point was created will disappear from your PC. So you will have to reinstall everything. If you have login credentials stored on Windows, you should create a backup just to be sure (in case you haven’t already done this by now).
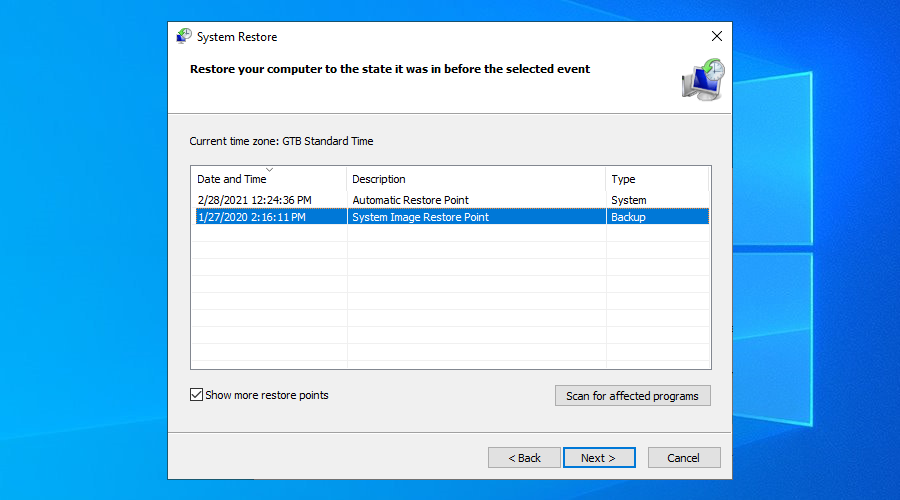
How to use System Restore:
- Press Ctrl + R, type control panel, and press Enter
- Select Recovery
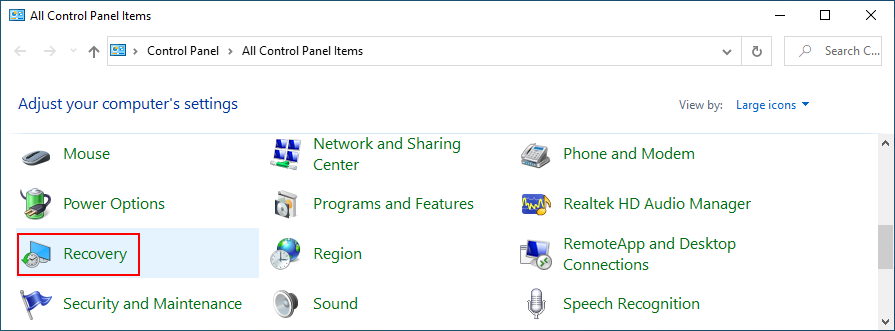
- Click Open System Restore
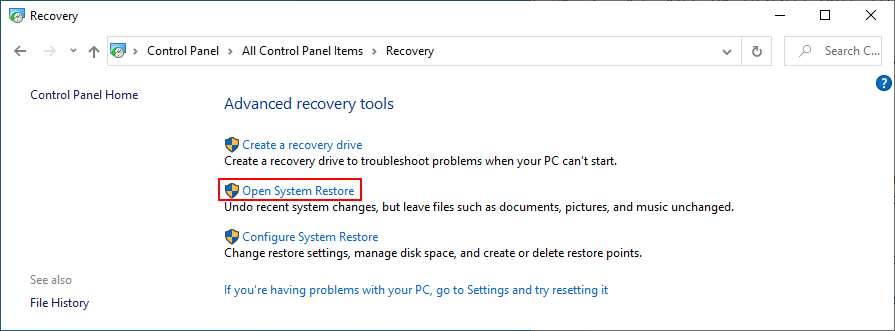
- Pick a checkpoint from the list and click Next
- Follow the on-screen instructions and restart your computer
- If recovery was successful, try to open File Explorer now
11. Change display settings
Many users claim that File Explorer stopped responding to commands after customizing their display settings, like changing the font type or size. It seems that the explorer.exe process has trouble with UI modifications, so you should revert your display settings to default to stay on the safe side.
- Right-click the Start button and go to Settings
- Select System and go to Display
- Click the dropdown menu under Change the size of text, apps, and other items and select 100% (Recommended)
- Set the Display resolution to the Recommended value
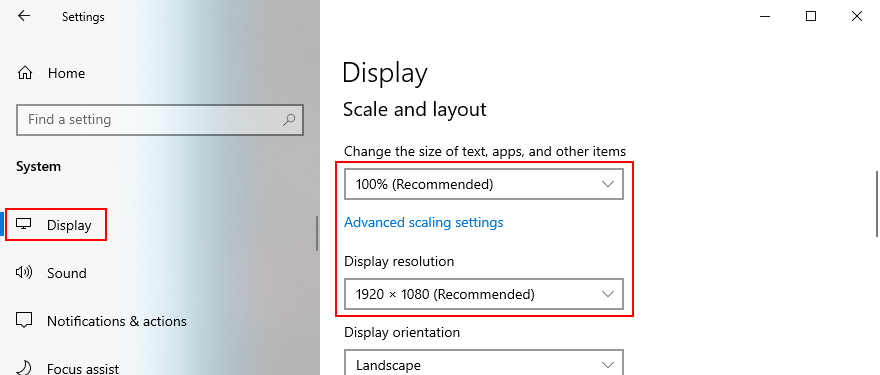
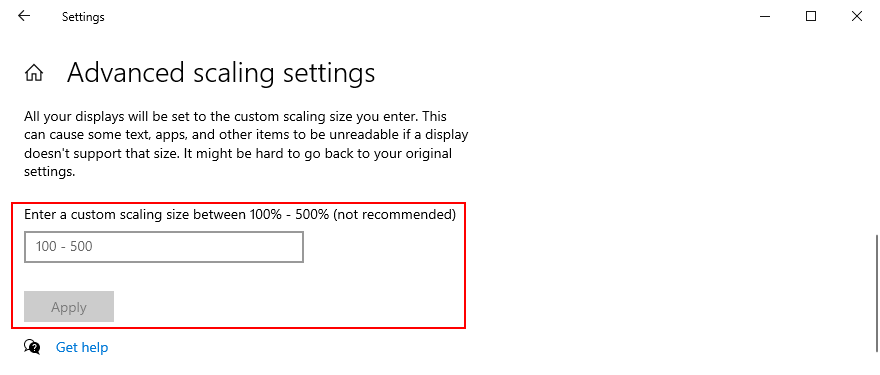
- Click Advanced scaling settings
- Clear any values written at Custom scaling and click Apply
12. Update your video driver
Display issues could also be caused by an incompatible or outdated GPU driver. It trigger problems not only in the games but also in the game launchers. Here’s how to update your video driver.
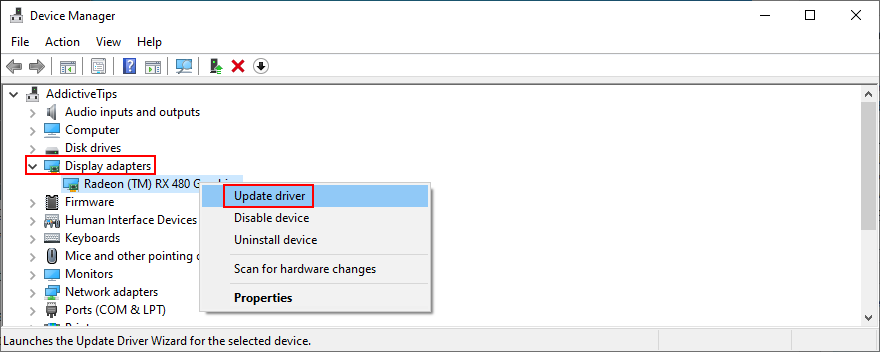
- Press Ctrl + R, type devmgmt.msc, and hit Enter to access Device Manager

- Expand the Display adapters
- Right-click your video device and select Update driver
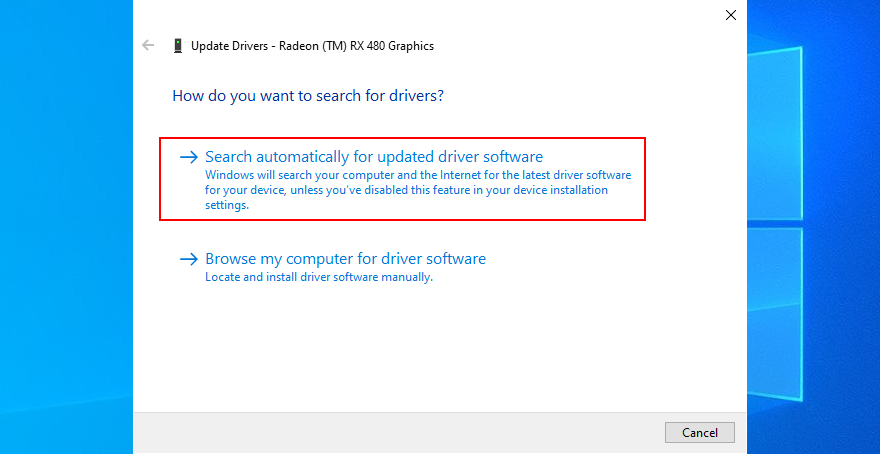
- Click Search automatically for updated driver software
- If you see the The best drivers for your device are already installed message, click Search for updated drivers on Windows Update
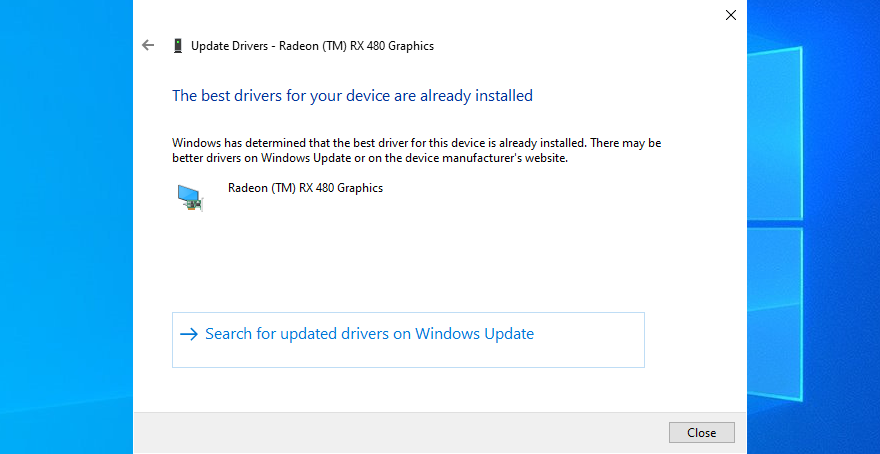
- Reboot your PC and try to open File Explorer
If Microsoft fails to find a newer display driver, you can look it up on your manufacturer’s website by taking into account the driver name and current version. However, if you don’t want to risk getting the wrong driver for your monitor, which could cause serious issues on your computer, then we suggest opting for a driver updating tool.
Such applications automatically detect all drivers installed on your PC, indicate the obsolete ones, find newer and compatible versions on the Internet, as well as download and install the drivers. Plus, you can use this type of program to update multiple drivers at the same time.
13. Make room for more files on your hard disk
Windows 10 needs free disk space to run its processes correctly and keep services active. Otherwise, it will not be able to create auxiliary files and download the required data. If you get notified by the insufficient disk space message on your PC, it could be the reason why File Explorer is no longer responding to commands.
There are two ways to fix this problem: add more room or free up disk space.
How to allocate more disk space:
In the first case, you can attach an external hard drive or allocate more disk space from a larger partition to the Windows drive. You don’t need to use third-party software since you can use the built-in Disk Management app.
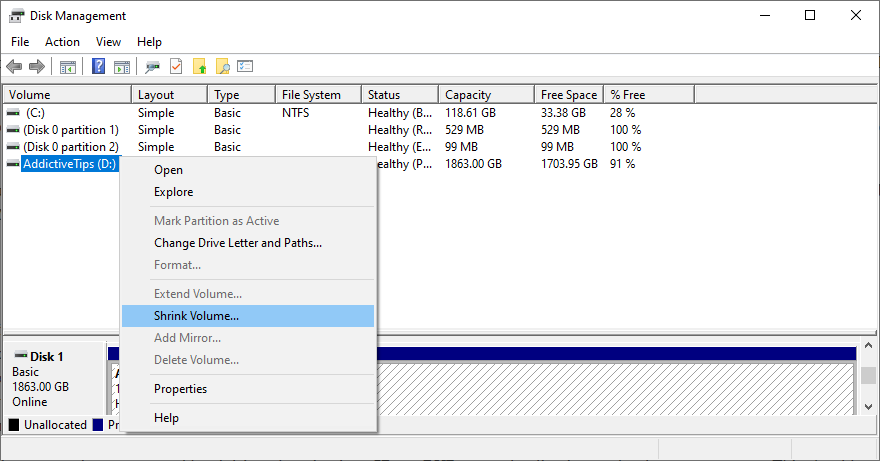
- Press Ctrl + R, type diskmgmt.msc, and press Enter
- Select a big partition that doesn’t host the operating system, right-click it, and select Shrink Volume
- Set the new amount of space for the big partition and click Shrink
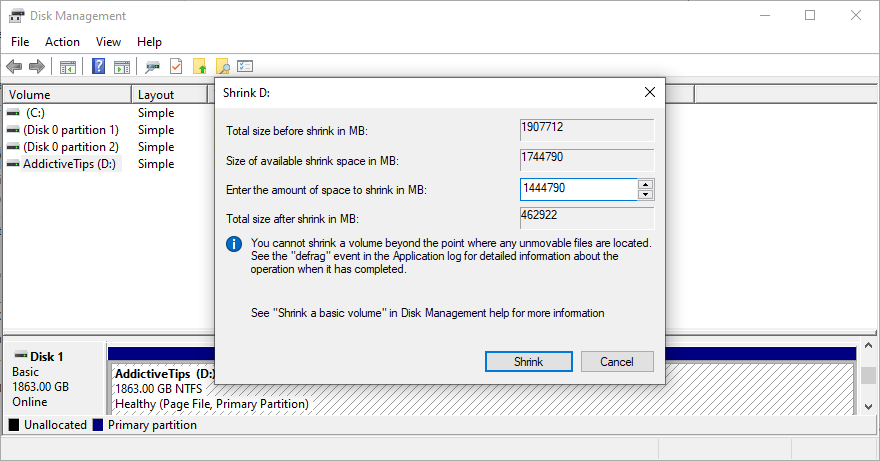
- Select the drive with the OS, right-click it, and choose Extend Volume
- Write its new volume size by adding the entire free space acquired from the large partition
- Follow the on-screen steps and restart your PC
How to free up disk space:
You can turn to a third-party system cleaner to remove the junk files from your PC, or you can use the integrated Disk Cleanup tool instead.
- Make sure to sign in to Windows 10 as the admin
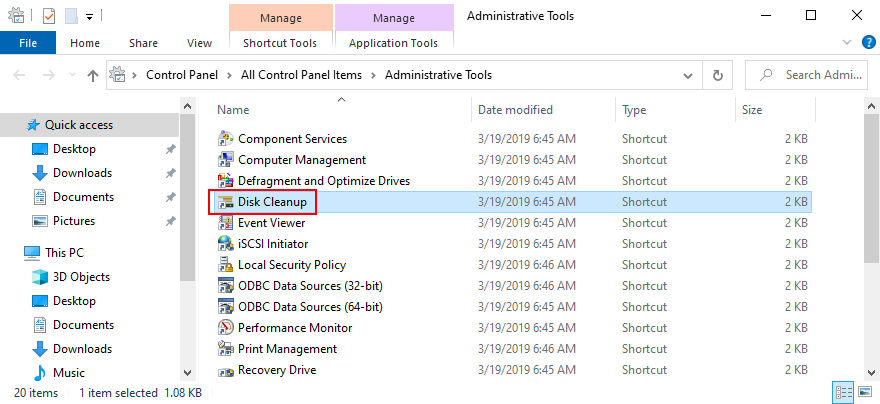
- Press Ctrl + R, type control panel, and press Enter
- Select Administrative Tools

- Launch Disk Cleanup
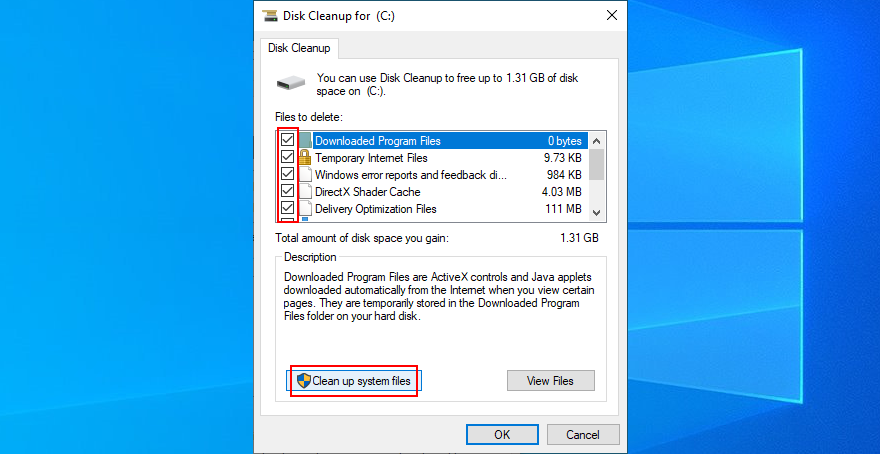
- Select the drive with Windows 10 to clean up (usually C:), and press OK
- At Files to delete, select everything and click Clean up system files
- Once the brief file scan is over, select all again and press OK
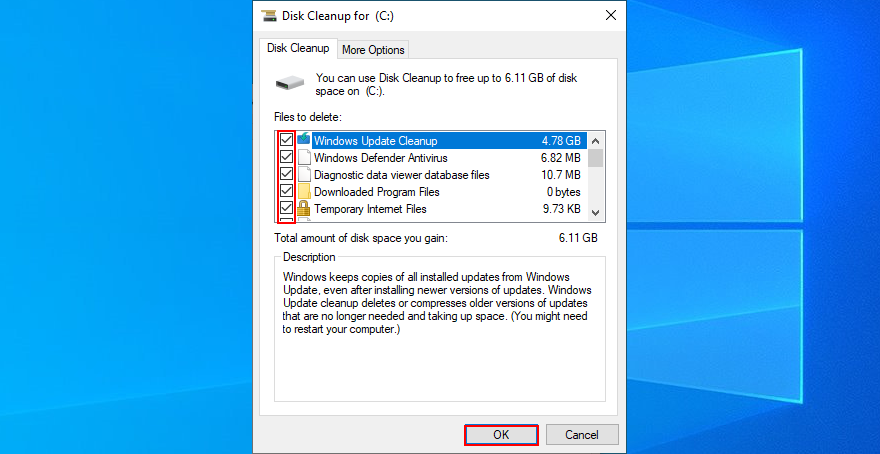
- Restart your PC and try to open File Explorer now
In addition to deleting junk files, you can free up disk space by uninstalling large applications or games you don’t play anymore. It’s also a good idea to move your collection of movies or photos to an external disk, upload it to the cloud, or burn it to discs.
14. Repair OS errors
If your operating system has any corrupt files or processes, it could affect the entire computer, including your File Explorer. However, you can quickly find and repair system errors without turning to an expert or by using third-party software applications.
Instead, you can launch SFC (System File Checker) and DISM (Deployment Image Servicing and Management) from the command-line environment. Don’t worry if you don’t have any experience with CMD. Just follow the simple instructions below.
How to use SFC:
- Press Ctrl + R, type cmd, and press Ctrl + Shift + Enter to run CMD as admin
- Type
sfc/scannowand press Enter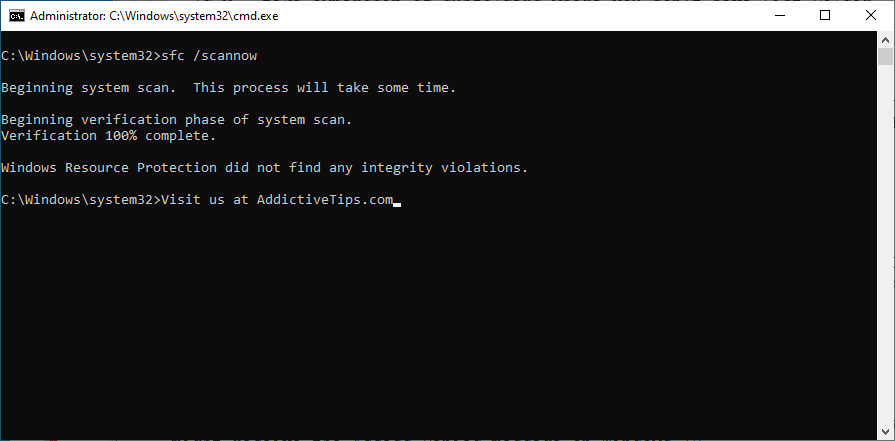
- Wait until SFC finds and fixes corrupt system data
- Restart your computer
If the File Explorer is still not responding to commands after using SFC, perhaps the problem is a bit deeper. You can turn to DISM to repair any damaged files in the component store of the Windows 10 image.
How to use DISM:
- Launch Command Prompt with the administrative role
- Type
DISM/online/cleanup-image/scanhealthand press Enter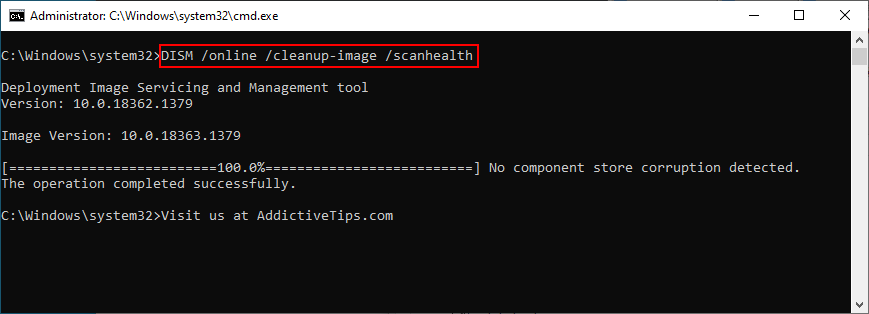
- If DISM finds any errors, you can fix them using
DISM/online/cleanup-image/restorehealth - Once the task is done, reboot your PC and launch CMD as admin again
- Type
sfc/scannow, press Enter, and wait until SFC does its job - Reboot your machine and try to open File Explorer
15. Sign in with a local user account
There are cases when File Explorer stops working properly due to Microsoft account issues. It’s unclear why that happens, but you should be able to solve this problem by logging in with a local user account.
If you already have a local account, make sure to sign in to Windows 10 using that one instead of your Microsoft account. Then, try to open File Explorer.
How to create a local user account (admin):
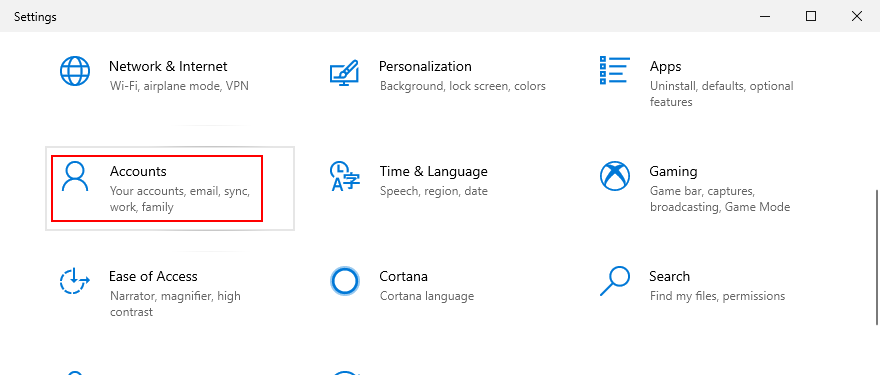
- Right-click the Start button and select Settings
- Go to Accounts
- Click Sign in with a local account instead
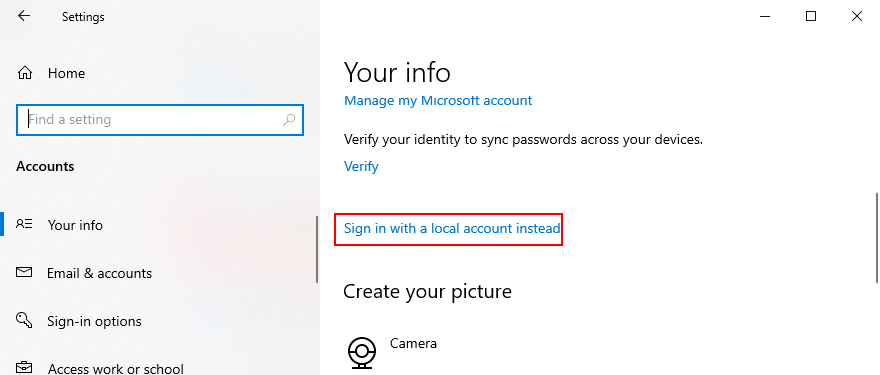
- Verify your identify by specifying your Microsoft account password or PIN
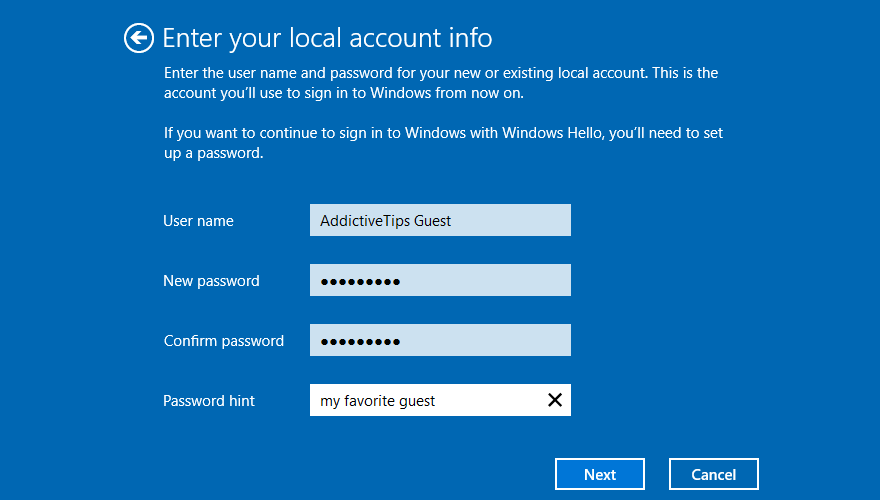
- When you reach the Enter your local account info screen, set the username and password information
- Click Next and then Sign out and finish
- Sign back in using the new local user account
- Try to access File Explorer
In other cases, File Explorer functionality issues are tied to the administrator account. It can be challenging to identify and fix the permission problems, but it’s easier to set up a local user account for guests.
How to create a local user account (guest):
- Right-click the Start button and go to Settings
- Select Accounts
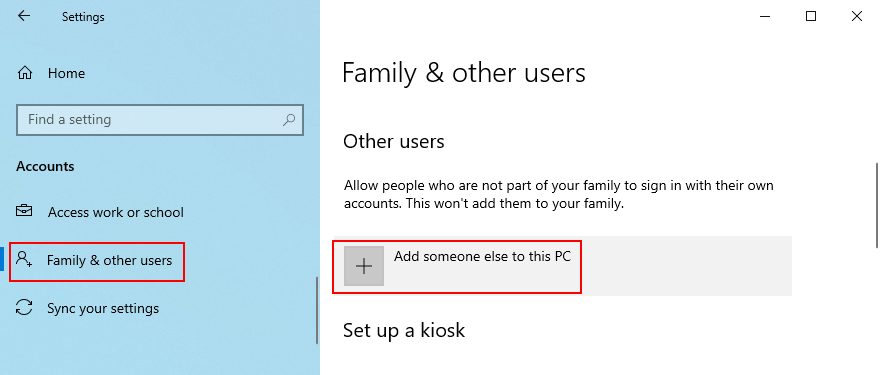
- Select Family & other users on the left side
- Click Add someone else to this PC
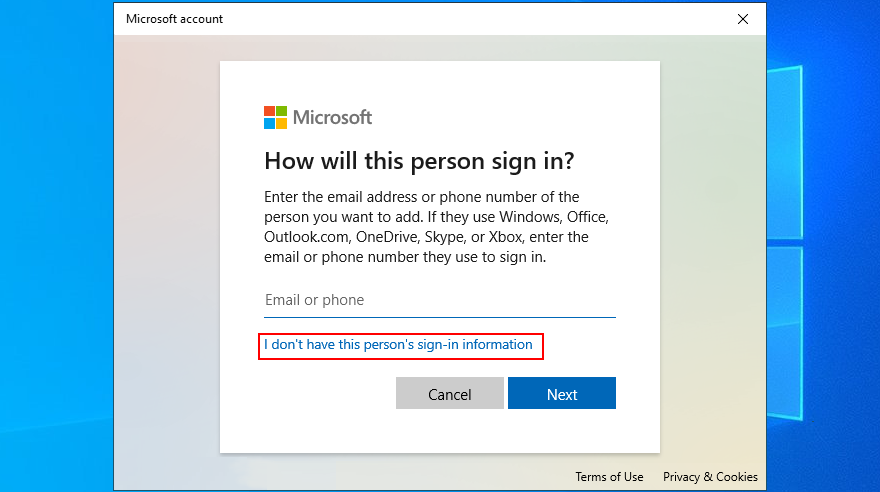
- When asked to enter the Microsoft account, click I don’t have this person’s sign-in information
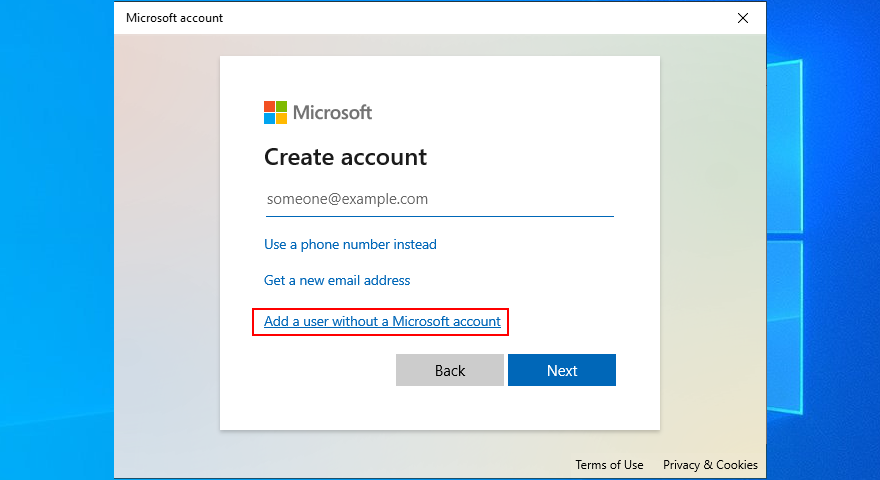
- Click Add a user without a Microsoft account
- Set the username and password of the new guest account
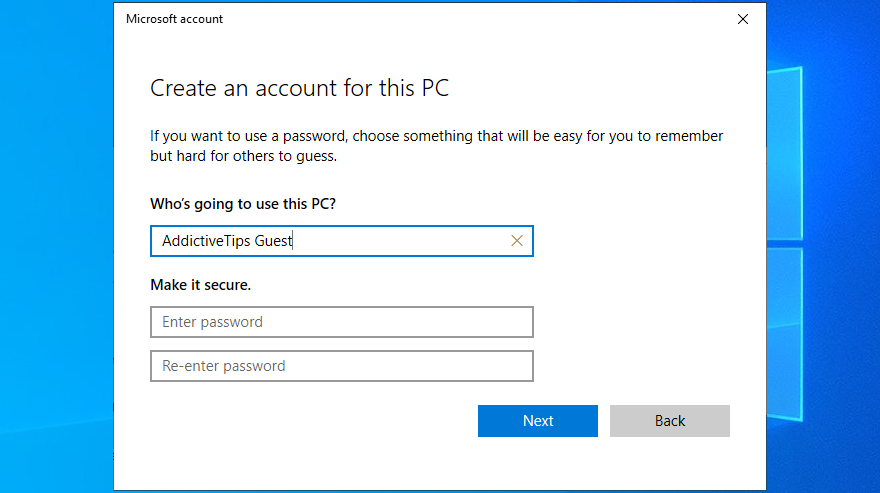
- Click Next
- Sign out of Windows 10 and sign back in using the guest account
- Try to open File Explorer
16. Check RAM issues
Any problems with your memory card could have a negative impact on various processes on your Windows 10 computer, including File Explorer. However, you can swiftly diagnose and fix RAM issues using an integrated system tool: Windows Memory Diagnostic.
How to use Windows Memory Diagnostic:
- Make sure to save any ongoing projects and quit all running applications
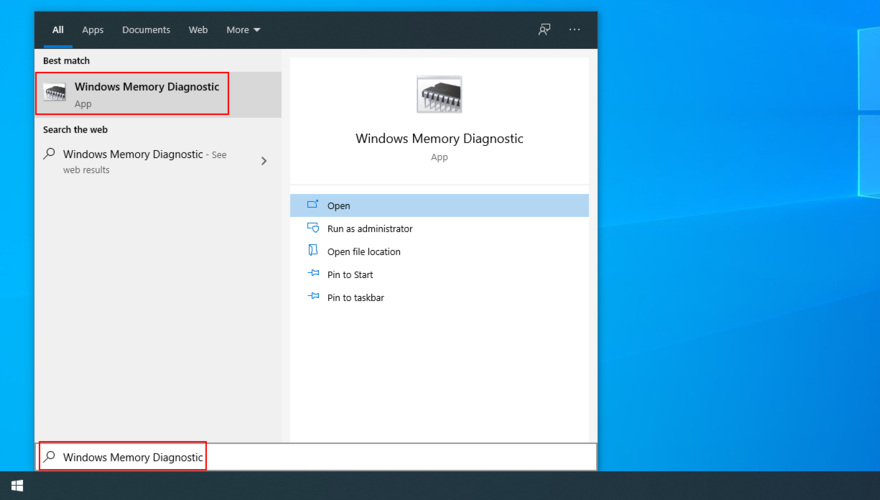
- Press the Windows key, type Windows Memory Diagnostic, and press Enter to launch this app
- Click Restart now and check for problems (recommended)
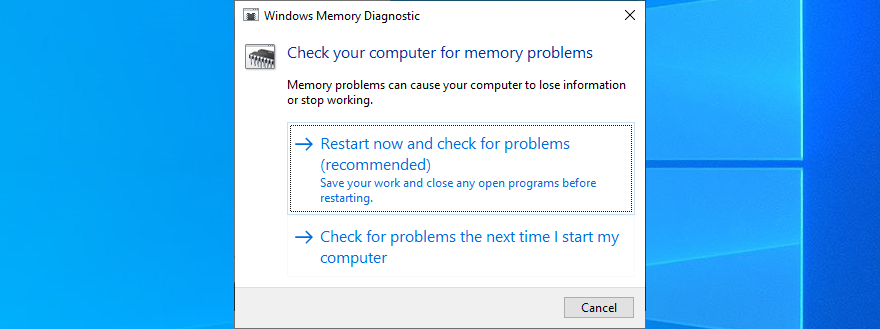
- Wait for the app to find and fix RAM issues during boot
- Sign in to Windows 10 and try to access File Explorer
17. Clean boot Windows 10
A clean Windows 10 boot means creating a safe environment to start Windows only with the essential processes, services, and drivers. So, if File Explorer functionality problems were triggered by a faulty process, service or driver, this is the way to fix it.
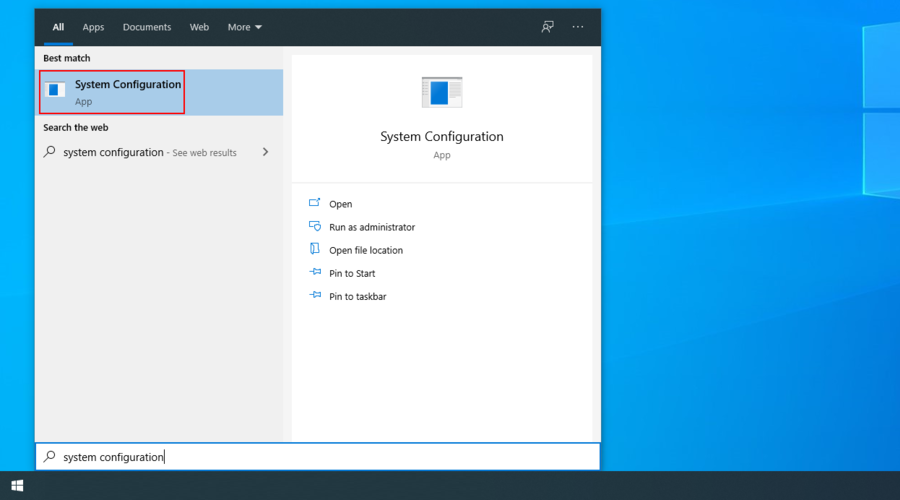
- Click the Start button, type System Configuration, and press Enter
- Select the Services tab, uncheck Hide all Microsoft services box, and click Disable All
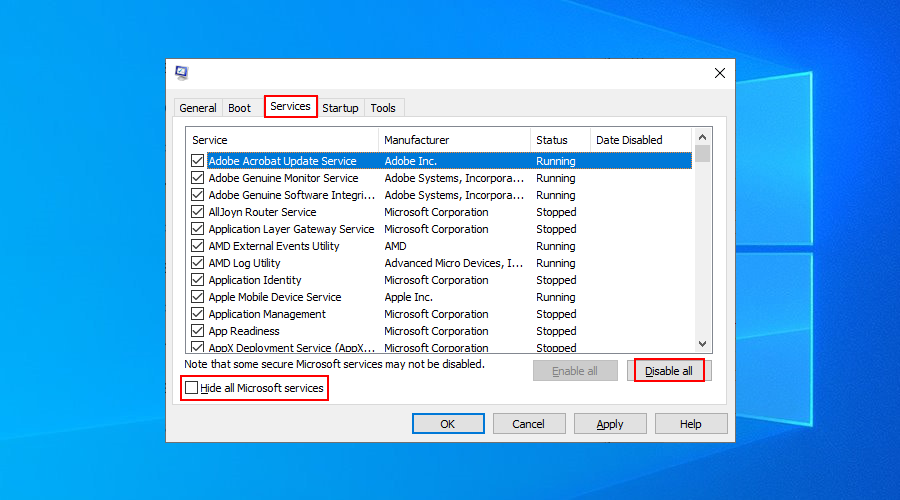
- Go to the Startup tab and click Open Task Manager
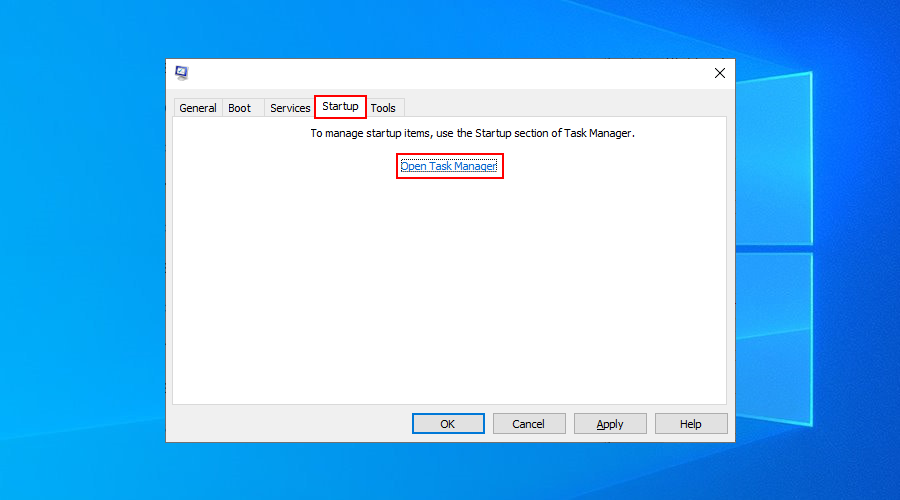
- For every process with the Enabled status, select and disable it
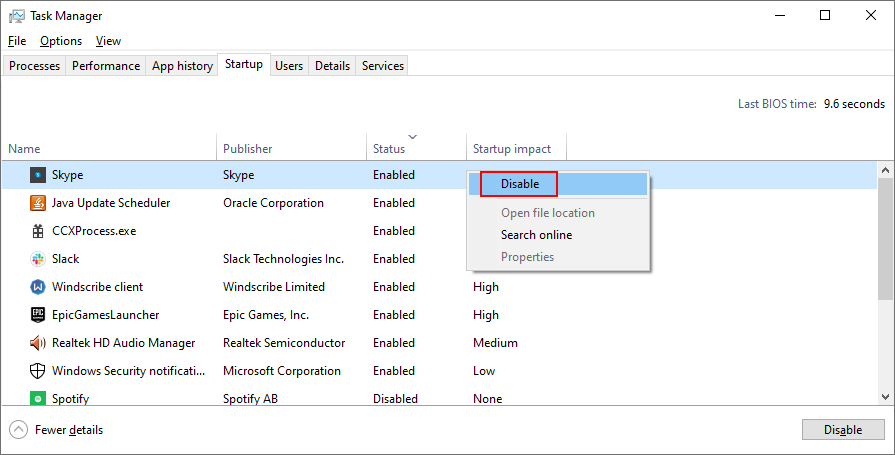
- Restart your computer and try to launch File Explorer
File Explorer can start working again
To conclude, if File Explorer is no longer responding to any commands, there’s no reason to panic since there are multiple solutions you can try.
For instance, you should restart explorer.exe, update Windows 10, clear the File Explorer history, reset File Explorer and folder options, uninstall recent Windows 10 updates, and rebuild the Windows Search index.
You can also run the Search and Indexing troubleshooter, uninstall unused context menu items, reset app associations, use System Restore, change display settings, and update the video driver.
Furthermore, it’s a good idea to make room for more files on your hard disk, repair OS errors using SFC and DISM, sign in with a local user account, repair any RAM errors, and clean boot Windows 10.
If everything fails or if you simply don’t want to deal with File Explorer anymore, then we suggest checking out the best file managers for Windows 10.
Did any of these solutions work for you? Did we miss any important steps? Let us know in the comment section below.