Quand il s’agit de travailler à domicile, il y a peu de choses pires que d’être en retard pour une réunion en raison d’une panne de webcam. D’autres types d’utilisateurs sont également affectés par les caméras défectueuses , comme les joueurs.
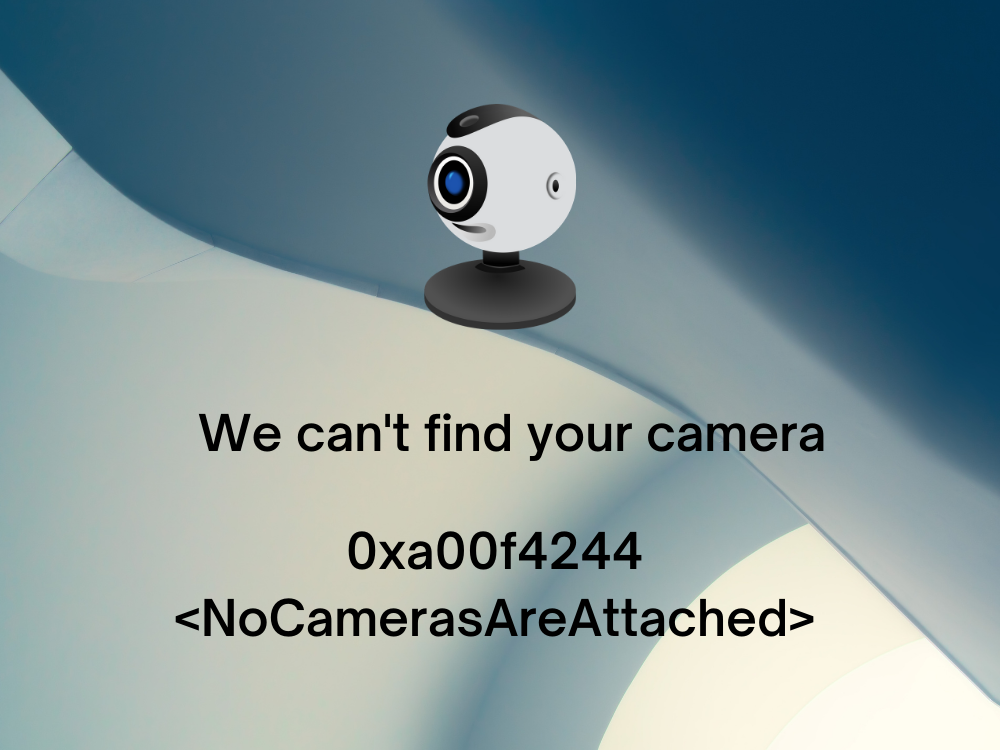
0xa00f4244 NoCamerasAreAttached est un message d’erreur courant affiché sur l’écran des utilisateurs de Windows 10 lors de la tentative de lancement de l’application Appareil photo. L’écran de la webcam devient noir et affiche du texte blanc, comme dans l’image ci-dessous.

Nous ne pouvons pas trouver votre caméra
Cela arrive généralement aux ordinateurs portables ou aux moniteurs avec webcams intégrées. Mais l’erreur peut également se produire sur les adaptateurs de webcam externes. Ne vous inquiétez pas, cependant, car vous devriez être en mesure de gérer cette question sans faire appel à un professionnel. C’est généralement une solution simple qui ne vous a jamais traversé l’esprit, comme appuyer sur une combinaison de touches qui active la webcam.
CORRECTIF: 0xa00f4244 NoCamerasAreAttached
Avant de tenter de réparer le code d’erreur 0xa00f4244 NoCamerasAreAttached sur votre ordinateur, il est conseillé de créer un point de restauration système . Les dernières solutions de cette liste sont avancées et apportent des modifications importantes à votre ordinateur. En cas de problème, vous pouvez toujours ramener Windows 10 à un point de restauration stable et réessayer.
Bien que les correctifs ci-dessous soient adaptés à l’application Appareil photo, ils peuvent également être appliqués à d’autres applications (par exemple, si votre la webcam ne fonctionne pas sur Skype ).
1. Exécutez Windows Update
Étant donné que l’erreur 0xa00f4244 NoCamerasAreAttached est déclenchée par l’application Appareil photo et que l’application Appareil photo est liée à Windows, vous devez rechercher les mises à jour du système et télécharger toutes les mises à jour disponibles. Voici comment y parvenir facilement:
- Appuyez sur la touche Win , saisissez Rechercher les mises à jour , puis appuyez sur Entrée
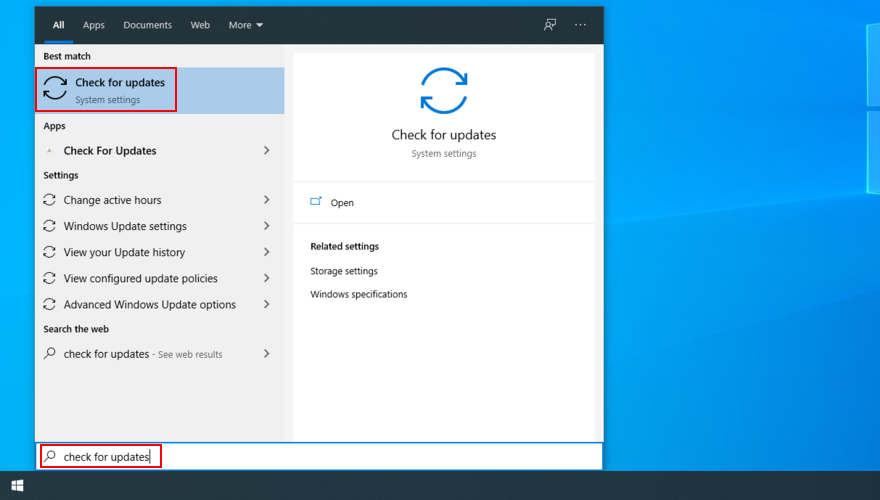
- Cliquez sur Rechercher les mises à jour et attendez que la recherche en ligne soit terminée
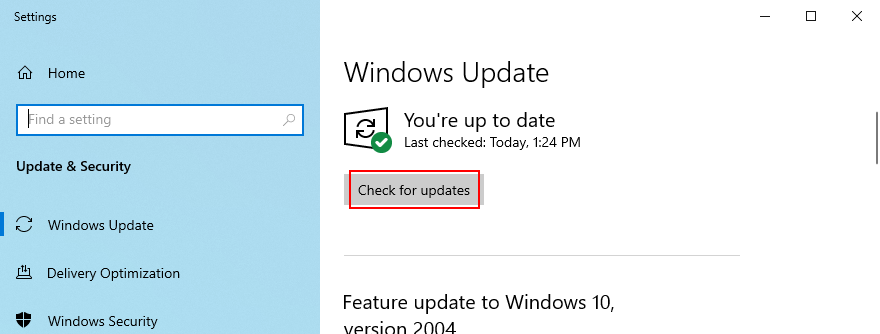
- S’il y a quelque chose de disponible, cliquez sur Télécharger
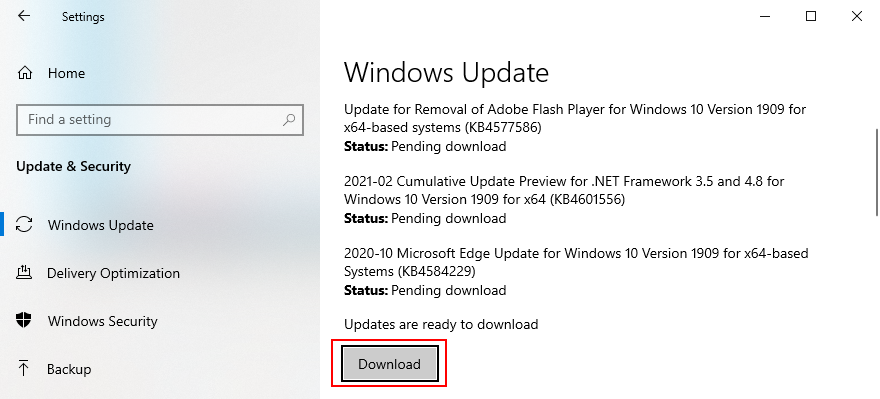
- N’éteignez pas et ne redémarrez pas votre PC pendant la mise à jour
- Une fois terminé, lancez l’application Appareil photo et recherchez les erreurs
2. Vérifiez le couvercle, le câble et le commutateur de la webcam
Certains ordinateurs portables et moniteurs avec webcams intégrées ont des couvercles ou des boutons que vous devez physiquement pousser ou tirer pour activer la webcam. C’est une mesure de sécurité contre les pirates de webcam. Par exemple, les ordinateurs portables MSI vous obligent à appuyer sur FN + F6 pour basculer la webcam. Pendant ce temps, les systèmes ASUS fonctionnent avec F10.
Étant donné que le message d’erreur 0xa00f4244 NoCamerasAreAttached indique clairement que Windows a du mal à identifier votre webcam, assurez-vous d’appuyer sur le bouton ou de basculer l’interrupteur responsable de la réactivation de la webcam.
Dans certains cas, il est nécessaire de connecter votre moniteur à l’ordinateur à l’aide d’un câble spécial pour la webcam, même si l’appareil est intégré à l’écran. Vérifiez le boîtier de la webcam pour un câble et branchez-le.
Si le câble était déjà installé, essayez de le détacher et de le reconnecter. Vous pouvez également essayer d’utiliser un autre port USB au cas où le port d’origine ne fonctionnerait pas correctement.
3. Vérifiez les autorisations de la webcam
Votre appareil et vos applications nécessitent un accès à la webcam. Par exemple, Microsoft Teams ne peut pas fonctionner avec une webcam sans votre permission. Sinon, vous continuerez à voir le 0xa00f4244 NoCamerasAreAttached sur votre écran. Cela s’applique particulièrement aux utilisateurs qui ont récemment effectué une mise à jour majeure de Windows ou qui ont actualisé le système d’exploitation.
- Connectez-vous à Windows 10 avec des droits d’administrateur
- Cliquez avec le bouton droit de la souris sur le bouton Démarrer et accédez à Paramètres
- Sélectionnez Confidentialité
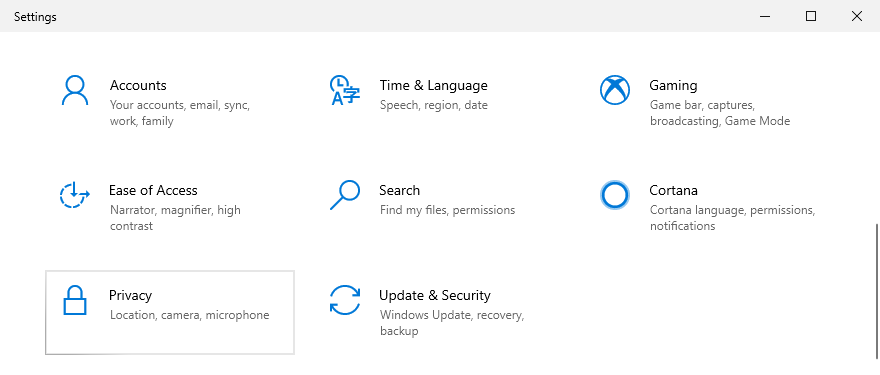
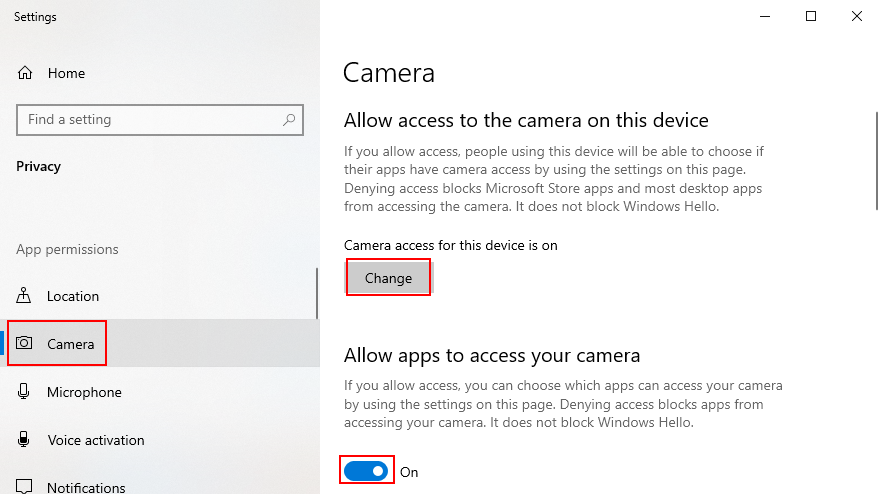
- Au niveau des autorisations de l’application sur le côté gauche, sélectionnez Caméra
- Cliquez sur Modifier et assurez-vous que L’accès à la caméra pour cet appareil est activé. Vous pouvez également autoriser l’accès de la caméra à d’autres applications, telles que Skype
- Activez Autoriser les applications à accéder à votre caméra
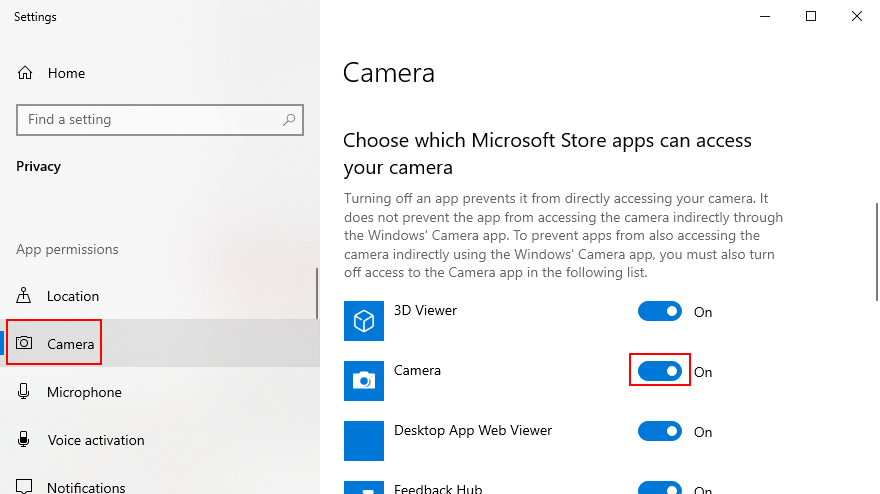
- Dans Choisissez les applications du Microsoft Store qui peuvent accéder à votre caméra , définissez Caméra sur Activé
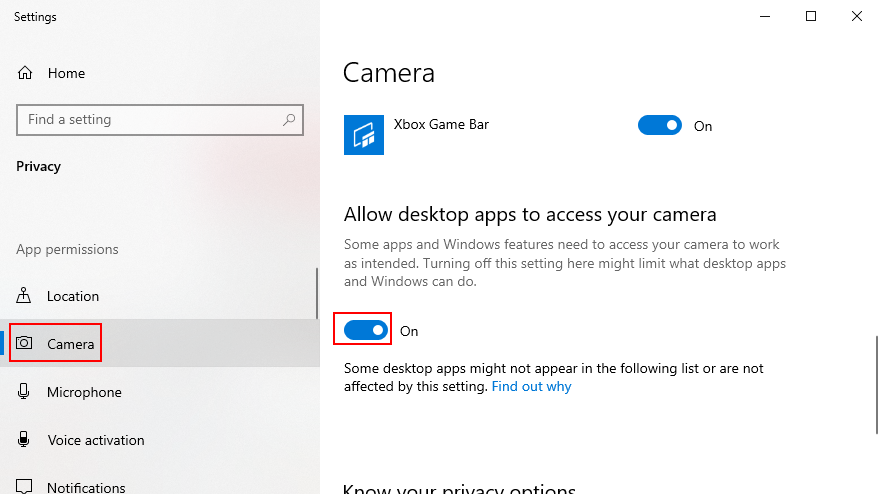
- Faites défiler jusqu’à Autoriser les applications de bureau à accéder à votre caméra et définissez-le sur Activé
- Sélectionnez Confidentialité
4. Vérifier la compatibilité de la webcam
Si vous avez acheté ou reçu votre webcam il y a longtemps, il est possible que le matériel ne soit pas pris en charge par Windows 10. Dans ce cas, il n’y a rien d’autre à faire que d’acheter une nouvelle webcam. Il existe une astuce simple pour découvrir rapidement ceci: trouver un fichier appelé stream.sys. Voici ce que vous devez faire:
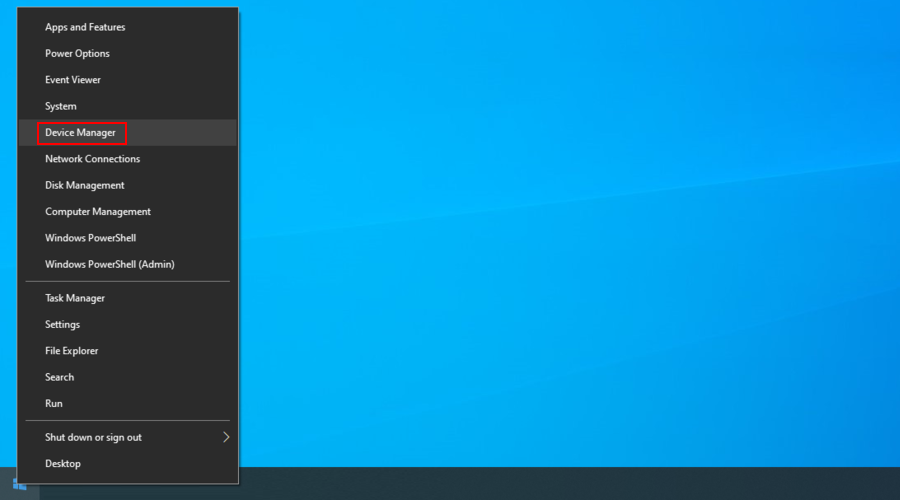
- Cliquez avec le bouton droit sur le bouton Démarrer et sélectionnez Gestionnaire de périphériques
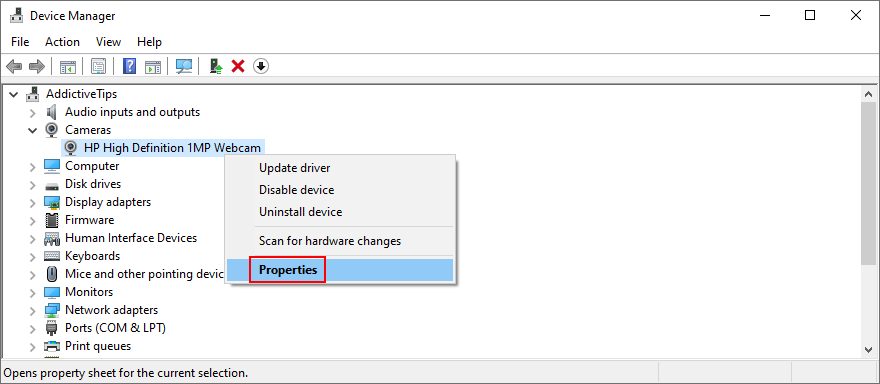
- Développez la catégorie Caméras pour rechercher votre webcam
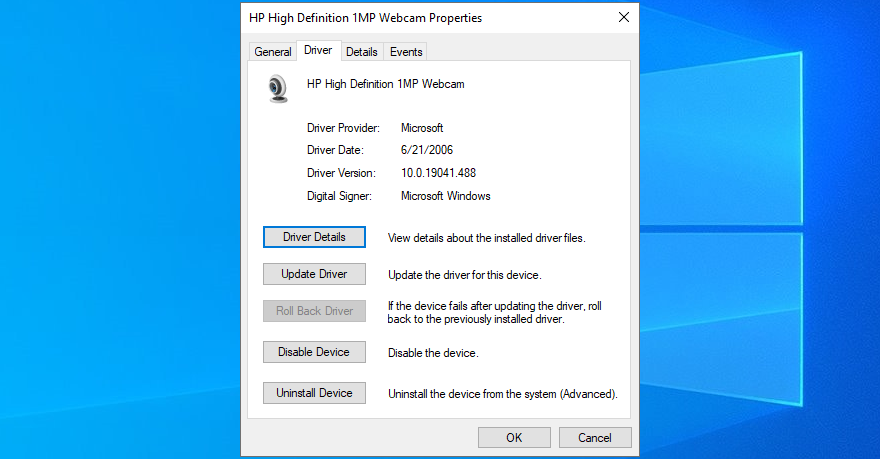
- Cliquez avec le bouton droit sur la webcam et sélectionnez Propriétés
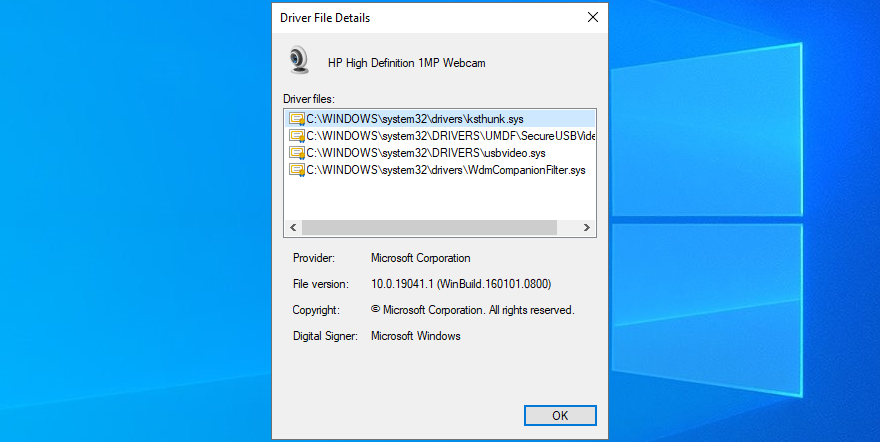
- Accédez à l’onglet Pilote et cliquez sur Détails du pilote

- Dans la liste des fichiers, recherchez stream.sys . Si vous le trouvez, cela signifie que la webcam n’est pas prise en charge par Windows 7 et les versions plus récentes, vous devez donc la remplacer par une nouvelle. Sinon, vous êtes prêt à aller
Si vous ne trouvez pas votre webcam dans le Gestionnaire de périphériques , découvrez comment résoudre ce problème.
5. Vérifiez les pilotes de la webcam
Il le dit dans le message d’erreur: vous devez inspecter les pilotes de votre webcam pour vous assurer que tout est en ordre de marche. Il existe trois approches pour cela: réinstaller le périphérique, mettre à jour le pilote ou restaurer le pilote.
Comment réinstaller la webcam:
- Cliquez avec le bouton droit sur le bouton Démarrer et accédez au Gestionnaire de périphériques
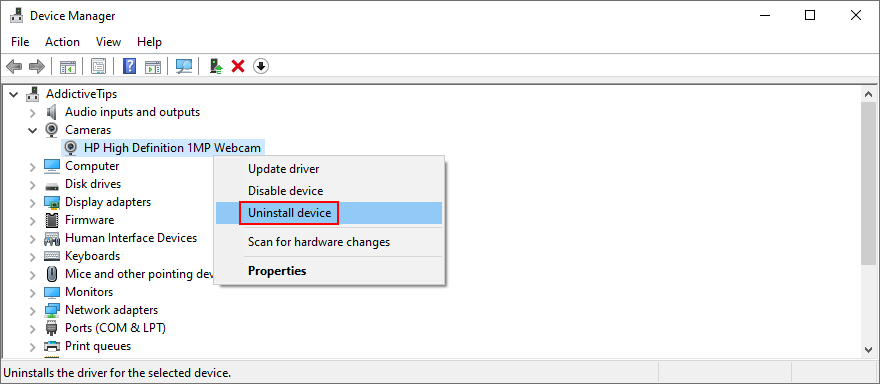
- Recherchez votre webcam dans le groupe Caméras
- Cliquez avec le bouton droit sur l’entrée de la webcam et sélectionnez Désinstaller le périphérique
- Procédez à la suppression de l’appareil
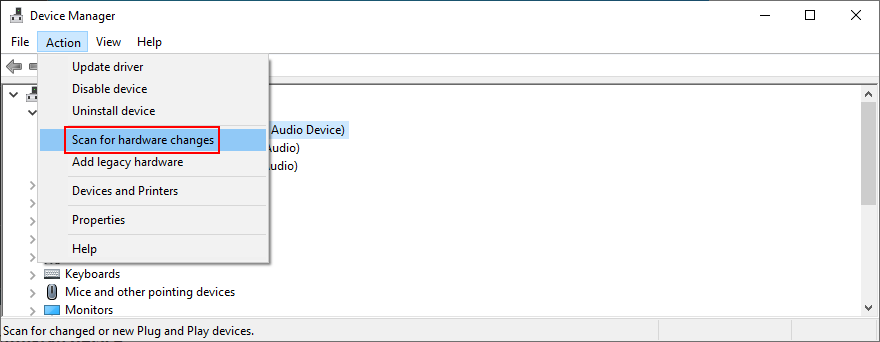
- Cliquez avec le bouton droit sur une entrée et sélectionnez Rechercher les modifications matérielles
- Redémarrez votre ordinateur. Windows réinstalle automatiquement les adaptateurs de webcam
- Ouvrez l’application Appareil photo et recherchez les erreurs

Comment mettre à jour le pilote de votre appareil photo:
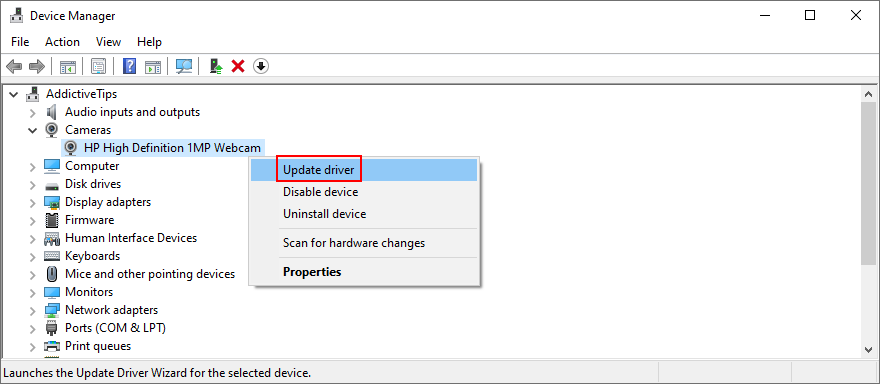
- Dans le Gestionnaire de périphériques , cliquez avec le bouton droit sur votre webcam et sélectionnez Mettre à jour le pilote
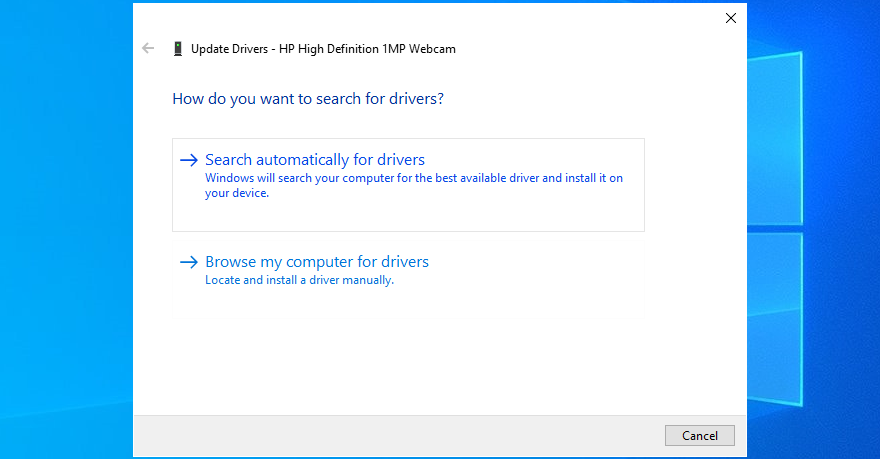
- Cliquez sur Rechercher automatiquement les pilotes et attendez
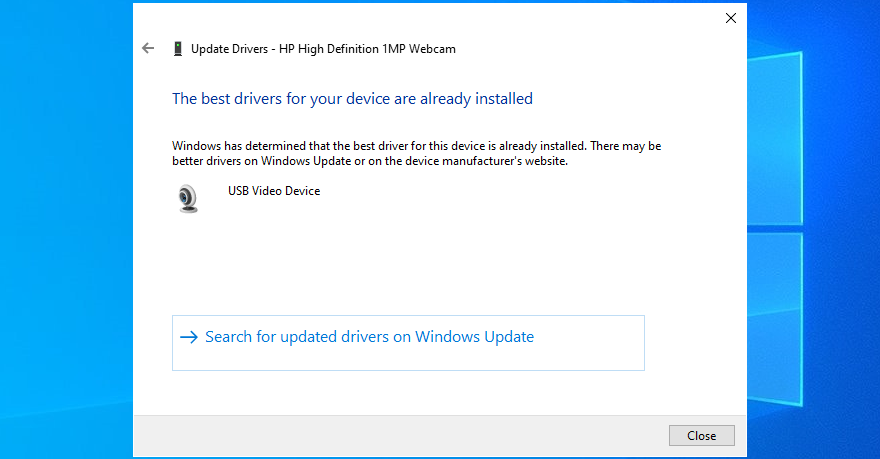
- Si la recherche en ligne ne renvoie rien, cliquez sur Rechercher les pilotes mis à jour sur Windows Update
Si Windows ne trouve pas de pilote plus récent pour votre webcam, accédez au site Web officiel pour rechercher et télécharger une version plus récente. Ensuite, revenez sur les étapes ci-dessus et utilisez Parcourir mon ordinateur pour le logiciel du pilote pour mettre à jour manuellement le pilote de la webcam.
En revanche, si vous avez accidentellement installé un pilote incompatible, vous devez effectuer une restauration.
Comment restaurer le pilote de votre webcam:
- Accédez au Gestionnaire de périphériques
- Cliquez avec le bouton droit sur votre webcam et sélectionnez Propriétés
- Passer à l’onglet Pilote
- Cliquez sur Restaurer le pilote et suivez les instructions
- Si le bouton Restaurer le pilote est grisé, vous ne pouvez pas effectuer de restauration. Vous pouvez donc ignorer toute cette étape
- Redémarrez votre PC et ouvrez l’application Appareil photo pour inspecter les résultats
6. Analysez votre ordinateur à la recherche de logiciels malveillants
Votre ordinateur a peut-être été récemment infecté par des logiciels malveillants sans même s’en rendre compte. En conséquence, l’agent malveillant pourrait avoir désactivé les processus système critiques et les services liés à l’application Appareil photo, et c’est pourquoi vous continuez à voir le message d’erreur 0xa00f4244 NoCamerasAreAttached.
Mais vous pouvez exécuter une analyse des logiciels malveillants et supprimer toutes les infections pour restaurer les paramètres de l’ordinateur. Si aucun antivirus tiers n’est installé, vous pouvez utiliser Windows Defender.
Comment exécuter une analyse des logiciels malveillants avec Windows Defender:
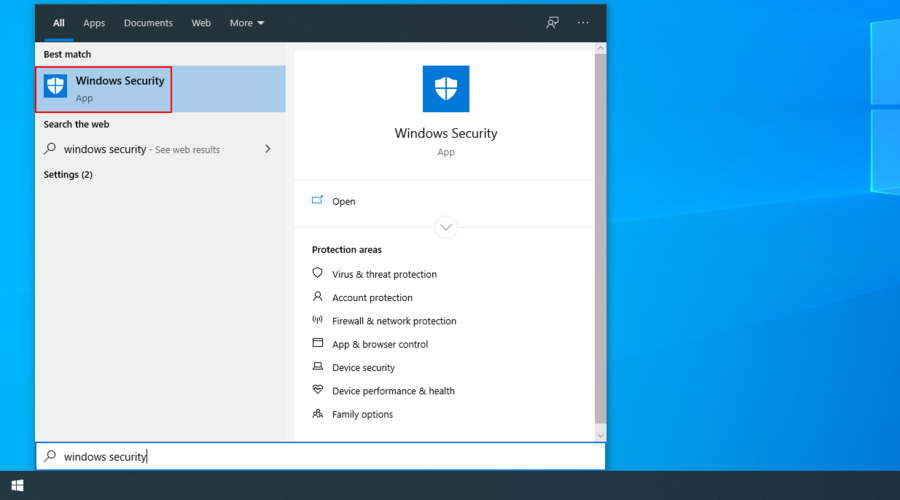
- Cliquez sur le bouton Démarrer , saisissez Sécurité Windows et appuyez sur Entrée
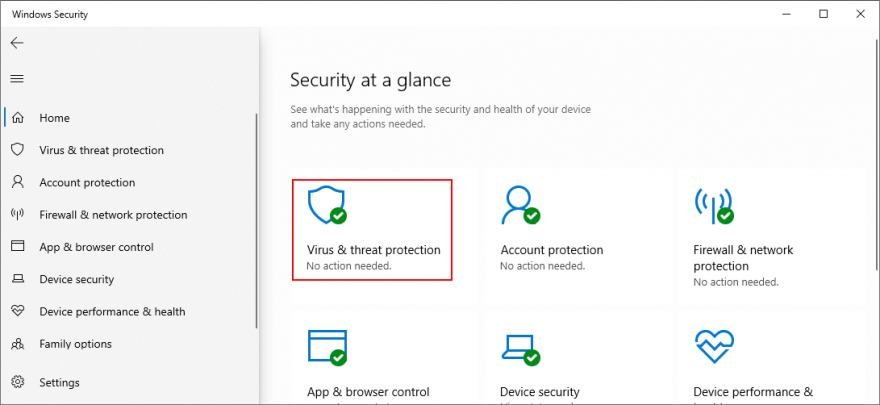
- Sélectionnez Protection contre les virus et les menaces
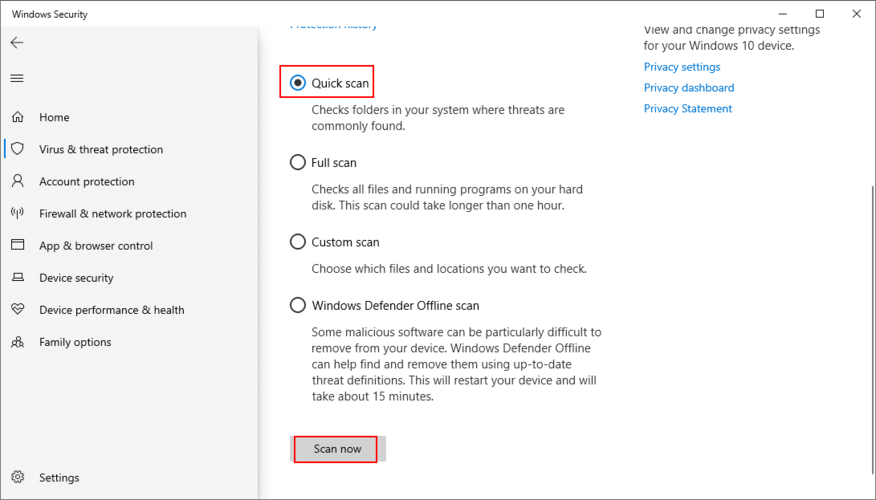
- Cliquez sur Options de scan
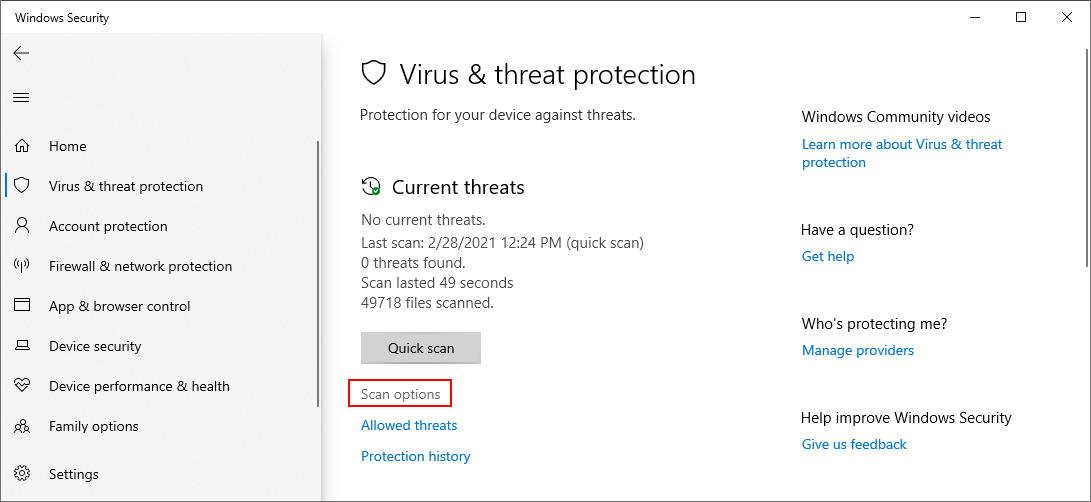
- Sélectionnez Analyse rapide et cliquez sur Analyser maintenant
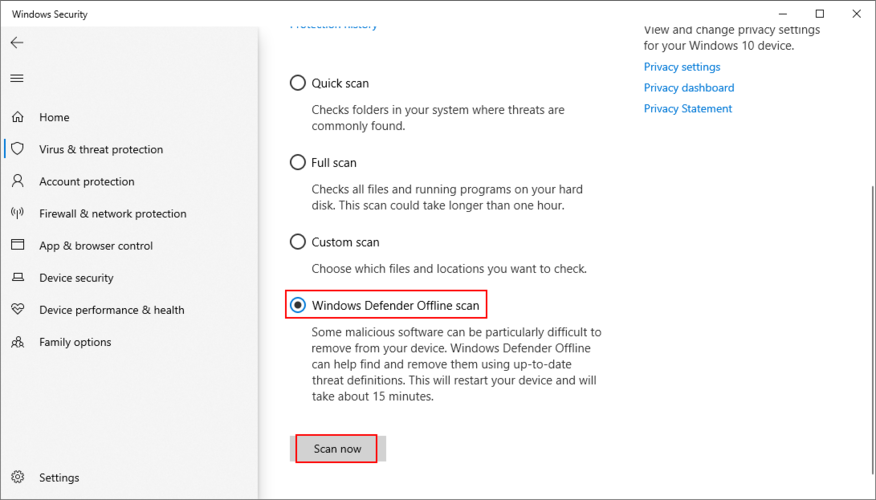
- Si les résultats de l’analyse ne révèlent rien de suspect, exécutez une autre analyse en utilisant le mode Analyse hors ligne de Windows Defender
- Redémarrez votre ordinateur
- Lancez l’application Appareil photo et recherchez les erreurs
7. Vérifiez votre application de sécurité Internet
Si une solution de cybersécurité est installée sur votre ordinateur, elle pourrait avoir une fonction spéciale dédiée au blocage de l’accès à la webcam, dans le but d’empêcher les espions de surveiller chacun de vos mouvements.
Étant donné que l’application remplace les paramètres de votre ordinateur, cela pourrait être la raison pour laquelle vous continuez à recevoir le code d’erreur 0xa00f4244 NoCamerasAreAttached.
Pour résoudre ce problème, localisez simplement la fonction de webcam dans votre programme de sécurité Internet et arrêtez-la pour permettre à la webcam d’accéder à toutes vos applications installées.
8. Examiner les autorisations de l’application Appareil photo
Dans une solution précédente, nous avons dit à quel point il est important de vérifier les autorisations de la webcam dans les paramètres de confidentialité de votre système d’exploitation. Cependant, il est tout aussi important de vérifier les autorisations de l’application Appareil photo pour vous assurer que tout est en ordre de marche. Voici comment y parvenir:
- Appuyez sur la touche Win , saisissez Appareil photo et accédez aux Paramètres de l’application

- At App permissions, enable Camera, Microphone, Videos, and Background apps
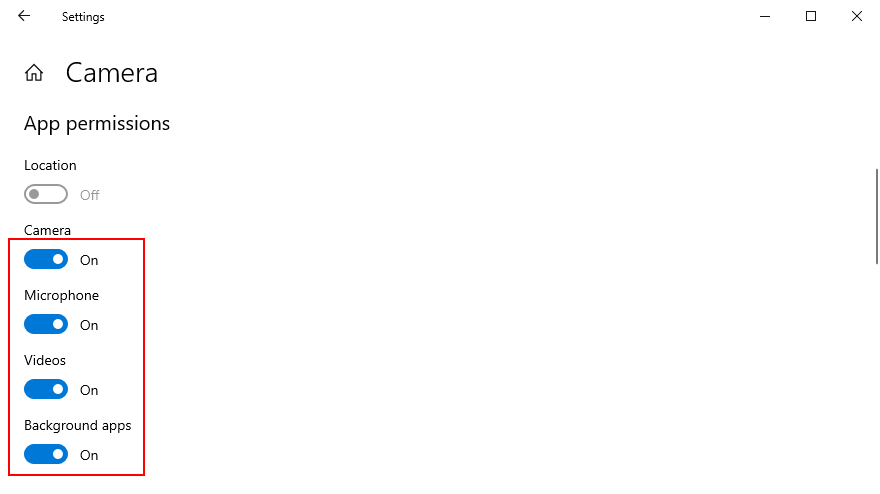
- Open the Camera app and check for errors
9. End any processes currently using your webcam
Windows Camera is just one app that requires webcam access, but there might be others currently running on your computer, such as Skype, Zoom, or Microsoft Teams. To avoid software conflicts, it’s a good idea to terminate all other processes besides the Camera app. Here’s how to do it easily:
- Right-click the taskbar and select Task Manager

- Locate all apps with camera access beside Camera
- Select each app and click Disable
- Also, disable the Camera app
- Relaunch Windows Camera and check for errors
10. Reset the Camera app
If there’s something wrong with the Camera app that could trigger the 0xa00f4244 NoCamerasAreAttached error code, you can easily reset its settings from Microsoft Store. However, keep in mind that all app data will be deleted. Here’s what you have to do:
- Click the Start button, type Camera, and click App settings
- Scroll down and click the Reset button
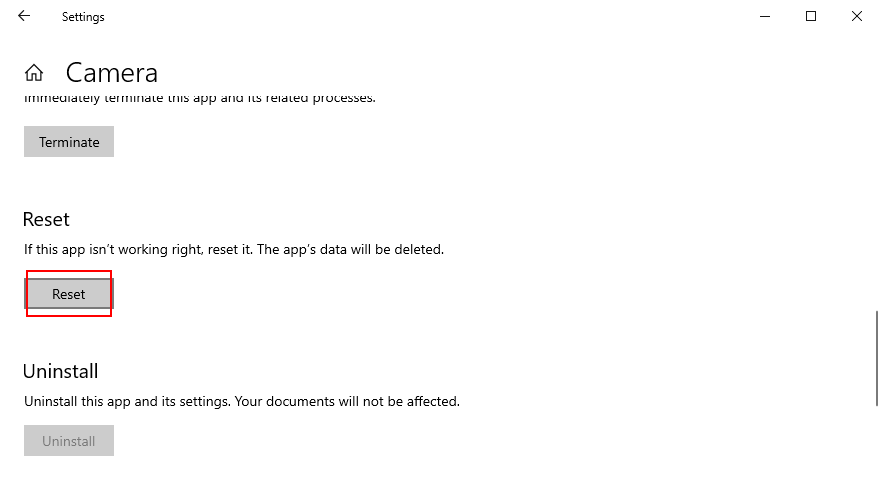
- Click Reset again to confirm
- Open the Camera app and check for errors
11. Reinstall the Camera app
The reset option sometimes fails to fix the 0xa00f4244 NoCamerasAreAttached error. A better but more complicated solution is to uninstall the Camera app and set it up again. To do this, you must first make sure that all its processes are properly closed.
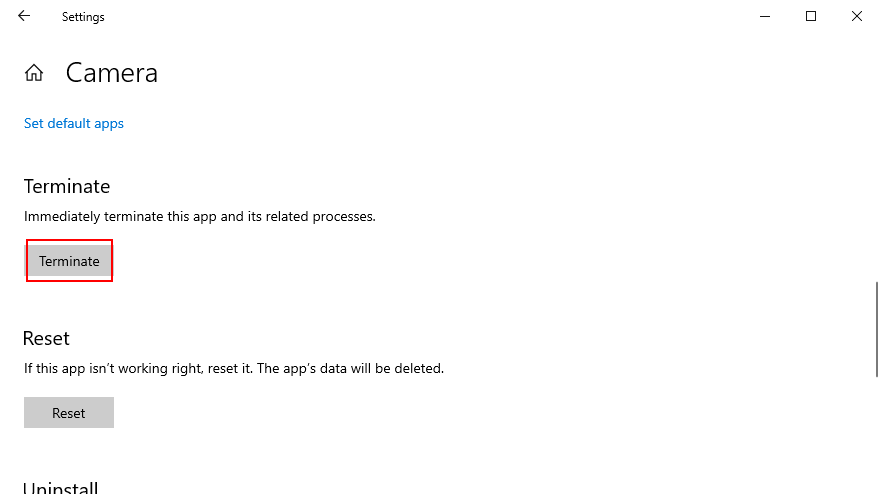
How to terminate all Camera app processes:
- Press the Windows button, type Camera, and select App settings
- Scroll down and click Terminate
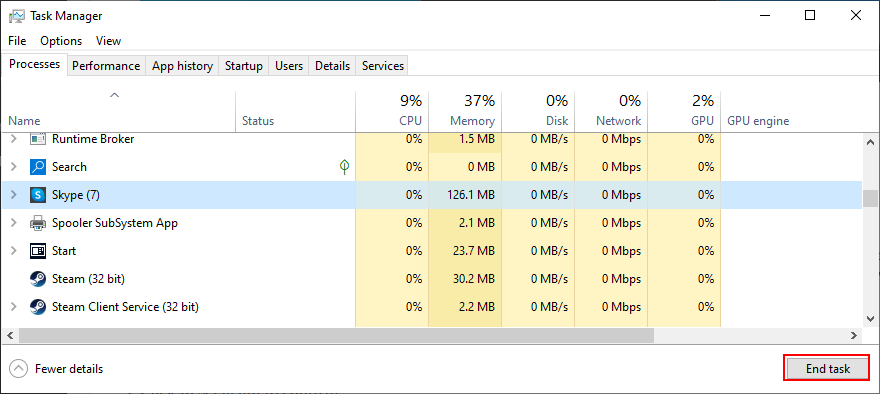
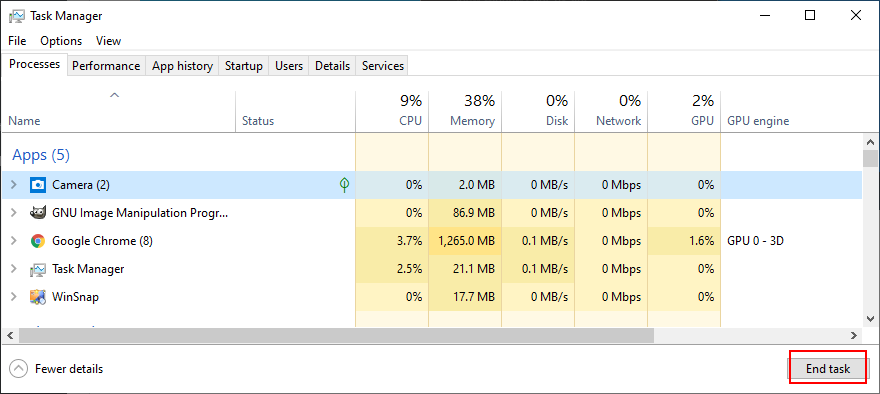
- Right-click the taskbar and go to Task Manager
- Look for the Camera process. If you can still find it here, select it and click End task
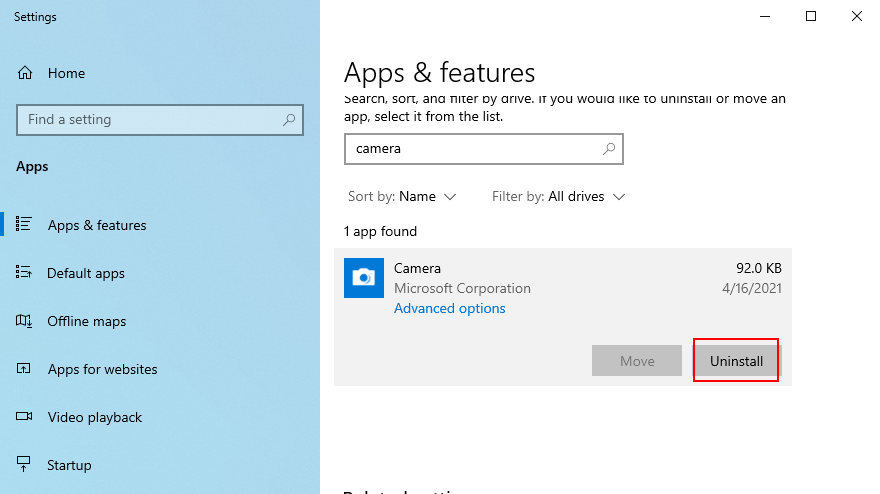
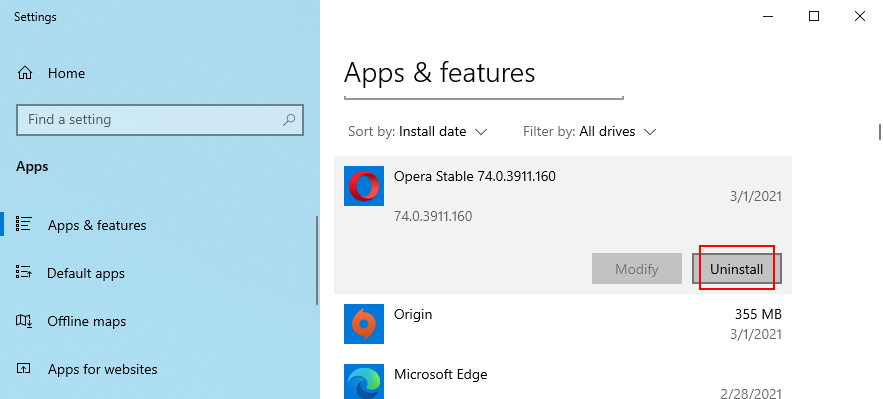
How to reinstall the Camera app using Apps and Features:
- Right-click the Start button and go to Apps and Features

- Find and select Camera (by Microsoft Corporation)
- Click Uninstall and proceed with the app removal
- Press the Win key, type Microsoft Store, and hit Enter
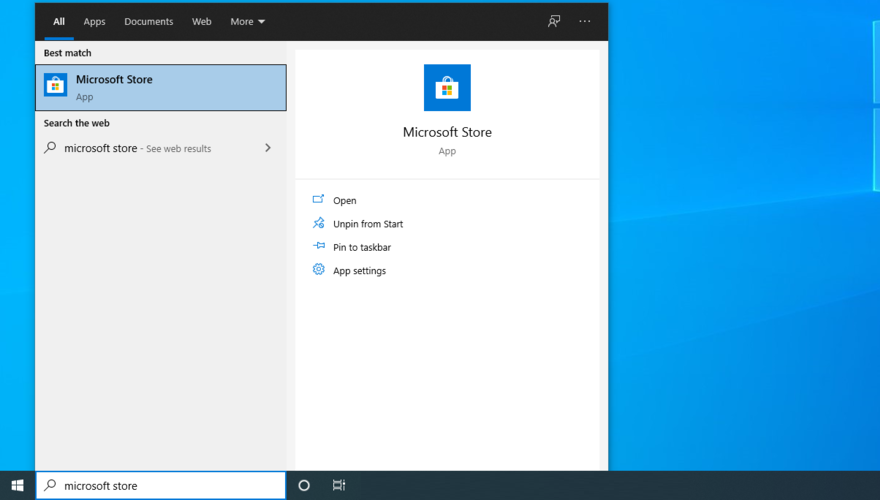
- Click the Search button on top, type Windows Camera, and select this app
- Click Get and then Install
If you can’t remove the Camera app from Apps and Features because the Uninstall button is greyed out, you can force the app’s uninstall with the help of PowerShell.
How to reinstall the Camera app using PowerShell:
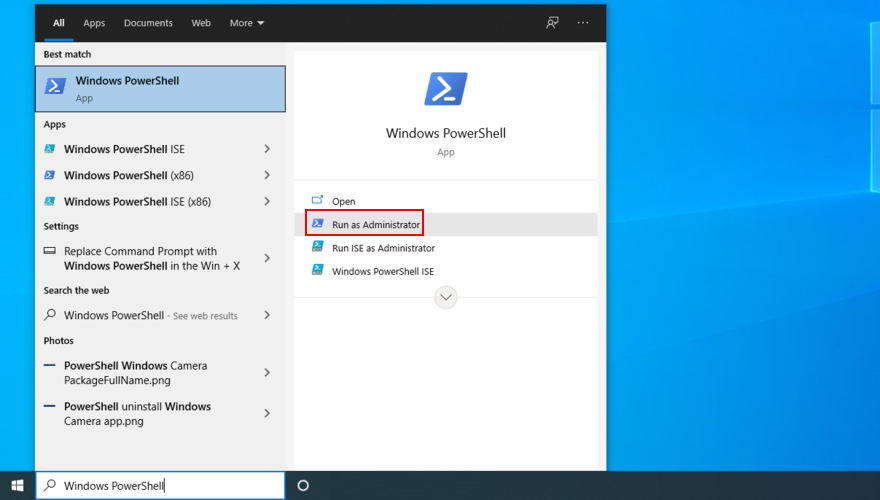
- Click the Start button, type Windows PowerShell, and select Run as administrator
- Type
Get-AppxPackage-allusers | Select Name, PackageFullNameand press Enter
- Locate the Name entry that says
Microsoft.WindowsCamera - Copy the
PackageFullNameassociated with that entry (e.g.Microsoft.WindowsCamera_2018.826.98.0_x64__8wekyb3d8bbwe)
- Type
Remove-AppxPackage PackageFullNameand replacePackageFullNamewith what you copied (e.g.Remove-AppxPackage Microsoft.WindowsCamera_2018.826.98.0_x64__8wekyb3d8bbwe). Press Enter
- Type
Add-AppxPackage-register “C:\Program Files\WindowsApps\PackageFullName\appxmanifest.xml”-DisableDevelopmentMode. ReplacePackageFullNamewith what you copied (e.g.Remove-AppxPackage Microsoft.WindowsCamera_2018.826.98.0_x64__8wekyb3d8bbwe). Press Enter
Launch the Camera app and check if you still get the 0xa00f4244 NoCamerasAreAttached error.
12. Run the Hardware and Devices troubleshooter
Windows has a built-in troubleshooter prepared to repair common issues with hardware devices. It’s worth a shot to repair webcam problems and works with multiple apps (for instance, if Zoom won’t work with your camera).
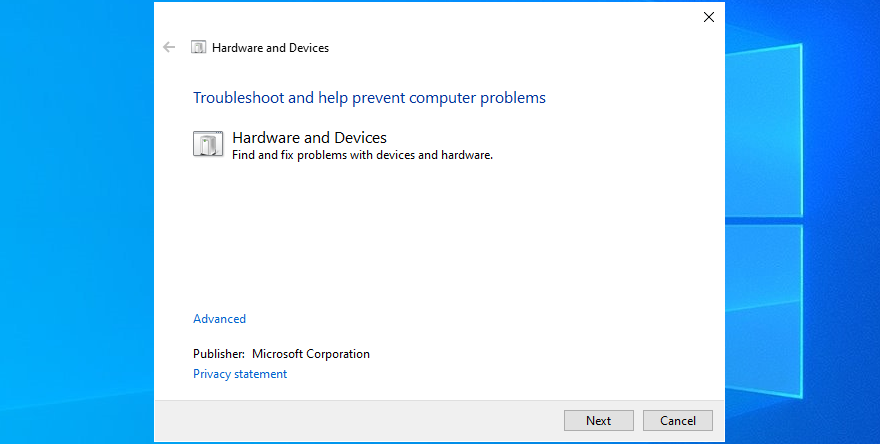
- Press the Win key + R, type
msdt.exe-id DeviceDiagnostic, and press Enter
- Click Next and follow the wizard instructions
- If the troubleshooter finds a solution, click Apply this fix
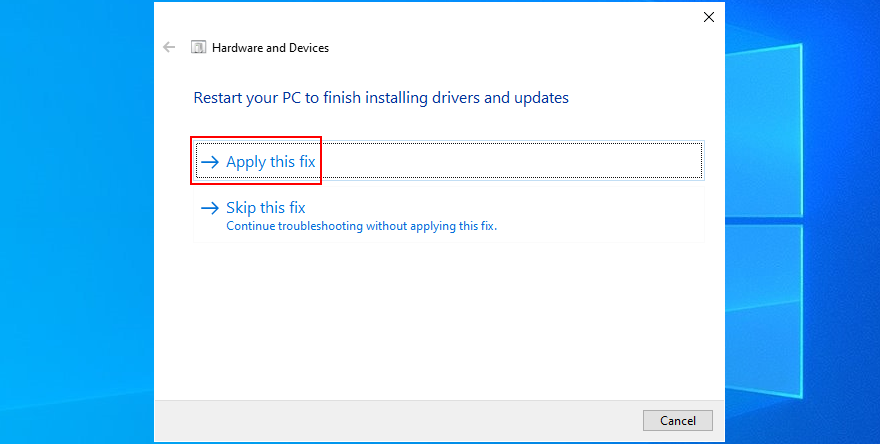
- Restart your computer
- Launch the Camera app and check for additional errors
13. Run the Microsoft Store troubleshooter
Since Windows Camera is a Microsoft Store, you should also troubleshoot this application, especially if you have trouble running other Store apps, too.
- Right-click the Start button and select Settings
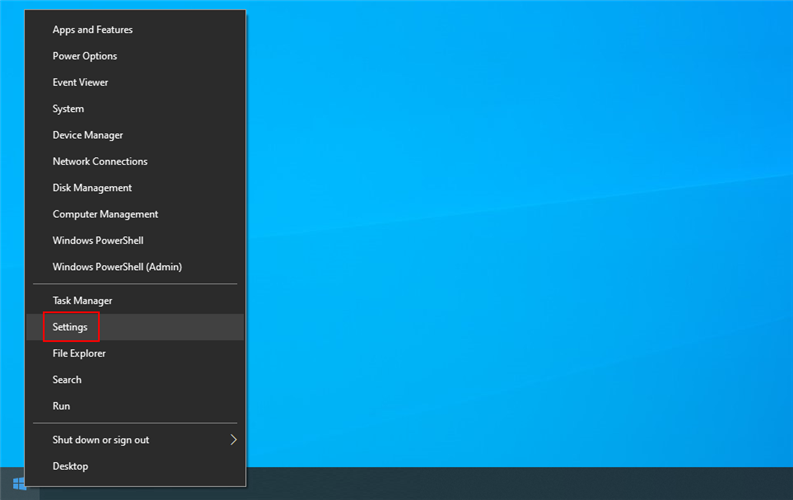
- Click Update & Security
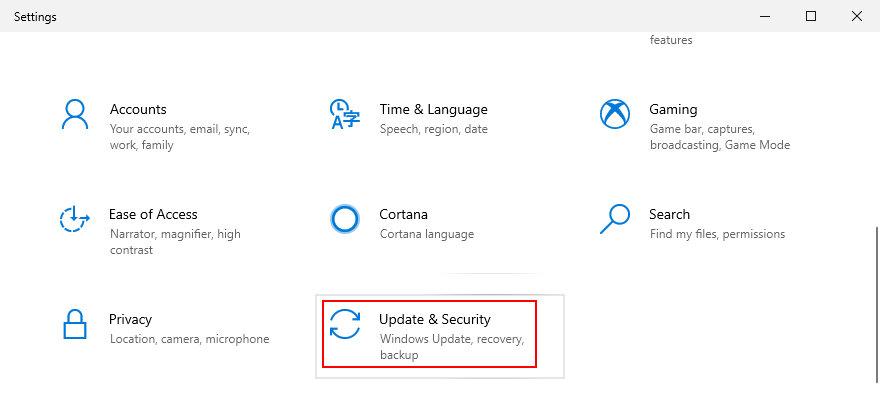
- Select Troubleshoot on the left side
- Cliquez sur Outils de dépannage supplémentaires

- Scroll down to the bottom of the window
- Select Windows Store Apps and click Run the troubleshooter
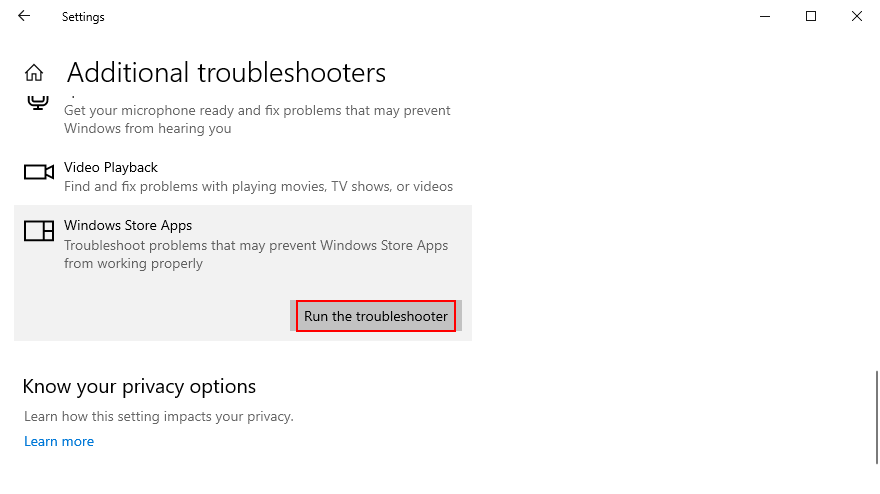
- Follow the on-screen instructions
- If the troubleshooter finds any solutions, apply them
- Redémarrez votre PC
- Open the Camera app and check for errors
14. Uninstall recent third-party software
If you have recently installed third-party software applications, they might not be fully supported by Windows 10, resulting in various functionality issues. In some cases, they can even cause error 0xa00f4244 NoCamerasAreAttached in your Camera app. But you can fix this problem by removing the problematic apps.
How to remove recent apps:
- Right-click the Start button and select Apps and Features
- Set Sort by to Install date
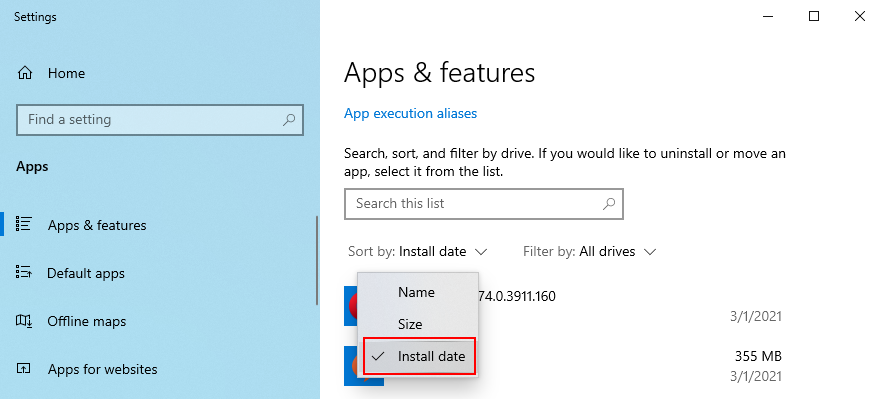
- Select the first entry in the list and click Uninstall
- Click Uninstall again to confirm and proceed with its removal
- Reboot your computer and try to use the Camera app
15. Uninstall recent system updates
A system update that rolled out lately might not be fully compliant with Windows 10, resulting in problems with Microsoft Store apps. It can be tricky to tell, but it makes sense if you started receiving the 0xa00f4244 NoCamerasAreAttached error code right after finishing a system update.
To test this, you can uninstall the most recent Windows update. Don’t worry since you can reinstall it later anyway.
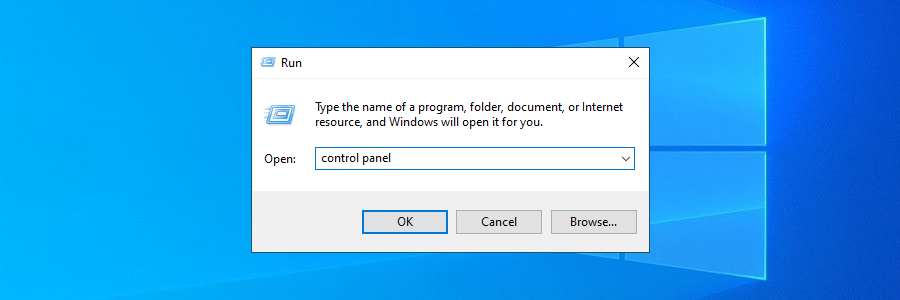
- Press Win key + R, type control panel, and press Enter
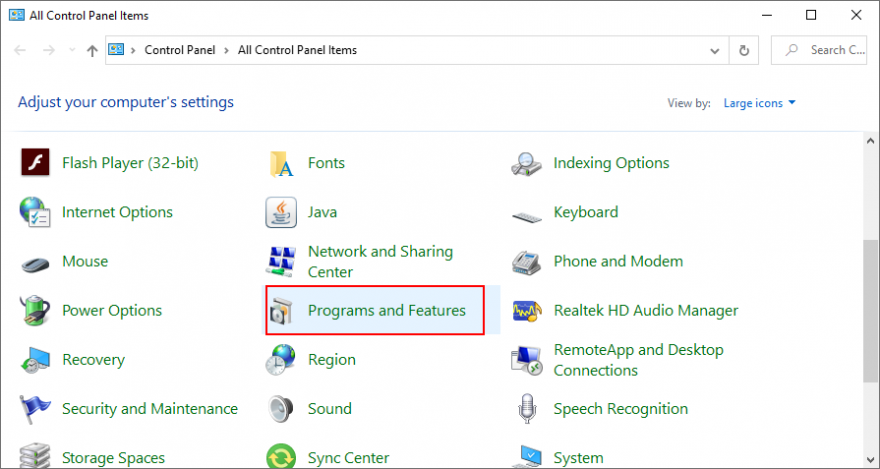
- Click Programs and Features
- Select View installed updates on the left side
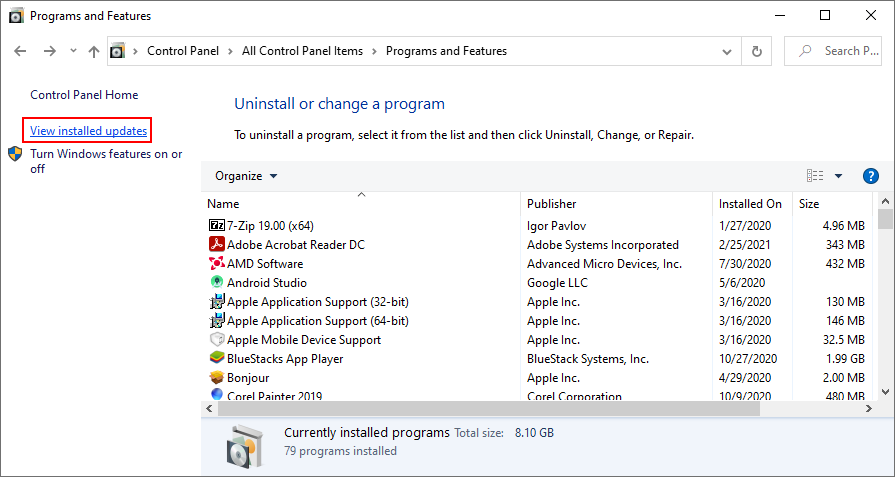
- Click the Installed On column to sort the updates (newest first)
- Double-click the first update on the list
- Click Yes to confirm its removal

- Reboot your PC and open the Camera app
16. Fix corrupt system files
Your operating system might have damaged or missing files that are directly related to the Windows Camera app. However, you can fix this problem without having to use third-party software solutions, thanks to SFC (System File Checker) and DISM (Deployment Image Servicing and Management).
Get started by running SFC:
- Press the Windows key + R, type cmd, and press Ctrl + Shift + Enter to open Command Prompt with admin rights

- Type sfc/scannow and press Enter

- Wait until SFC finds and fixes any issues
- Exit CMD and restart your PC
- Open the Camera app and check for errors
If SFC doesn’t do the trick, then you can turn to DISM to verify the component store of the Windows image.
How to use DISM:
- Open Command Prompt with elevation rights
- Run
DISM/online/cleanup-image/scanhealth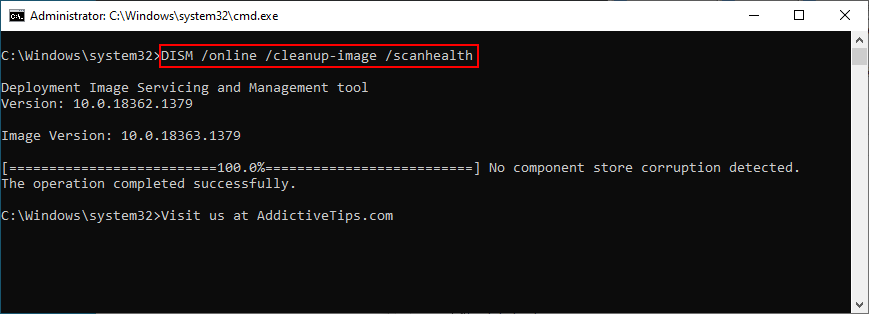
- If DISM reports any issues, run
DISM/online/cleanup-image/restorehealth - Reboot your PC and restart CMD as admin
- Run the SFC command
- Restart your computer, open the Camera app, and check for errors
17. Reset BIOS settings to default
Several users reported that they got rid of the 0xa00f4244 NoCamerasAreAttached error message by resetting BIOS settings to default. It’s an easy task that requires just a couple of clicks. Voici ce que vous devez faire:
- Reboot your PC and quickly press the key shown on the screen to enter BIOS mode
- Go to the advanced BIOS settings
- Find the option that resets configuration data and enable it
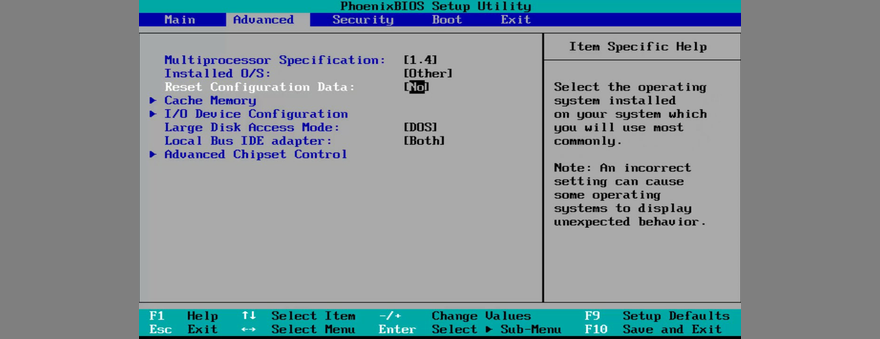
- Save the current BIOS configuration and exit to Windows
- Open the Camera app to check for improvements
18. Check a registry setting
Microsoft Store apps like Camera or Skype need a specific registry in order to function normally. If it doesn’t exist, then you can wake up with error messages like 0xa00f4244 NoCamerasAreAttached.
But you can check this issue by taking a look in Registry Editor and by adding the entry if it’s missing. Don’t worry since there’s no risk of damaging your PC because you will create a registry backup first.
- Click the Start button, type Registry Editor, and select Run as administrator
- Click Yes if prompted by UAC (User Account Control)
- Open the File menu and select Export
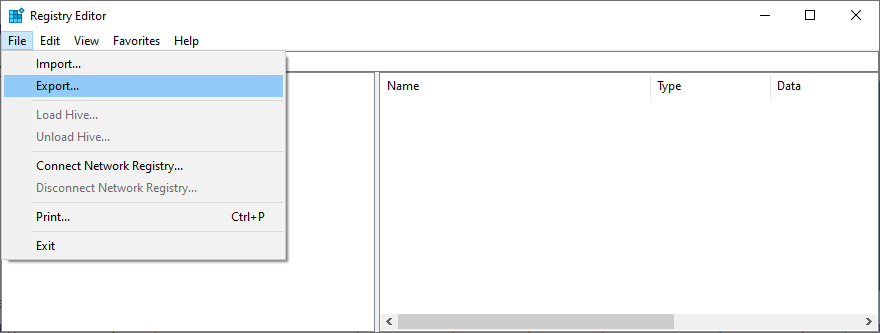
- Write a file name and indicate a folder where you want to save the registry backup. Then, click Save
- If you’re running 32-bit Windows, visit the following location
Computer\HKEY_LOCAL_MACHINE\SOFTWARE\Microsoft\Windows Media Foundation\Platform
- For 64-bit Windows, go to this address instead
Computer\HKEY_LOCAL_MACHINE\SOFTWARE\WOW6432Node\Microsoft\Windows Media Foundation\Platform
- Check if you have an entry called EnableFrameServerMode

- Otherwise, open the Edit menu, click New, and select DWORD (32-bit) Value
- Rename the entry to EnableFrameServerMode
- Double-click EnableFrameServerMode and set its Value Data to 0
- Set Base to Hexadecimal and click OK
- Exit Registry Editor and restart your PC
- Open the Camera app to see if it works now
If you have started experiencing other issues on your computer after making this registry change, you can roll back settings by double-clicking the.reg backup file you previously created. Or, if you didn’t create a backup, simply revisit that registry location and delete the EnableFrameServerMode entry.
19. Create a new user profile
It’s pretty rare, but the Camera app might not be working properly due to data corruption in your user profile. As a result, you get the 0xa00f4244 NoCamerasAreAttached error on your screen. But you can fix this problem by setting up a new local user profile. Here’s how to do it:
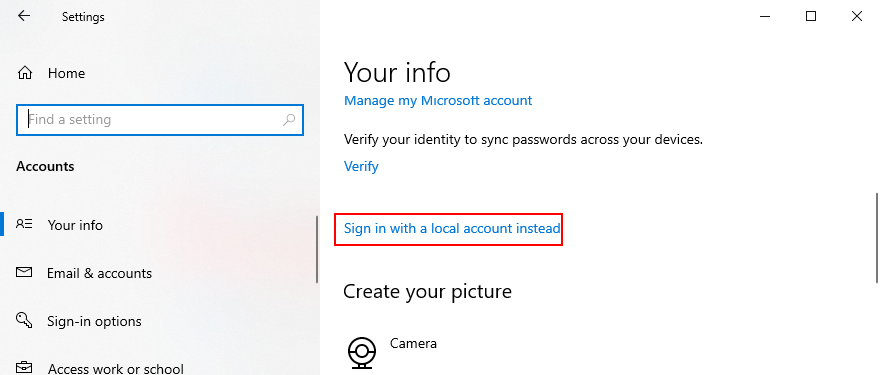
- Cliquez avec le bouton droit sur le bouton Démarrer et accédez à Paramètres
- Select Accounts

- If you’re logged in with your Microsoft account, click Sign in with a local account instead. Otherwise, click Add someone else to this PC
- Set up the username and password of the new account
- Click Change account type and select Administrator
- Log out of your current account and log back in with the new one
- Try to use the Camera app now
20. Use System Restore
Finally, if you can’t pinpoint the software event that caused the 0xa00f4244 NoCamerasAreAttached error code, you can roll back Windows 10 if there are any restore points created before the Camera app started acting up. However, keep in mind that it will affect your programs, so you will lose apps installed after the restore point was made.
- Make sure you’re signed in to Windows 10 with the admin role
- Press Win key + R, type control panel, and hit Enter
- Select Recovery
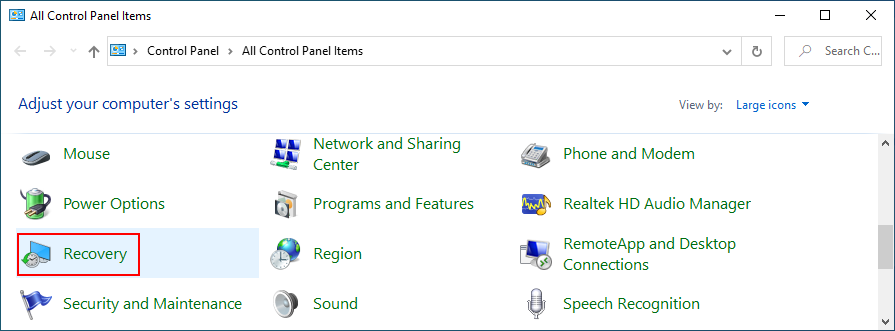
- Click Open System Restore
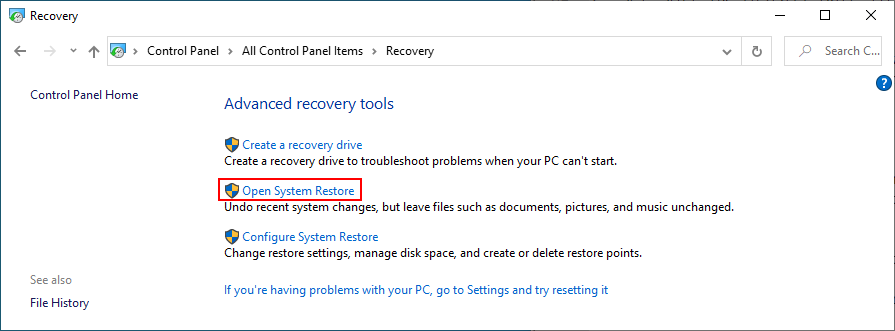
- Select a restore point from the list
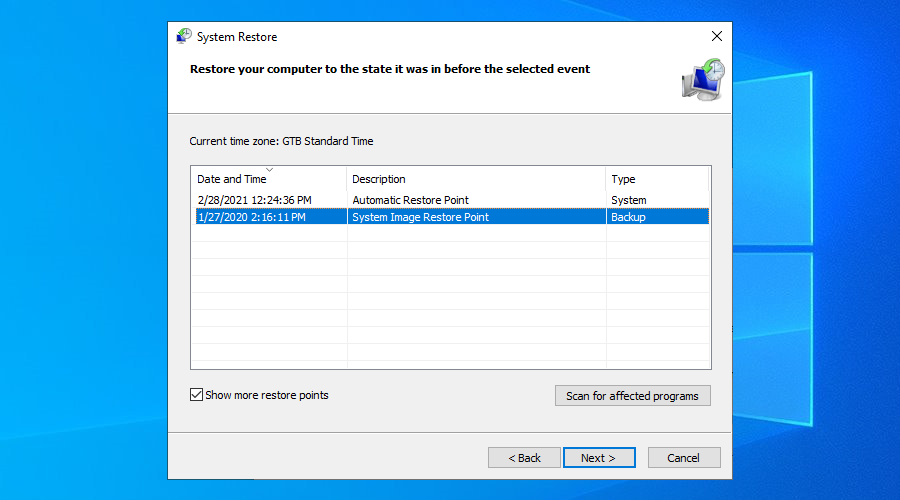
- Click Scan for affected programs if you want to learn more about the changes
- Click Next and proceed with the instructions
- System Restore might take a while. Once it finishes, restart your PC
- Launch the Camera app and try to use it now
The 0xa00f4244 NoCamerasAreAttached error can be fixed
To recap, 0xa00f4244 NoCamerasAreAttached is an error code that appears in the Windows Camera app, preventing you from using your camera. To fix this problem, you can run Windows Update, check the webcam cover, cable and switch, review webcam permissions, verify webcam compatibility, and inspect the webcam drivers.
It’s also a good idea to scan your PC for malware, check the settings of your Internet security solution, verify Camera app permissions, end all processes currently using your webcam, reset or reinstall the Camera app, as well as to run the Hardware and Devices troubleshooter.
Moreover, you can run the Microsoft Store troubleshooter, uninstall recent third-party software and system updates, fix corrupt system files, reset BIOS settings to default, add a registry entry if it’s missing, create a new user profile, and use System Restore.
How did you manage to get rid of error 0xa00f4244 NoCamerasAreAttached on your Windows 10 PC? Tell us about your experience in the comment section below.