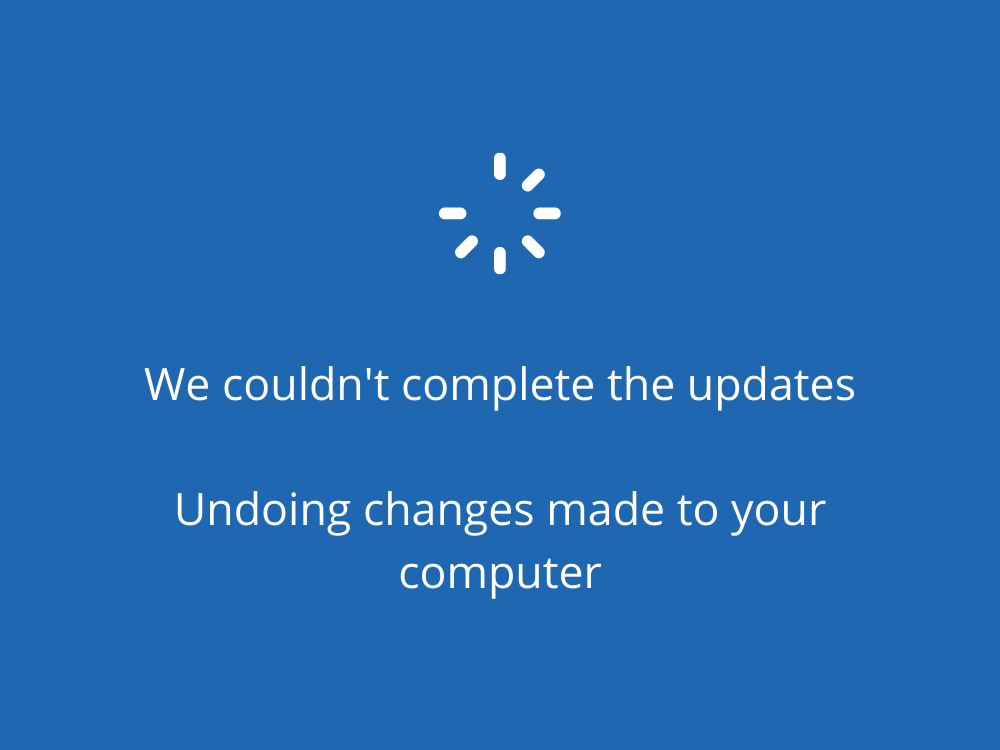
Microsoft regularly pushes Windows updates to deliver new features, improvements, hotfixes, and security patches. Unfortunately, Windows Update doesn’t always work as expected. Instead, it sometimes shows the We couldn’t complete the updates, undoing changes made to your computer error message.
It means that Windows 10 isn’t capable of updating itself, rolling back all changes made up until that point. Usually, it’s a one-time issue that gets resolved on its own by simply running Windows Update again.
However, it becomes truly problematic when Windows Update gets stuck at 0%. Other times, it enters a loop and repeatedly rolls back changes made to your computer.
What causes the Undoing changes made to your computer error?
Software problems are usually the ones to blame if Windows Update won’t work properly on your PC anymore. There could be something wrong with the Windows Update or other dependent services that send your PC into a spiral.
For instance, you might have recently installed a system update that’s not fully supported by Windows 10. Or perhaps your operating system has corrupt files which must be restored as soon as possible.
How to fix We couldn’t complete the updates, undoing changes on Windows 10
There are several ways in which you can approach Windows Update problems and get rid of the Undoing changes made to your computer message. However, it’s a good idea to create a system restore point before getting started. This way, you can roll back Windows 10 to the starting line in case you make any mistakes.
1. Run the Windows Update troubleshooter
Common problems that prevent you from updating Windows can be fixed with the help of the Windows Update troubleshooter. Here’s how to use it:
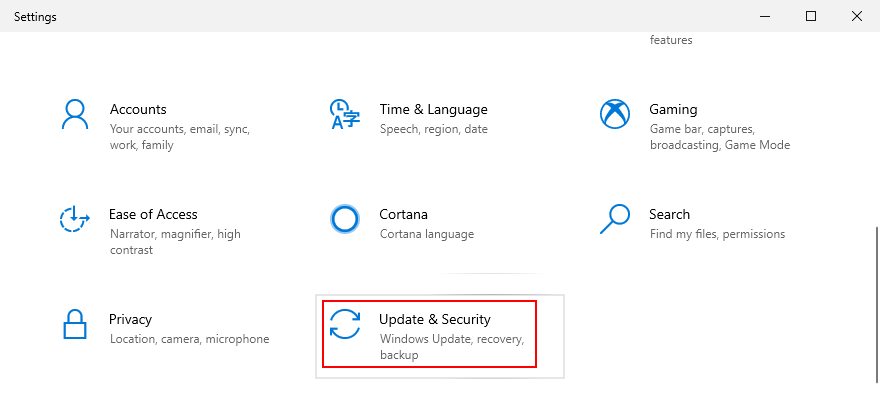
- Right-click the Start button and select Settings

- Go to Update & Security
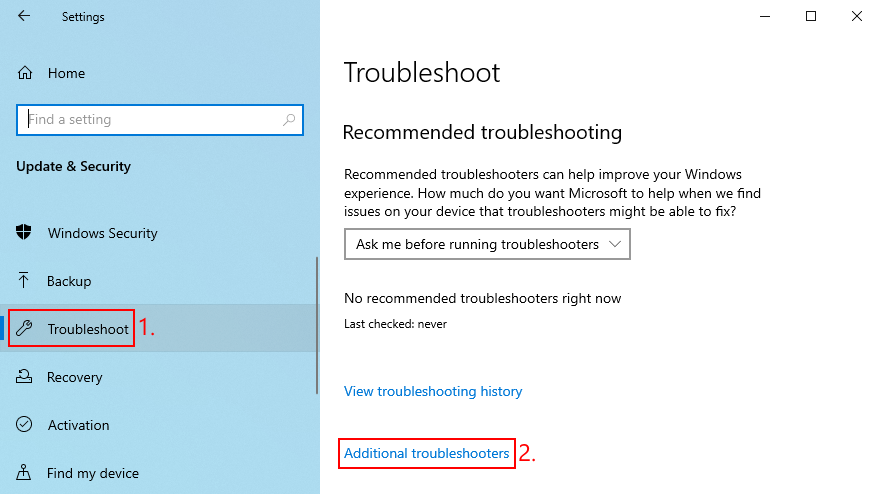
- Select Troubleshoot on the left side
- Click Additional troubleshooters
- Select Windows Update and click Run the troubleshooter
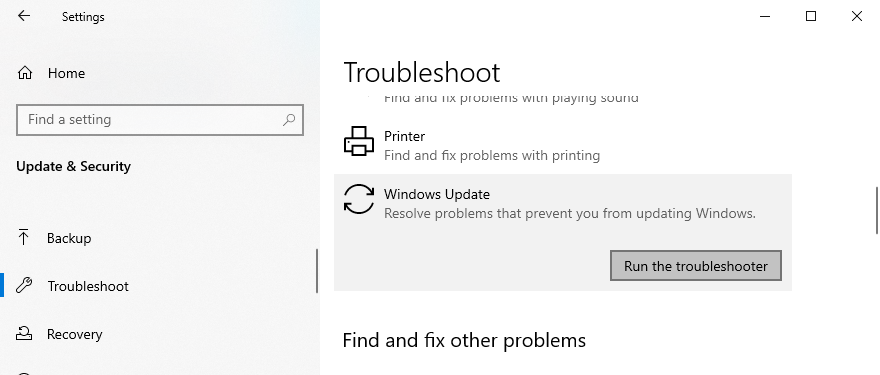
- Follow the on-screen instructions
- Reboot your PC and try to use Windows Update
2. Restart the Windows Update and dependent services
If the Windows Update, Background Intelligent Transfer, and App Readiness services aren’t running properly or aren’t scheduled to start automatically, your operating system will have a hard time trying to complete updates on your PC. But you can fix this by restarting the services and checking the startup status. Here’s what you should do:
- Press Win key + R, type services.msc, and press Enter

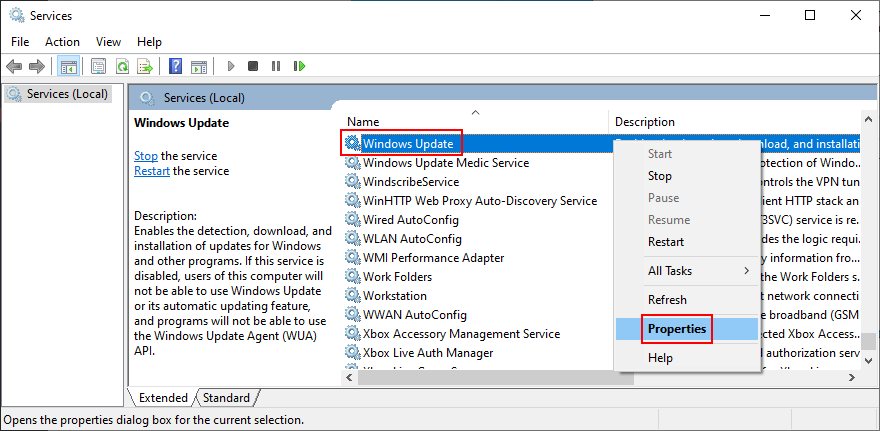
- Find and right-click Windows Update
- Open Properties from the menu
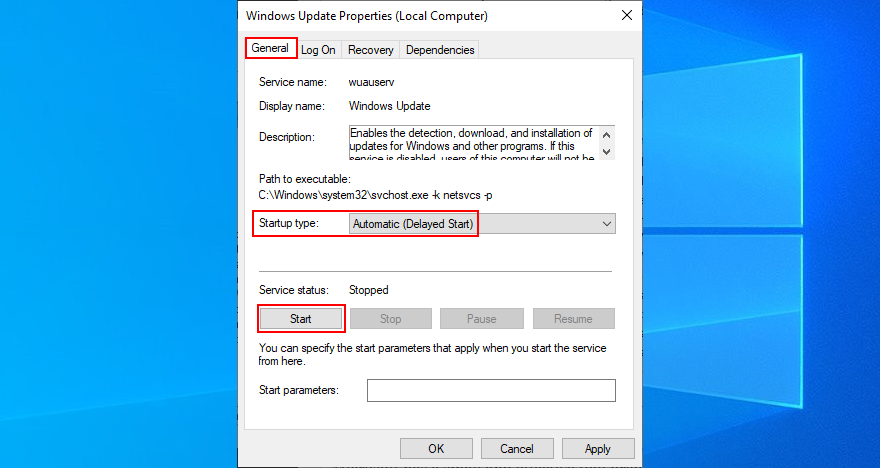
- In the General tab, set Startup type to Automatic (Delayed Start)
- If Service status says Stopped, click the Start button
- Click the Apply button and exit this window
- In the Services list, locate Background Intelligent Transfer Service and App Readiness to perform the same steps
- Reboot your PC and use Windows Update now
3. Turn off Network List Service
Network List Service is a system service that keeps track of the Wi-Fi networks your device connects to. However, it sometimes clashes with the Windows Update service, leading to the Undoing changes made to your computer error after a failed update. To resolve this problem, you just need to disable the faulty service. Here’s how:
- Press Win key + R, type services.msc, and press Enter
- Locate Network List Service
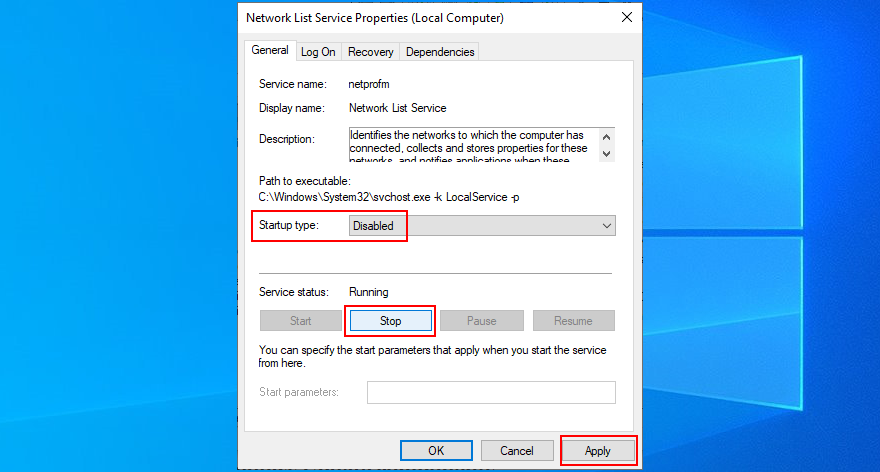
- Right-click the service and go to Properties

- In the General tab, set Startup type to Disabled
- Click Stop if the service is currently running
- Click Apply to commit changes and exit
- Restart your PC and try using Windows Update now
4. Use Windows Update Diagnostic
Windows Update Diagnostic is not a tool built into Windows 10 but it’s specially made by Microsoft to troubleshoot Windows Update issues. Here’s how to use it to your advantage:
- Log in to Windows 10 with an admin account
- Download Windows Update Diagnostic from the official website
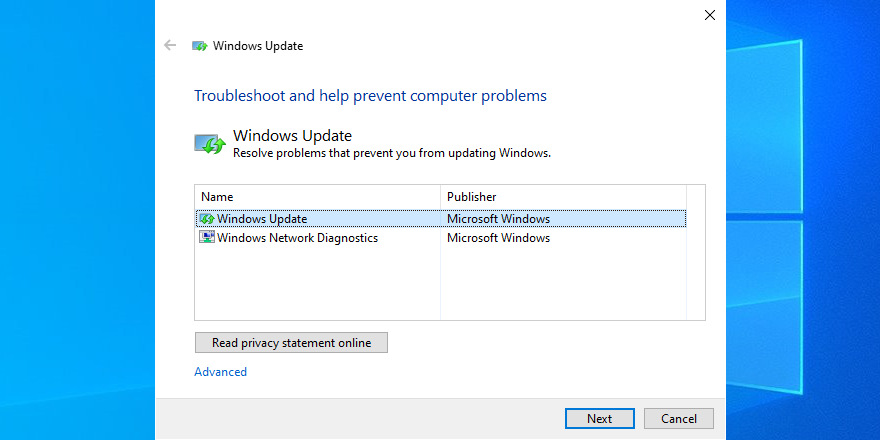
- Run the tool and select Windows Update
- Click Next and follow the on-screen instructions
- After the fixes are made, open Windows Update Diagnostic again
- Select Windows Network Diagnostics, click Next, and proceed with the given steps
- When it’s done, restart your PC and try to install system updates
5. Rename the SoftwareDistribution folder
Your operating system downloads Windows updates in the SoftwareDistribution directory and temporarily keeps them there until it finishes updating your computer. But there might be a problem with the folder cache.
Normally, deleting the folder should fix this problem. However, since you’re dealing with a critical part of the operating system, it’s wiser to keep the directory and rename it. Here’s how:
- Make sure you’re logged in to Windows 10 with admin rights
- Press Win + E to open File Explorer
- Go to the
C:\Windowslocation - Locate and rename the SoftwareDistribution folder
- Reboot your PC and try to use Windows Update
6. Configure Group Policy settings
The We couldn’t complete the updates, undoing changes error message could also be caused by an incorrect configuration in Group Policy. Here’s how you can change it:
- Press Win key + R, type gpedit.msc, and press Enter to launch Local Group Policy Editor

- Visit Computer Configuration > Administrative Templates > Windows Components > Windows Update
- Locate and right-click Configure Automatic Updates
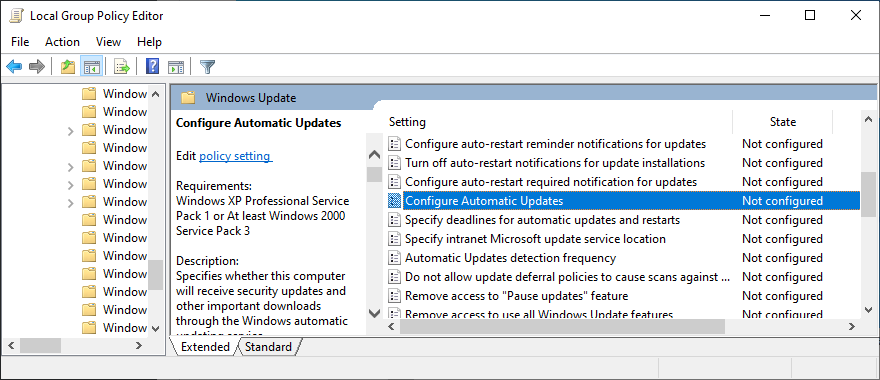
- Go to Properties
- Select Enabled on the top-left side
- Click Apply and exit this window
- Restart your PC and try running Windows Update now
7. Check the free disk space
Windows Update needs a certain amount of disk space available on the hard disk. Otherwise, it will not have enough room to download and install new updates. To fix this problem, you can add more disk space to your Windows partition (usually C:) by using a partition manager or Disk Management, a built-in tool.
How to use Disk Management:
- Press Win key + R, type diskmgmt.msc, and hit Enter
- Pick a large drive besides C: (or where you have Windows installed)
- Right-click the drive and select Shrink Volume

- Set the new volume size and click Shrink
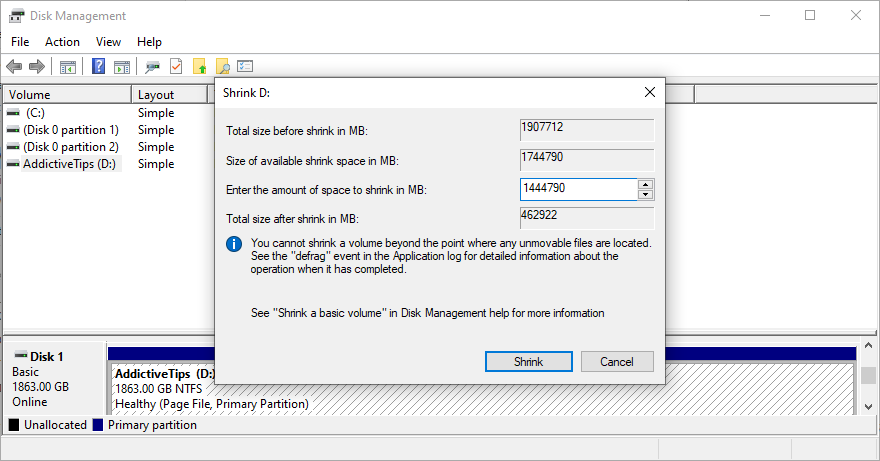
- Select C:, right-click it, and choose Extend Volume
- Specify the new, larger size
- Reboot your PC and try to use Windows Update
Another way to free up your disk space is by removing large files, applications, and games you don’t need anymore. It’s also a good idea to move data to external disks, upload it to cloud accounts, or burn it to DVDs. This includes photos and videos, among others.
When it comes to junk data, you can get rid of it by turning to a third-party system cleaner or by using the Windows Disk Cleanup tool.
How to use Windows Disk Cleanup:
- Sign in to Windows 10 with elevation rights
- Check the Recycle Bin and Downloads locations for any files you wish to keep (these folders will be emptied)
- Press the Win key, type control panel, and press Enter
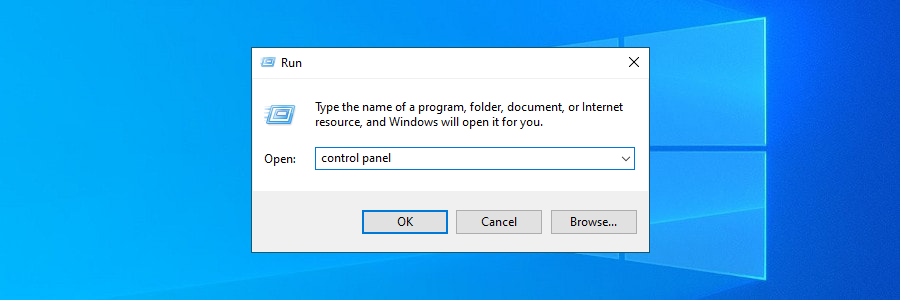
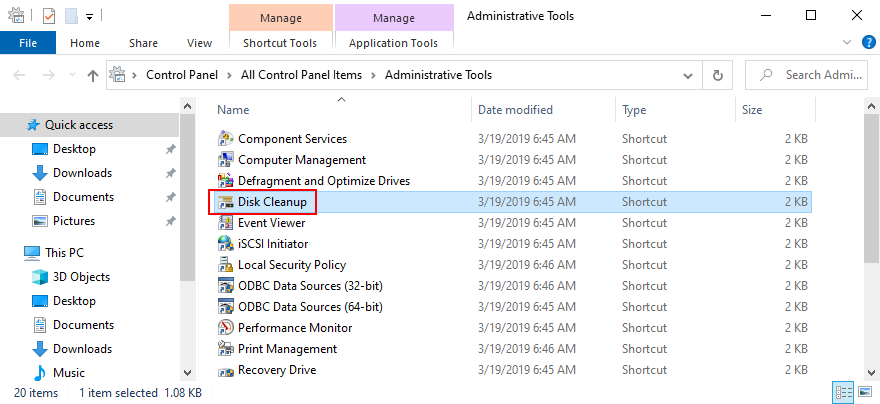
- Select Administrative Tools
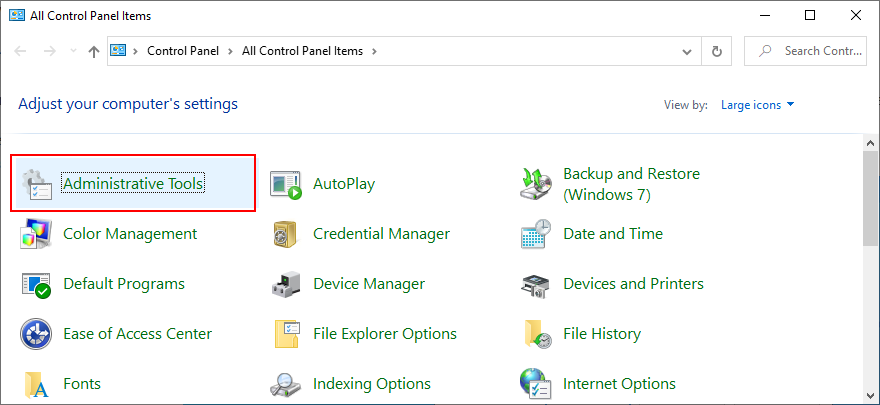
- Double-click Disk Cleanup to open this app
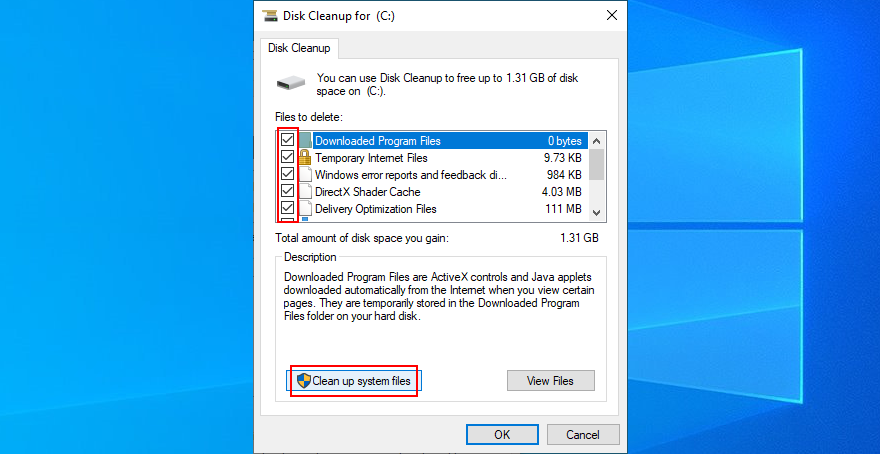
- Select C: and click OK
- At Files to delete, select all items. Then, click Clean up system files
- Once the file search is complete, select all items again and click OK
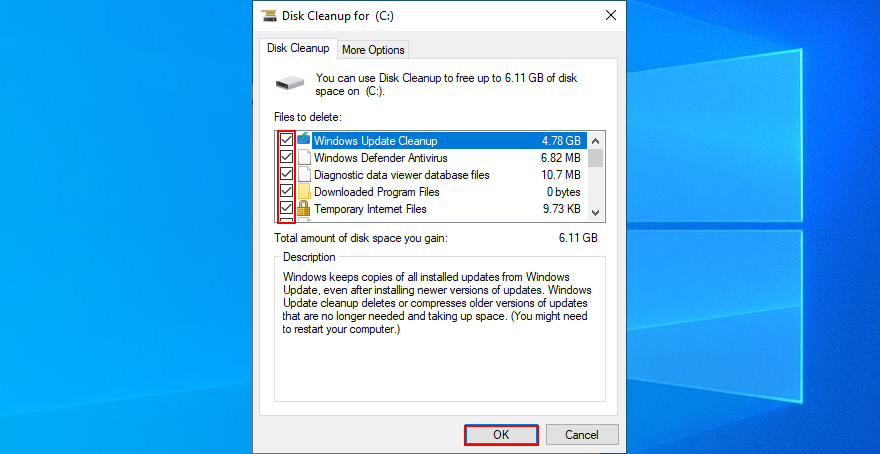
- After Disk Cleanup finishes its job, restart your PC and try to use Windows Update
8. Start Windows 10 in Safe Mode
It can be tricky to find the malfunctioning driver, service or process that triggers the We couldn’t complete the updates, undoing changes error message on your Windows 10 PC. However, you can turn off all non-essential components by starting Windows 10 in Safe Mode. Here’s how:
- Click the power button to open the menu with the power options
- Hold down the Shift key and click Restart
- Windows 10 will start in Recovery mode. Select Troubleshoot from the blue screen

- Choose Advanced options

- Go to Startup settings
- Click Restart

- Press F5 to start Windows 10 in Safe Mode with Networking
- Wait until the operating system boots
- Run Windows Update
9. Check your drivers
Your computer might have missing or outdated drivers that prevent Windows 10 from updating itself. To fix this problem, you can try reinstalling the missing adapters, updating the obsolete drivers, and rolling back a malfunctioning driver to a previous, stable version.
How to reinstall missing adapters:
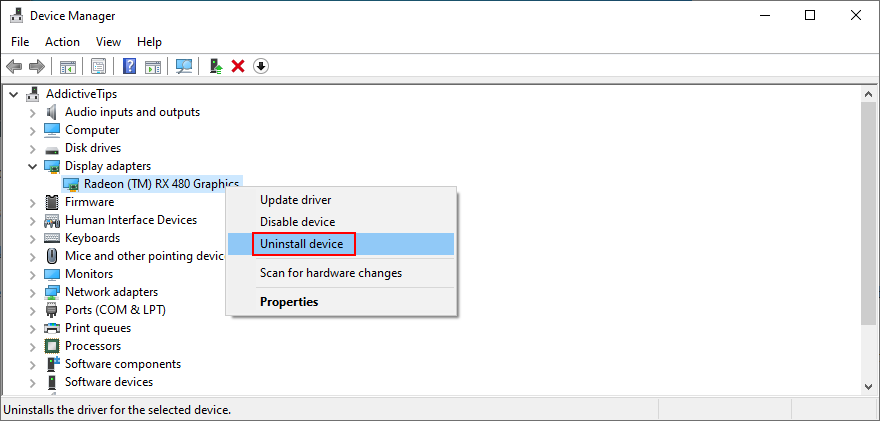
- Right-click the Start button and go to Device Manager

- Look for entries with a yellow exclamation point (it indicates a missing device)
- Right-click such an entry and select Uninstall device
- After the action completes, right-click any device from the list and click Scan for hardware changes
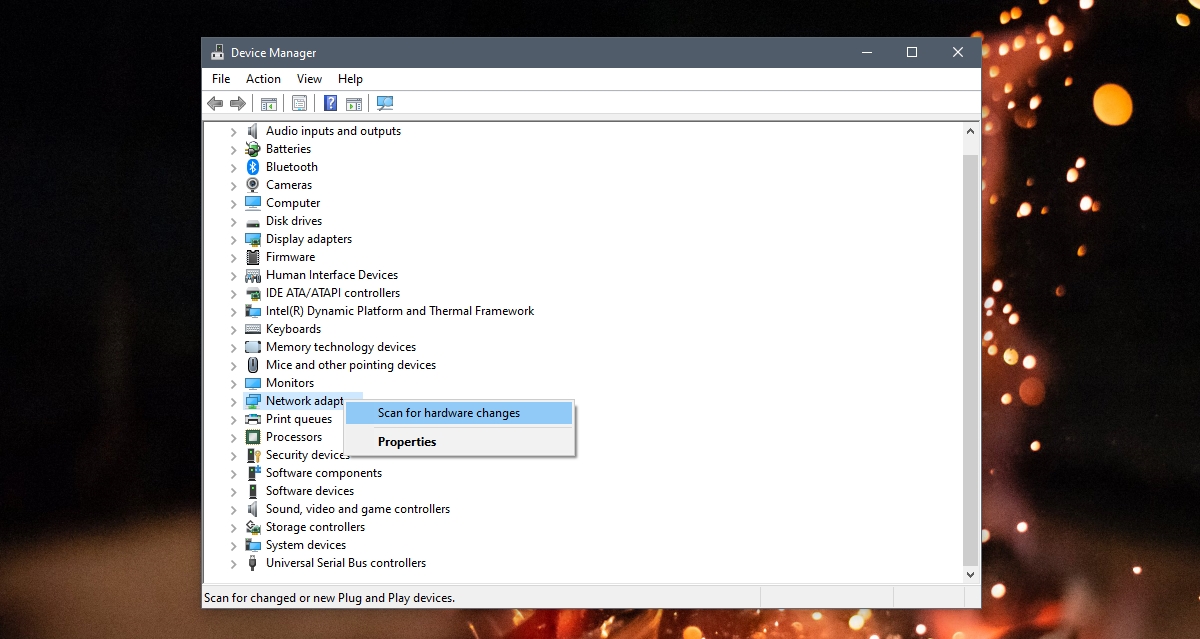
- Restart your computer and allow Windows to automatically install the missing adapter
How to update drivers:
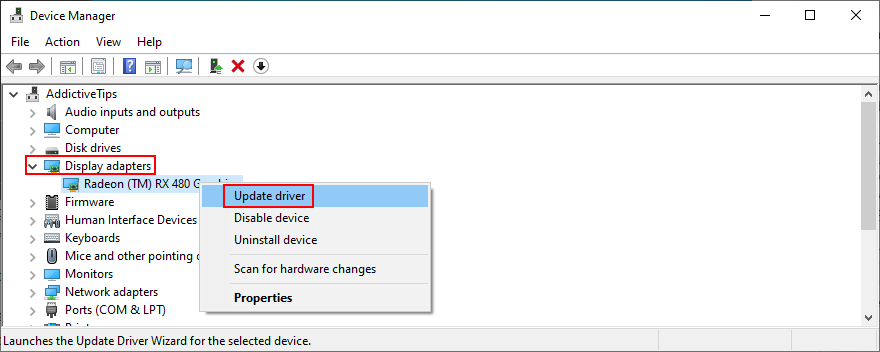
- Go to Device Manager
- Select a device with an outdated driver
- Right-click it and choose Update driver
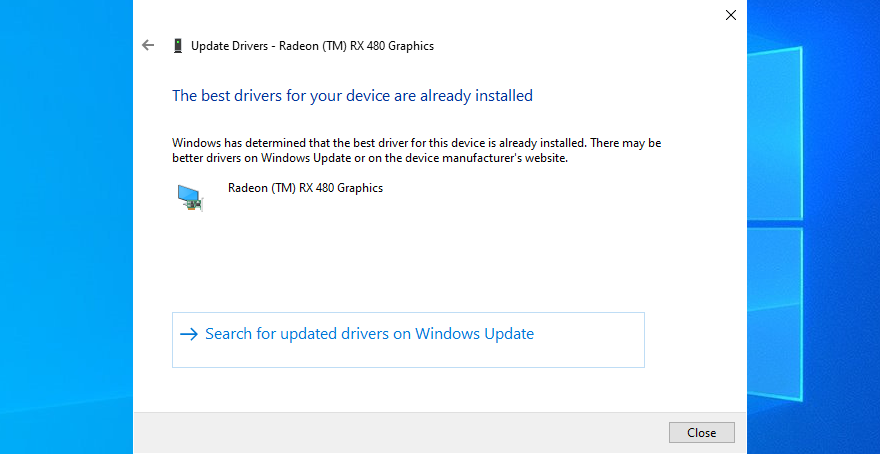
- Click Search automatically for updated driver software
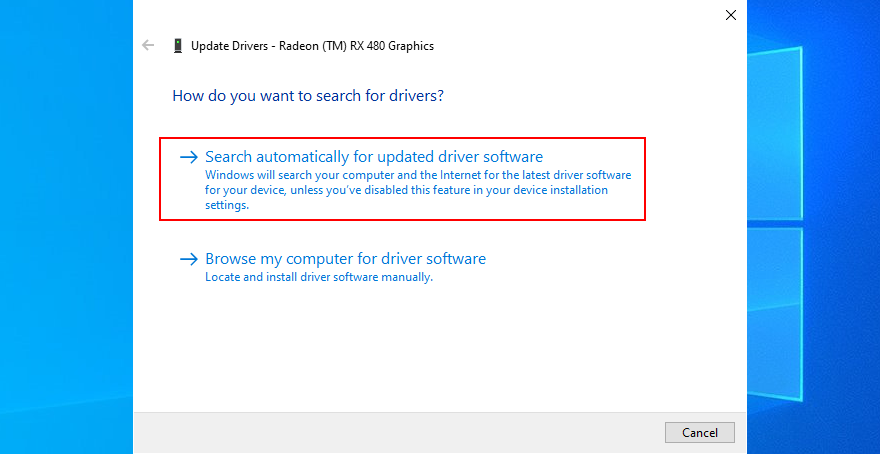
- If it can’t find anything, click Search for updated drivers on Windows Update
- Reboot your PC and try to use Windows Update
If you can’t identify the obsolete drivers or find a newer version on the web, you can turn to a driver updating tool. It automatically detects all outdated drivers on your PC, finds newer versions on the web, then downloads and installs them.
On the other hand, if you have an incompatible driver that’s already installed in Device Manager, you should roll back to the previous version to avoid system stability problems and any errors triggered in Windows Update.
How to roll back drivers:
- Access Device Manager
- Right-click the device and go to Properties
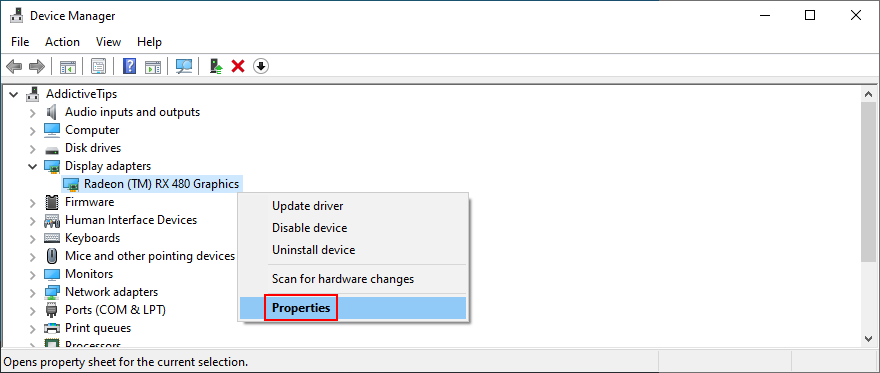
- Switch to the Driver tab
- Click Roll Back Driver and follow the on-screen instructions
- If the button is greyed out and you can’t click it, you can’t roll back the driver so it’s safe to skip this step

- Reboot your computer and run Windows Update now
10. Unplug peripheral devices
Driver problems can also be caused by peripheral devices recently connected to your computer. For example, if you purchased or received a new webcam or Wi-Fi adapter as a gift, it’s possible that the device is not fully compatible with your operating system or has damaged drivers.
To handle this matter, shut down your PC and unplug everything, except for your keyboard and mouse. Then, boot your OS and try to run Windows Update. It if works, just replug the devices after the system is updated. But it’s not a long-term solution because you have to detach the hardware components every time you need to update Windows.
11. Fix hard disk and operating system errors
Hard disk and system file corruption can prevent Windows Update from running properly, resulting in a failure to apply system updates that are signaled by the Undoing changes made to your computer error message.
However, you can repair this problem by turning to CHKDSK (Check Disk), SFC (System File Checker), and DISM (Deployment Image Servicing and Management). All three tools can be operated from the console environment on Windows 10, so you don’t need to install anything. Plus, previous experience with Command Prompt is not required, as long as you follow the instructions below.
How to use CHKDSK:
- Press Win key + R, type cmd, and press Ctrl + Shift + Enter to open Command Prompt with elevation rights

- Run
chkdsk c: /for replacec:with the Windows drive letter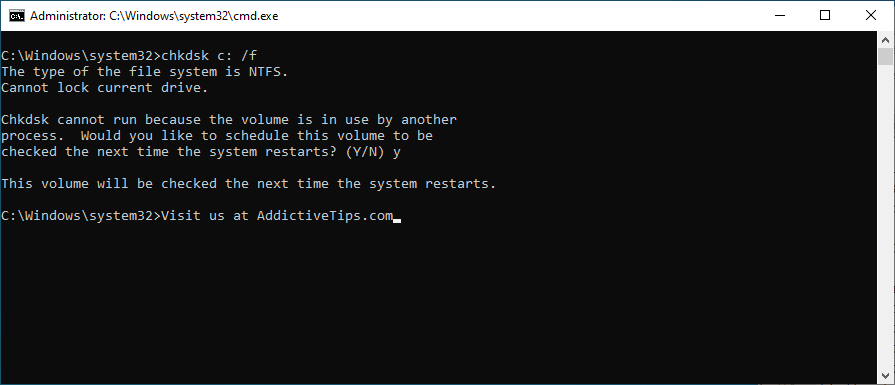
- When asked to confirm the disk checkup task at the next system boot, type y and press Enter
- Reboot your PC and wait for CHKDSK to do its job
- Try to run Windows Update now
How to use SFC:
- Open Command Prompt with admin rights
- Run
sfc /scannowand wait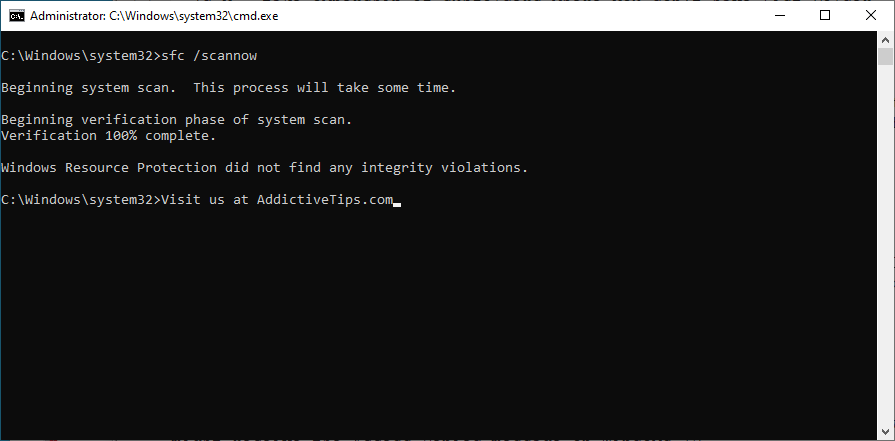
- Once SFC fixes the system errors, reboot your PC
- Try to update your operating system now
How to use DISM:
- Launch CMD as admin
- Run
DISM /online /cleanup-image /scanhealthand wait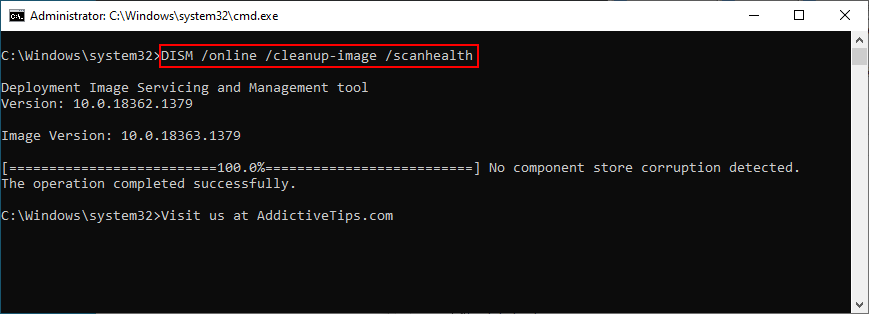
- If DISM finds any errors, repair them using
DISM /online /cleanup-image /restorehealth - Restart your computer and run CMD as admin again
- Run SFC, exit, and restart your PC one last time
- Try to use Windows Update now
12. Uninstall third-party tools
Not all software applications are fully compatible with Windows 10, even the ones that run in compatibility mode for older Windows versions. A wrong registry entry could conflict with the Windows Update registry settings, so it’s better to avoid installing apps that you’re not 100% sure of.
If you have recently installed a program and started noticing that Windows Update doesn’t work properly anymore, then you should remove it to restore the stability of your operating system. Here’s how:
- Right-click the Start button and visit Apps and Features

- Set Sort by to Install date (newest first)
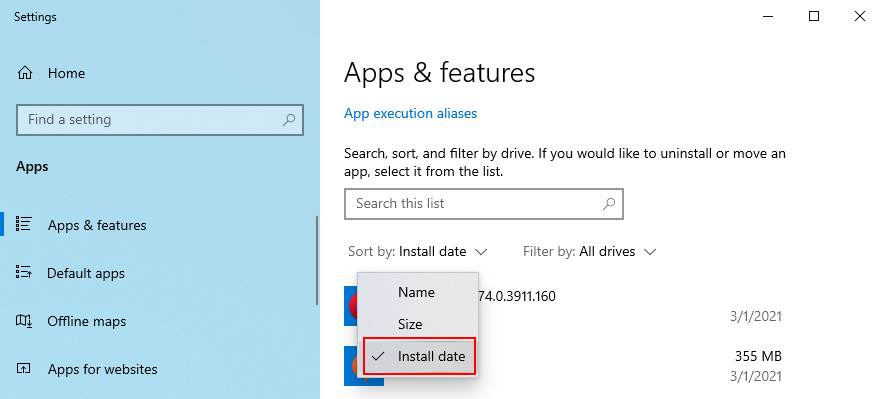
- Select the first app in the list and click Uninstall
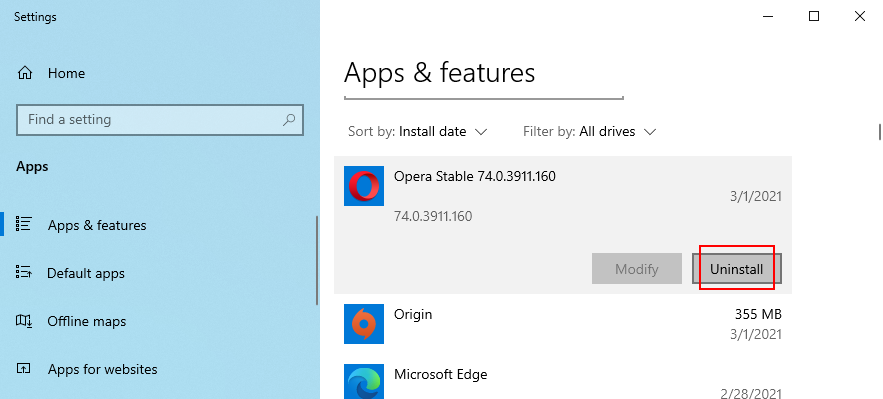
- Click Uninstall again to confirm
- Restart your computer and run Windows Update
Unfortunately, the Windows built-in uninstaller is not advanced enough for stubborn applications. Instead, you can use a program uninstaller to also delete any files and registry entries left behind by the app.
13. Uninstall recent Windows updates
The latest system update you installed could have compromised the entire operating system, rendering Windows Update useless. But you should be able to fix this issue by getting rid of it. Here’s how:
- Click the Start button, type control panel, and press Enter
- Select Programs and Features
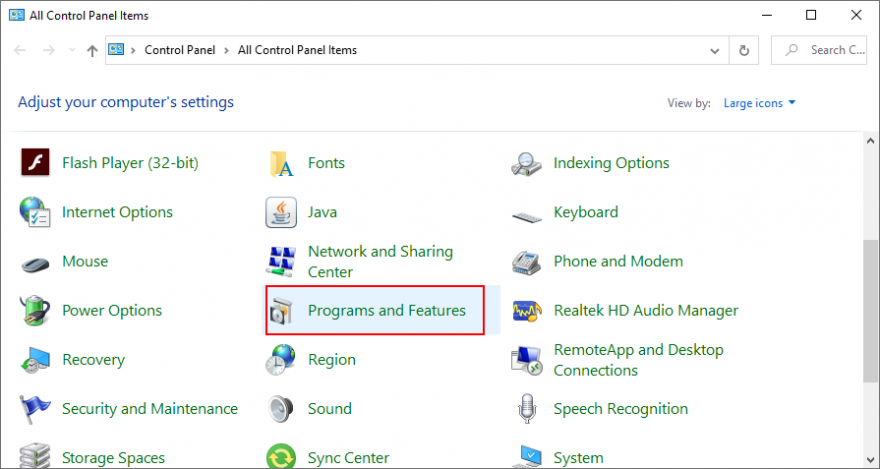
- Click View installed updates
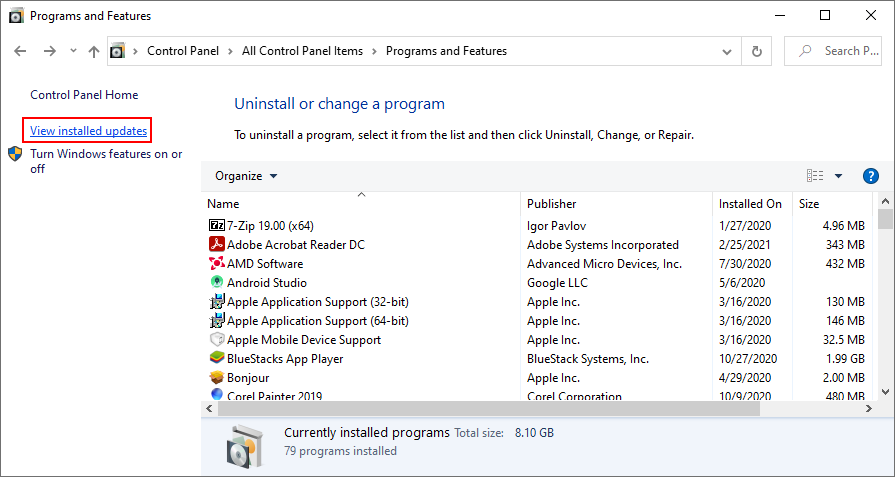
- Click the Installed On column to sort the updates (newest first)
- Double-click the first update in the list
- When asked to confirm its removal, click Yes
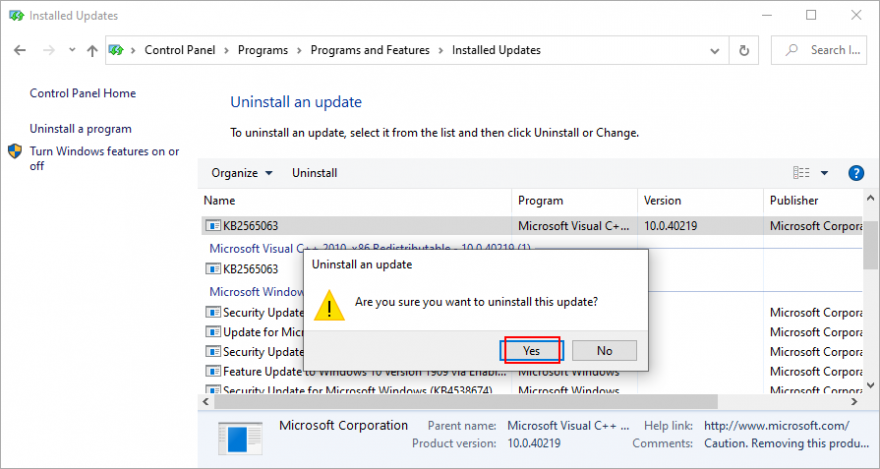
- Restart your PC and try to run Windows Update now
14. Run a malware scan
A malware infection can be serious enough to block critical processes and services. This can also translate to Windows Update functionality issues, represented by the We couldn’t complete the updates undoing changes error message after a failed update.
To rule this out, it’s better to check your PC for malware and remove any pests. If you don’t have any third-party antivirus solutions installed, you can turn to Windows Defender since it’s pretty powerful.
How to use Windows Defender:
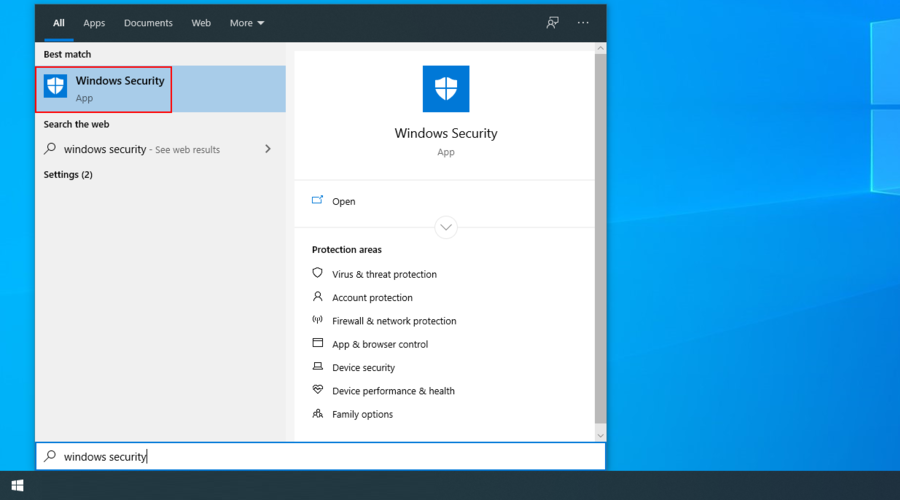
- Click the Start button, type Windows Security, and open this app
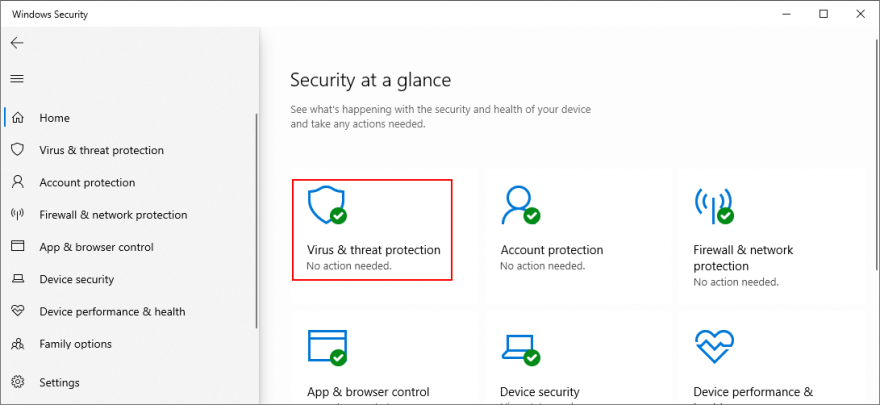
- Go to Virus & threat protection
- Click Scan options
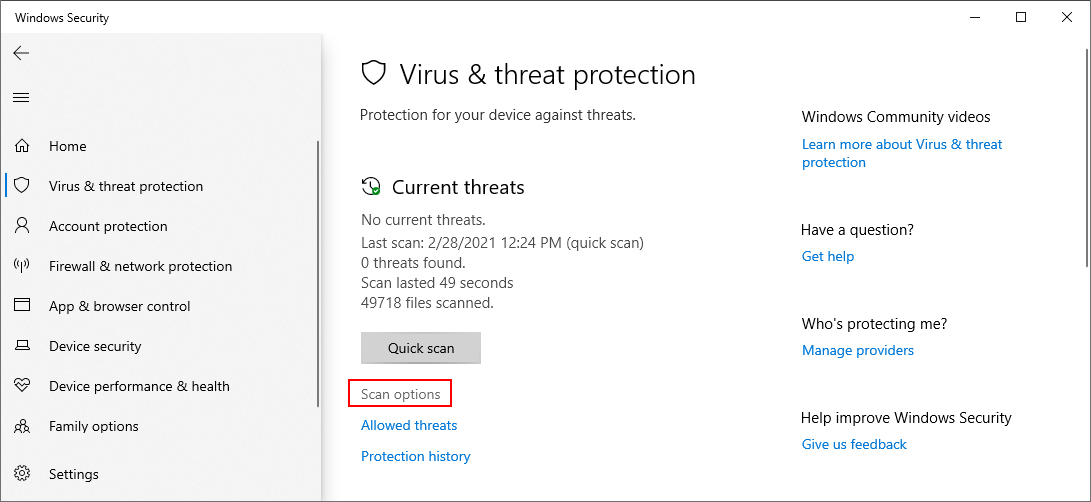
- Select Quick scan and click Scan now
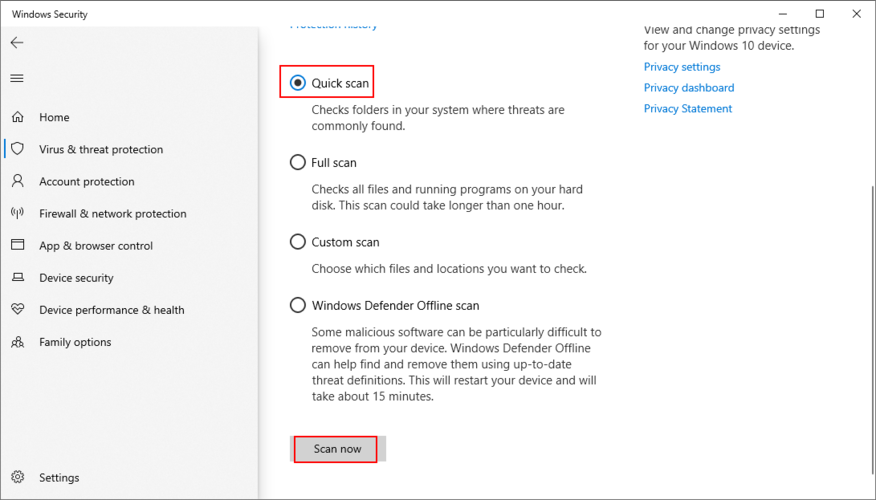
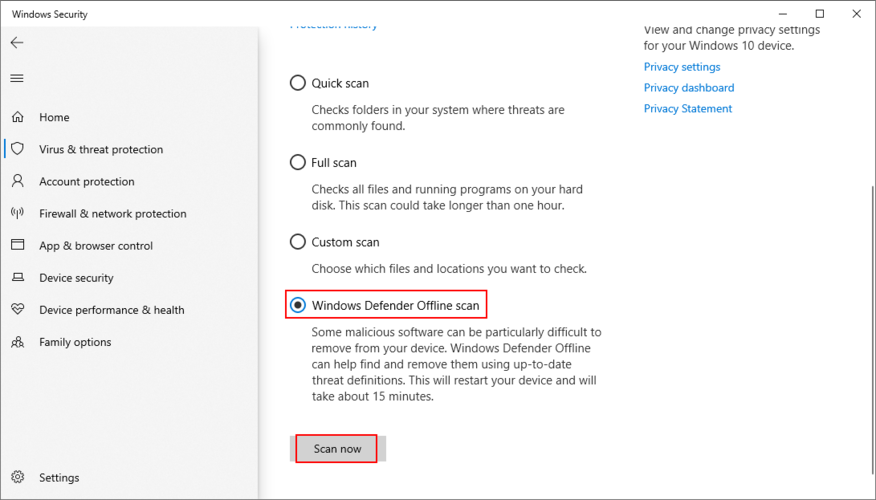
- If no malware agents are revealed after the scan, run another one using Windows Defender Offline scan mode
- Restart your PC and run Windows Update
15. Repair Windows 10 startup issues
If your operating system has trouble loading services, processes, and drivers on boot, this could cause serious problems on your computer, even with Windows Update. To get rid of the Undoing changes made to your computer error message, you can use the Startup Repair tool.
- Click the Windows 10 power button
- While holding down Shift, click Restart. An alternative solution is to interrupt the Windows booting operation three times to enter Recovery mode
- Select Troubleshoot from the blue screen
- Go to Advanced options
- Click Startup Repair
- Choose your administrator account and specify your password
- Follow the given instructions
- Boot Windows and try to update it now
16. Fix system registry settings
Incorrect system registry values can affect the entire operating system and prevent you from using Windows Update properly. Here’s how to repair settings using the Registry Editor:
- Press Win key + R, type regedit, and hit Enter

- Click Yes if prompted by UAC (User Account Control)
- Open the File menu and click Export
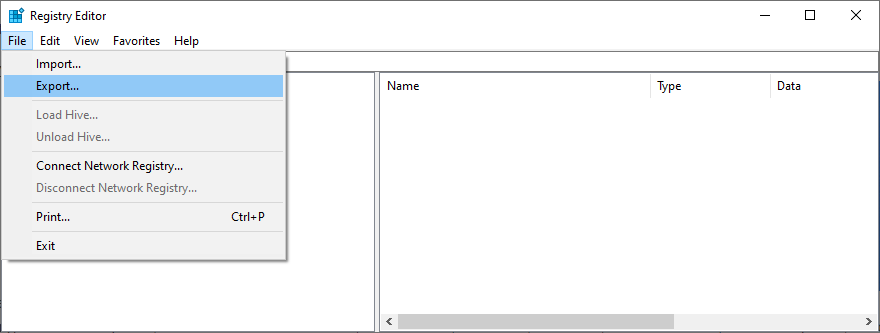
- Indicate a name and saving location for the registry backup file
- Click Save
- Visit the following address in Registry Editor:
HKEY_LOCAL_MACHINE\SOFTWARE\Microsoft\WindowsUpdate\UX
- Right-click IsConvergedUpdateStackEnabled and select Modify
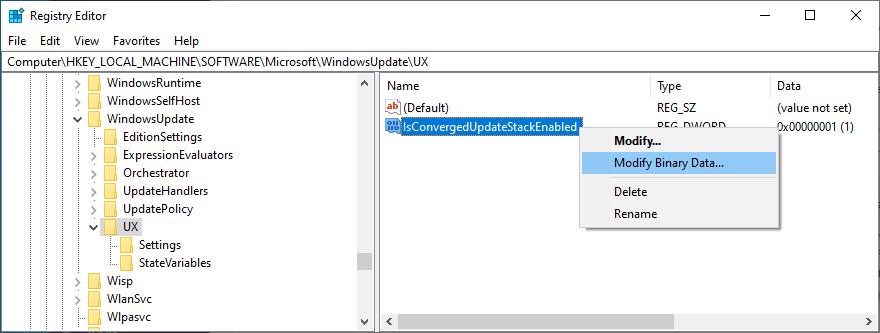
- Set Value data to 0
- Set Base to Hexadecimal
- Click OK
- Now, go to the next location:
HKEY_LOCAL_MACHINE\SOFTWARE\Microsoft\WindowsUpdate\UX\Settings
- Right-click UxOption and select Modify
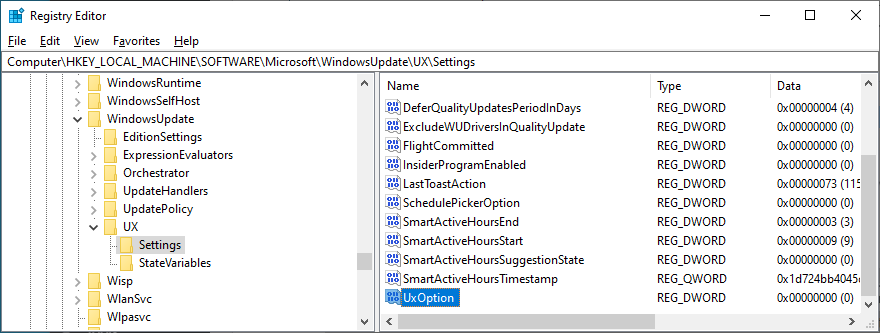
- Set Value data to 0
- Set Base to Hexadecimal
- Click OK
- Head over to:
HKEY_LOCAL_MACHINE\SOFTWARE\Policies\Microsoft\SystemCertificates
- Open the Edit menu, go to New, and select DWORD (32-bit) Value
- Write the CopyFileBufferedSynchronousIo name
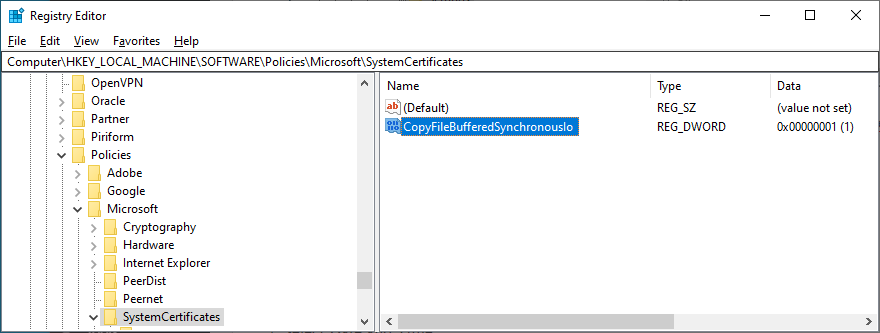
- Set Value data to 1
- Set Base to Hexadecimal
- Click OK
- Exit Registry Editor
- Restart your PC and try to use Windows Update now
If you encounter any stability issues with your operating system and need to roll back registry settings, just double-click the .reg file you previously created and click Yes when asked to make changes.
17. Edit Group Policy properties
In order for Windows Update to work properly, certain permissions must be set by the Local Group Policy Editor. Otherwise, the system updates might not be able to complete, prompting the We couldn’t complete the updates, undoing changes error message. Here’s what you need to do:
- Press the Windows key + R, type gpedit.msc, and hit Enter
- Go to Computer Configuration > Administrative Templates > Windows Components > Windows Update
- Locate and double-click Configure Automatic Updates
- Select Enabled and click Apply
- Exit Local Group Policy Editor
- Reboot your PC and use Windows Update now
18. Reset the Windows Update components
It sometimes helps to restart the services and other components involved in Windows Update. Here’s how:
- Make sure you’re logged in to Windows 10 with admin rights
- Press Win key + R, type cmd, and hit Enter to launch Command Prompt
- Copy and paste the following commands (press Enter after each line)
- Reboot your computer and try to update Windows now
19. Use System Restore
System Restore is a reliable solution to fix any unidentified software issues caused by a new change on your computer. You are basically uninstalling recent applications and rolling back registry settings which could have lead to the Windows Update functionality problems.
How to use System Restore:
- Press Win key + R, type control panel, and hit Enter
- Go to Recovery

- Select a restore point from the list that was created before you started having issues with Windows Update
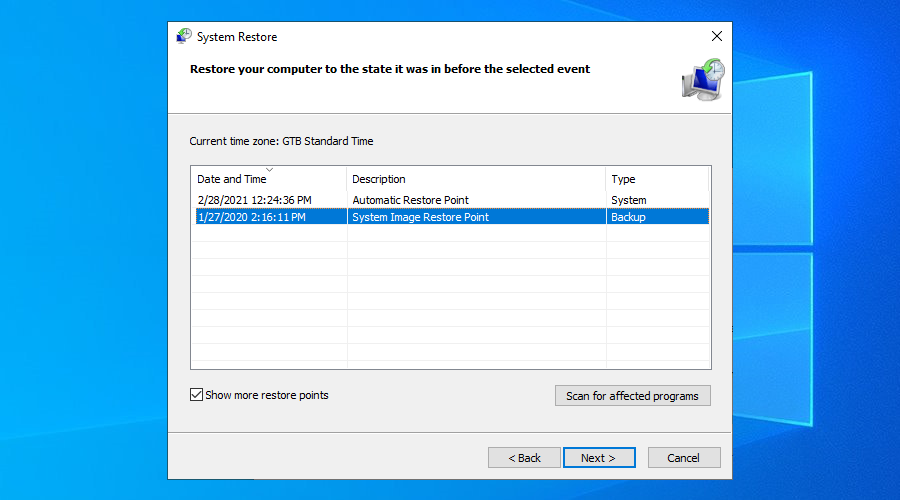
- Click Next and follow the on-screen steps
- Restart your computer and try to use Windows Update now
20. Reset Windows 10
If System Restore doesn’t work, you can reset Windows 10 to factory values to keep your personal files but uninstall all applications. Here’s how:
- Right-click the Windows 10 Start button and go to Settings
- Go to Update & Security
- Select Recovery on the left side
- At Reset this PC, click Get started
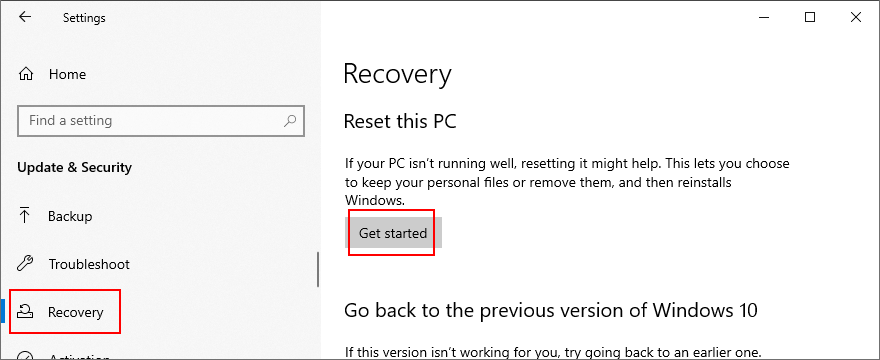
- Click Keep my files and proceed with the on-screen instructions
- After resetting the operating system, try to use Windows Update
Conclusion
To review, Windows Update sometimes fails to complete system updates and shows an error message instead, which says We couldn’t complete the updates, undoing changes made to your computer. There’s nothing to worry about since should be able to fix this problem without turning to professional aid.
For instance, you can run the Windows Update troubleshooter, restart Windows Update and its dependent services, disable Network List Service, use the Windows Update Diagnostic app, change the SoftwareDistribution folder name, as well as configure Group Policy settings.
It’s also a good idea to check the free disk space, start Windows 10 in Safe Mode, check your drivers, unplug peripheral devices, fix hard disk and operating system errors, uninstall third-party tools and recent system updates, as well as run a malware scan.
Furthermore, you should repair any Windows 10 startup issues, repair broken system registry entries, edit and correct Group Policy properties, reset the Windows Update components, use System Restore to roll back Windows 10 to an error-free checkpoint, as well as reset Windows 10 to the original settings.
How did you manage to repair Windows Update? Did we miss any important steps? Let us know in our comment section below.